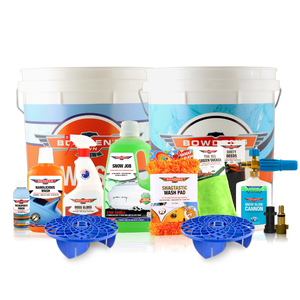
Safe Wash System Kit
Congratulations
Congratulations on your purchase! This Safe Wash System Kit was created for the person who is completely paranoid about putting swirls and marks in their paint. This guide will give you a run through of the products in your new kit, how to use each product and what order to use them in to get the most out of them all. We have a good selection of products here to get you started and help look after your car - everything from washing and drying, to protecting to your paint, to looking after your microfibre.
The pre wash
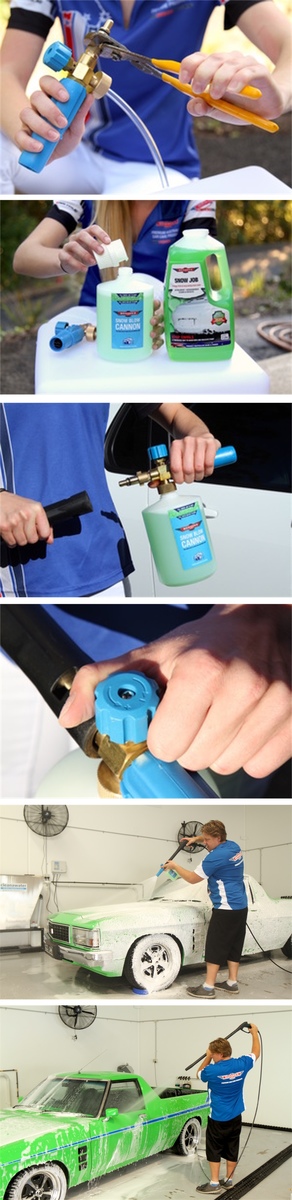
We supply the popular current Karcher K Series, Gerni/Alto/Nilfisk Pro/Kew and Stihl pressure washer adapters to hook your pressure washer up to the Snow Blow Cannon. If you require a different type of adapter, please contact us as we also keep the more popular Kranzle, Lavor, Karcher HD/HDS, Nilfisk and Kew quick connect, Black and Decker, Ryobi, Bosch and a 1/4" quick connect fittings in stock too.
A lot of these fittings will work on other machines as well (there are literally hundreds of different machines) but if we don't have the fitting you need, they can usually be found online at different eBay stores.
For first time use, screw the required adapter on very tight to the white thread taped end. We have found the base model Karcher K Series pressure washers don't allow the Cannon to swivel and sit straight, so apply some extra thread tape to the connector end and move to where it feels comfortable.
Set up your pressure washer directly in front of your car and connect the power and your hose/water to it. Don’t turn it on yet!
We use a 9:1 ratio of water to foam wash and have made this super easy to work out. Simply fill the Cannon’s bottle to the “Fill Water to Here” mark (that’s 900ml of water), and then top it up with the Snow Job foam formula to the “Fill Snow Job to Here” mark (100ml of Snow Job). We put the Snow Job in last so it doesn’t foam up while you’re filling.
If you're not using our Snow Blow Cannon, each capful of Snow Job is 50mls, so two capfuls is all you need to make up to one litre.
Before you begin foaming away, make sure the car is cool to touch (especially black plastic mirrors and trim) and it's not overly windy. We also think it's best to foam in the cooler parts of the day, like first up in the morning or late in the afternoon. All these are done to slow down the evaporation time of the foam, so it gets optimum dwell time.
Attach the bottle to the Cannon’s screw in intake, being careful to not cross-thread it, then shake it well with your thumb over the adapter tip to stop it splashing out. Now attach the Cannon to the pressure washer, turn on the water, and then power it up.
For the thickest foam possible, turn the Cannon’s top blue air adjustment knob clockwise towards the “-” symbol. If you desire less foam or wish to use less foam solution, turn it the opposite way towards the “+” symbol.
Squeeze the trigger of your pressure washer till the foam starts coming out.
Adjust the Cannon’s blue end nozzle to find your desired foam arc. We like it around half to two thirds the way between full fan and powerful jet.
Keep the Cannon about a metre away from the cars surface to cover it in a lovely, thick foam. Starting on the lower sections and rear of the car, working your way around the car, from the bottom to the top, allowing the foam a longer dwell time on the dirtier lower areas. Let the foam sit and do its work for 4 to 5 minutes, gently dissolving the grit and dirt from the surface.
Remove the Snow Blow Cannon attachment and apply your pressure washer nozzle. Pressure wash the whole car starting from the top and working to the bottom, cleaning the very back of the car last so the foam has the longest dwell time on it.
Don’t let the jet of water get too close to window and door rubber seals or other delicate parts like fabric tops, or emblems on the car. A distance of 30 to 50cm away is always recommended so no damage can occur from the water jet.
Once the foam is completely washed off, use your best judgement on whether it now needs a hand wash or not.
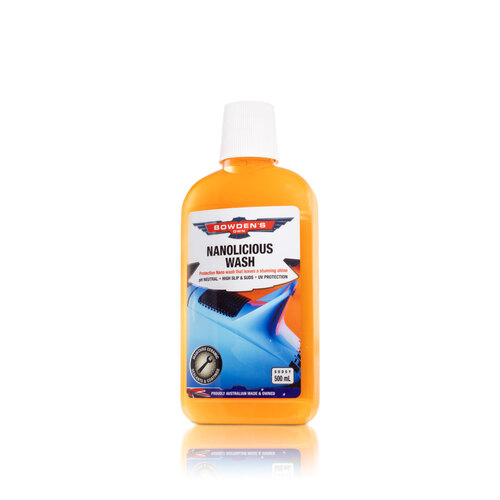
Inspect the cars surface at the rear and lower parts of the car closely for any dirt or grime. If you see any, or if it has been through rain since the last wash, you should follow up this foam wash with a safe two bucket wash method. This is where you have 1 bucket that is filled with our lubricating Nanolicious Wash (best, most lubricating), Wax Wash or Auto Body Gel, and a 2nd bucket that's filled with clean water to rinse your Shagtastic Wash Pad out in each time you come off the car, so you're releasing any left-over dirt and grime from the cleaning tools and never putting dirty water back on the car.
If there was only light dust or sea spray on the car, we find the Snow Job foam can remove it all, so you can begin drying it with The Big Green Sucker microfibre drying towel and the Boss Gloss spray as the lubricant/drying aid spray.
Handy Tips:
If you don’t use all the foam solution in one wash, it can be stored in the Cannon’s bottle for up to a month.
Use the Fully Slick protective spray as a standalone sealant after the car is all done, as the slick and slippery finish allows the Snow Job foam to be more effective as the dirt cannot stick as well to the slick surfaces. You'll also notice how it also makes the foam slide off the car a bit faster, helping take any dust and grime away with it.
Time to wash
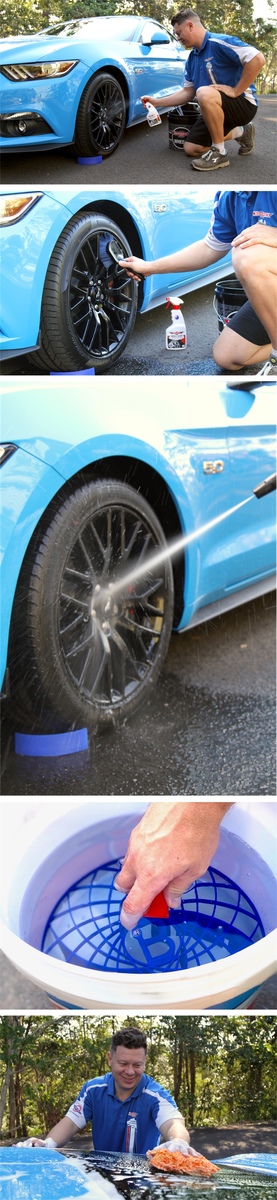
The Wash & Rinse buckets and Great Barrier Thingy is a match made in heaven. Place your Great Barrier Thingy into the bottom of your Wash & Rinse buckets before you start washing your car to make sure you’re going to be trapping as much dirt as possible in the bottom of your buckets. We would strongly recommend purchasing our Wheels bucket to go with this kit, to use as a dedicated wheels only bucket.
Always do any car washing in the shade, with the paint cool to the touch for best results. Not doing this can cause the water and the wash suds to evaporate faster than you'd like, possibly leading to water spots on the glass and paint!
With your Great Barrier Thingy in the Wash & Rinse buckets, fill the Rinse bucket with approximately 10-12L of water. Add 1 capful of Nanolicious Wash to the Wash bucket and then froth it up nicely with either the jet function of your hose, or preferably with a pressure washer.
With the bulk of the heavier dirt and grime removed from the car with the pre wash snow foam, put your Shagtastic Wash Pad into your suds solution, giving it a gentle squeeze while it’s in there to really suck up all the suds it can. Then, starting from the top of the car first, gently wash the whole car, being sure to wipe the Shagtastic Wash Pad over the Great Barrier Thingy when it goes back into your Rinse bucket, to ensure any dirt and grime picked up from the car goes to the bottom of the bucket and is trapped by The Great Barrier Thingy.
Once washed, rinse the whole car off with a nice gentle stream of water from the hose. At this point we want to flood the panels with water to help remove as much water from the surface as possible, so there’s less to dry.
Drying
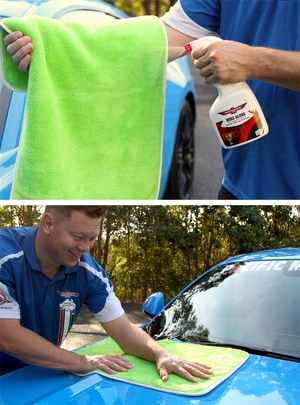
Boss Gloss - Grab The Big Green Sucker and mist each side of the cloth with 3-4 sprays of our Boss Gloss detailing spray. We use Boss Gloss, as its formula is amazing for this job. It adds more lubrication for the towel to make it glide over the surface, it also helps draw more water into the cloth as well as helping the light trailing water spots evaporate faster and cleaner too. It also leaves a pretty stunning finish!
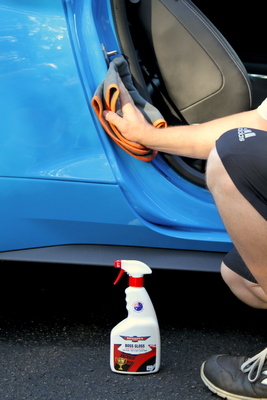
Dirty Deeds
The ideal cloth for the dirtier jobs around your car and bike. If you’re after a flawless finish, our Dirty Deeds is a true multi-purpose cloth, made specifically for fast and easy wheel cleaning or drying, inner door jambs, lower body & undercarriages, engine bay detailing, dirty interior cleaning and superb metal polishing. It's strong and durable, but still gentle enough that it won’t scratch or damage the areas you’re using it on. Get the dirty deeds done with this perfect all rounder.
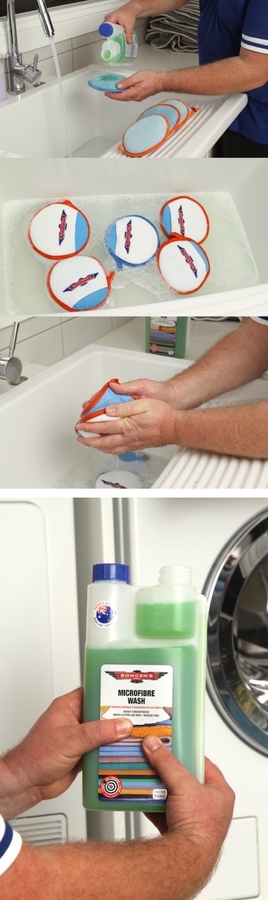
Microfibre cleaning
Probably the most important and overlooked part of detailing is keeping your cloths clean. We made our own microfibre wash to break down detailing chemicals from the fibres of the cloth and allow the fibres to rinse free, meaning your cloths will continue to work like new for years to come. For any heavier stained cloths or applicators, put a few MLS of the Microfibre Wash directly onto the cloth or pad and massage it around with your fingers to help release the product, then give it a good rinse under some warm water before putting it into the wash. You can also put approximately 10-20ml of Microfibre Wash into a bucket with some warm water and let the applicators and cloths soak in there for 30 minutes prior to putting them through the wash.
Put all your cloths and pre soaked dirtier applicators into the washing machine on a normal cycle, on the warm water setting. Put 20ml of Microfibre Wash in the machine (DO NOT USE FABRIC SOFTENERS) and away you go. Once they’re washed, tumble dry the cloths on the cool setting and then store them in an air tight container if possible, ready for their next use.
Any questions?
This gives you a good overview of the products in your new kit, and a step by step guide on how to use them and in what order to use them in.
If you have any questions, please email us info@bowdensown.com.au or call our office on 1800 351 308.
Happy detailing!
Brett Hobbs