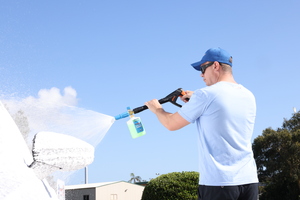
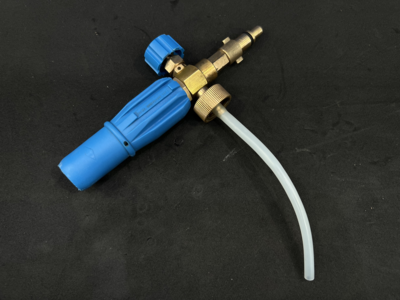
Snow Blow Cannon Maintenance
Regular Maintenance
We have found that the best way to keep the Snow Blow Cannon working its best is to carry out simple maintenance procedures.
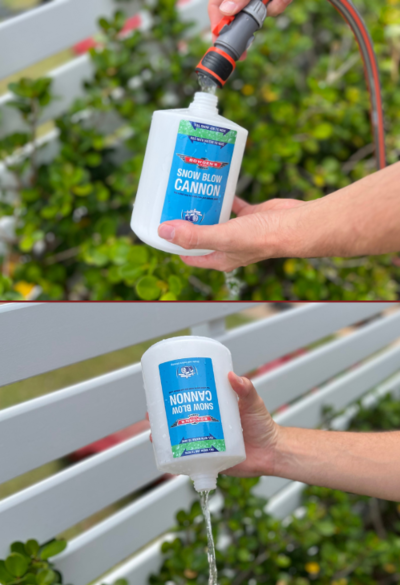
Make sure to thoroughly rinse out your Snow Cannon bottle and Happy Ending Cannon Bottle before connecting them to your cannon. Any debris that has settled in here can block your cannon. It's especially important to rinse out your Happy Ending Cannon Bottle as any residual product that has been allowed to dry in the bottle can cause a blockage once mixed up with water.
If you ever drop your cannon in dirt or sand, make sure you give it a thorough rinse off under the tap, particularly the adapter. Any dirt jammed into the adapter will be pushed through the cannon and clog it immediately.
Running fresh water through the cannon after you use it will also help keep the internals clean and clear.
Diagnosing the problem
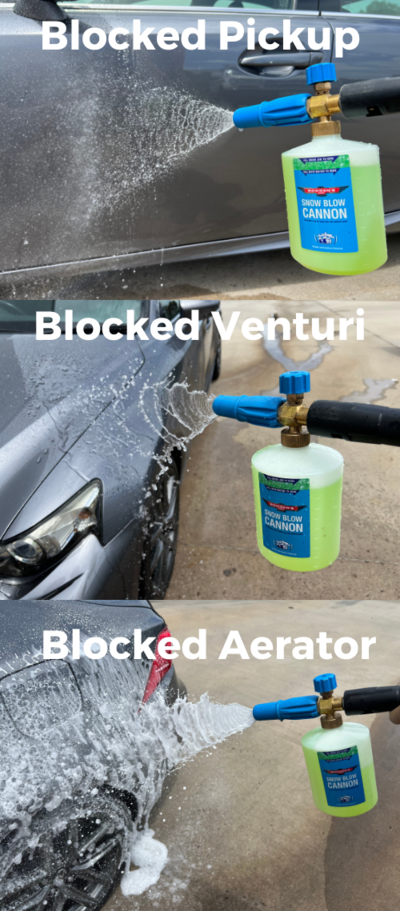
Like all quality snow foam cannons, the Snow Blow Cannon has several small orifices which can be blocked up with larger pieces of debris. The main two are the soap solution pickup and the venturi nozzle behind the adapter.
Symptoms for a blocked pickup:
- No foam or soap of any kind exiting the cannon nozzle.
- The cannon stopped producing foam in the middle of use.
Symptoms for a blocked venturi:
- The pressure washer stops/starts while the cannon is connected.
- Very poor pressure exiting the cannon nozzle.
A quick and easy way to identify where the blockage might be is fondly named "the blow test". Try and blow air through the cannon from the bottom of the pickup tube and through the adapter for your pressure washer (make sure it's clean and dry), and if you can't blow through, there's a blockage in there.
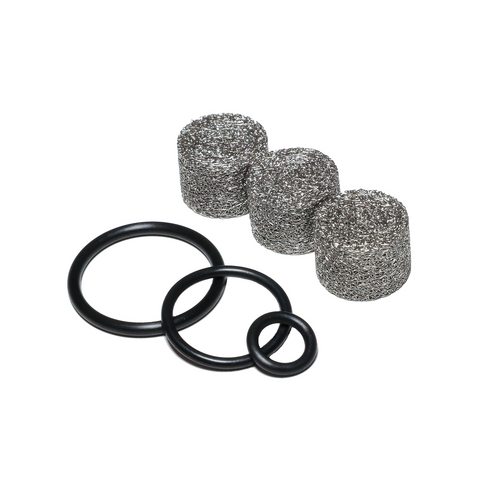
Our cannons also contain a small mesh filter/aerator that mixes the Snow Job/Mega Snow Job solution with water and air to create the amazing thick foam. Over time, these aerators can become clogged with debris and cause poor foaming and low pressure output.
Symptoms for a clogged aerator:
- Poor or runny foam Bubbling or spluttery foam
- Thin, runny foam
Unfortunately there is no safe and easy way to clean the aerators out, and are best replaced once they clog up. A cannon servicing kit can be purchased from our website here.
Blocked pickup
If you have identified that your pickup is blocked, follow the steps below to clear this out.
1. Remove the clear plastic tube from the bottom of the cannon, and using a 10mm socket, unscrew the brass barb from the cannon.
2. Unscrew the round brass piece that screws onto the cannon bottle, using a pair of pliers/grips or a vice.
3. Thoroughly Inspect these pieces, ensuring that they are clear of blockages, and poke a paperclip through the various holes to clear them. Don’t forget to clear the breather hole on the side of the larger round piece. Also take the time to clear out any stray pieces of thread tape/sealant.

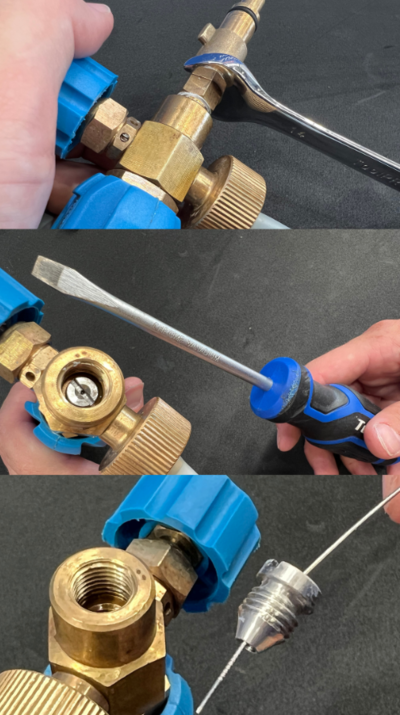
Blocked venturi
If you have identified that your venturi is blocked, follow the steps below to clear this out.
1. Start by removing the cannon adapter with a 14mm spanner.
2. Using a flat blade screwdriver, unscrew the nut (venturi) that is nested inside the main body of the cannon.
Make sure to inspect this piece carefully, and poke a pin or paperclip through the hole to ensure it’s clear of debris. Also take the time to clear out any stray pieces of thread tape/sealant.
Clogged aerator
A cannon servicing kit can be purchased from our website here:
.png)
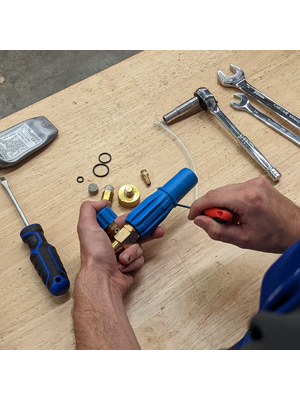
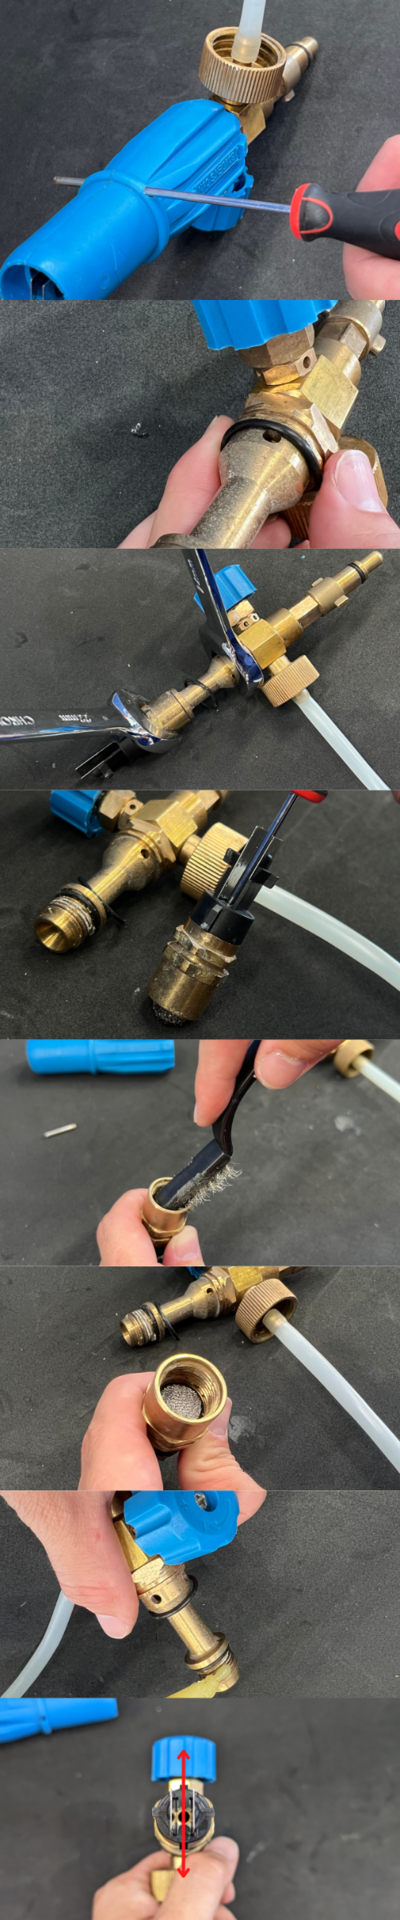
1. To access the aerator, start by pushing out the small silver pin located on the side of the front nozzle, using a small allen key or screwdriver. You will find it easier to push out from of the sides, so don’t try to force it in one direction only.
2. The blue nozzle should now slide freely off the front of the cannon.
3. Gently pinch and roll the rubber O rings on the shaft, out of the way. Grab your two spanners (22mm and 24mm) and turn them against each other to crack the seal (or put the cannon in a vice).
4. Inside the nozzle, you will find the mesh aerator. Take a small allen key or something similar and push the aerator out from the front.
5. Use a wire brush, or a paperclip to clean out the inside of the brass nozzle, taking special care to make sure the threads are clear of any debris.
6. Gently slide your new aerator into the nozzle, being careful not to damage it.
7. Using a thread sealant or plumbers tape, reassemble the cannon in reverse order to how you disassembled it, being sure not to use too much tape/sealant which can cause blockages in the future.
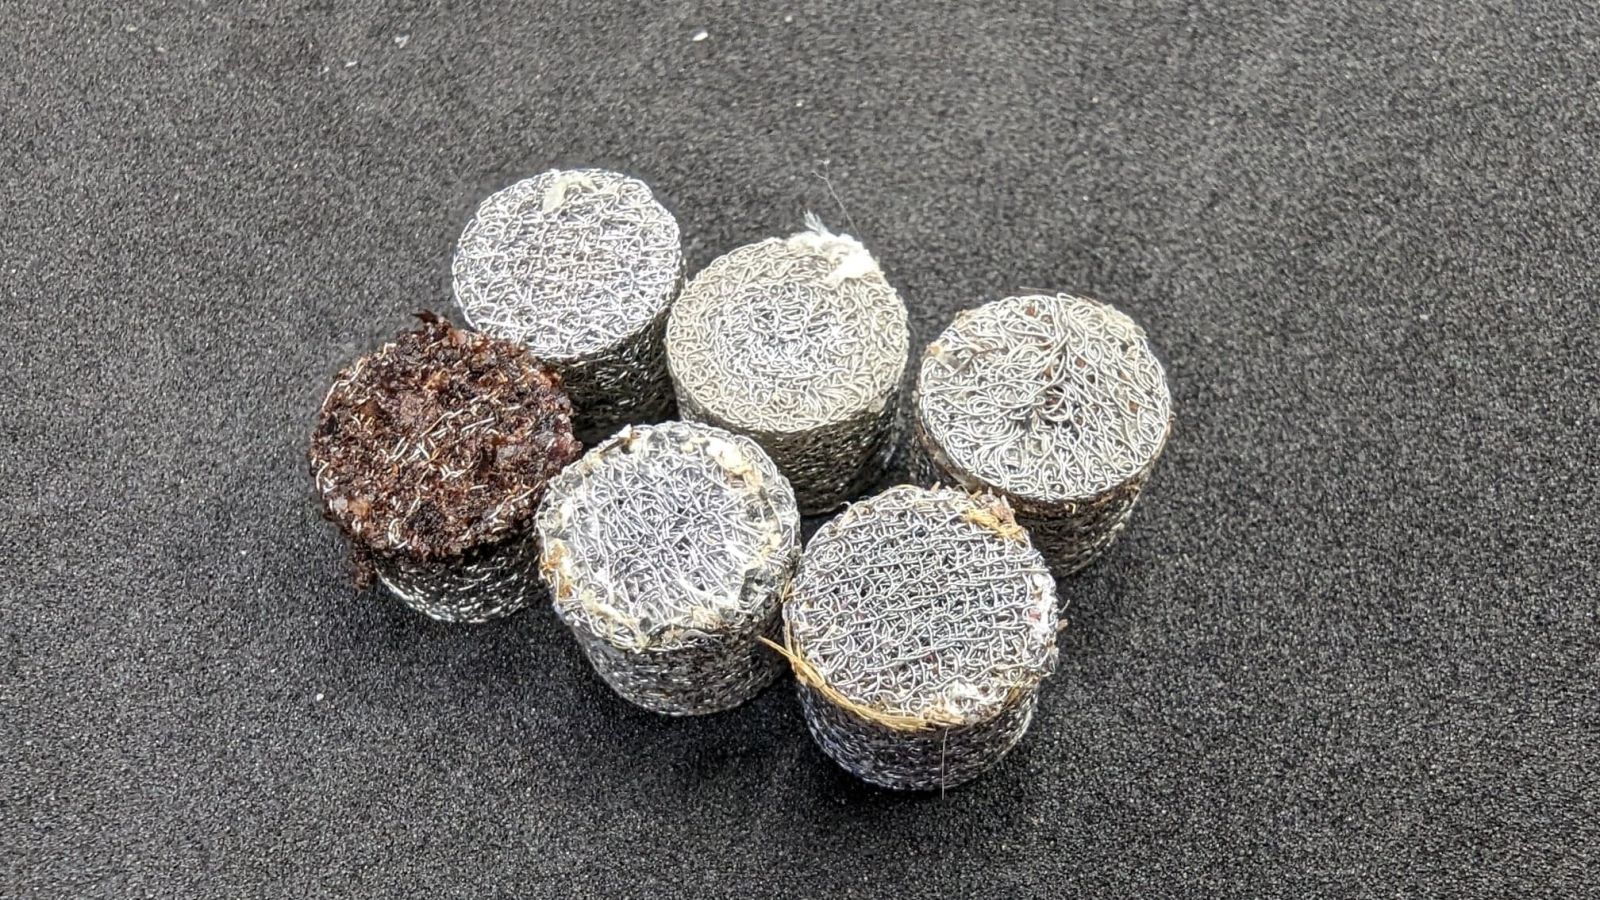
Here is an example of aerators that need to be replaced. Keep in mind that the aerator might look okay from the outside, but can be clogged inside.
Re-assembly
It's important to re assemble your cannon properly for it to produce thick foam. Thread Sealant or thread tape are essential to seal up any potential leaks.
1. Thoroughly clean out the threads with a wire brush, any bits of leftover sealant or tape can block your cannon in the future.
2. When using thread sealant, don't use too much, as this will squeeze out into places that you don't want it.
3. Thread tape only needs 4-5 wraps around, too much can cause blockages down the line. Make sure to line it up on the threads properly, remove any excess overhanging where possible.
4. The fan piece that holds the aerator needs to be oriented correctly. Line up the black toggles with the top and bottom of the cannon for correct foaming angle.
5. Don't forget to reconnect the tube on the bottom!
Free Cannon Service
If you are having any problems with blockages or foaming performance, we offer a free cannon service for anyone with our Snow Blow Cannon.
Once your cannon head arrives our team will give it a thorough inspection to fix any issues, and then test to make sure it’s working before posting it back to you the same week we receive it. You can be sure that your cannon will be in tip top shape when you receive it back.
Please complete the form below to arrange the free Cannon Service.
Tips and tricks
- After using the cannon, turn the adjustment knob all the way to the + side, and run for 10-20 seconds to flush out the internals with fresh water, which will help prevent blockages from occurring.
- A vice makes the disassembly a MUCH easier job.
- Make sure the plastic tube is connected to the cannon before use.
- Don’t use too much thread sealant/tape, as this can cause blockages in the cannon.
- Be careful not to damage the rubber O rings when disassembling, use your fingers to pinch them off and roll them down the shaft. Using a screwdriver can cause cuts or rips in the rubber.
If you have any questions on anything in this guide, please feel free to email our team using info@bowdensown.com.au or call our office from 9am till 4pm business days on 1800 351 308.