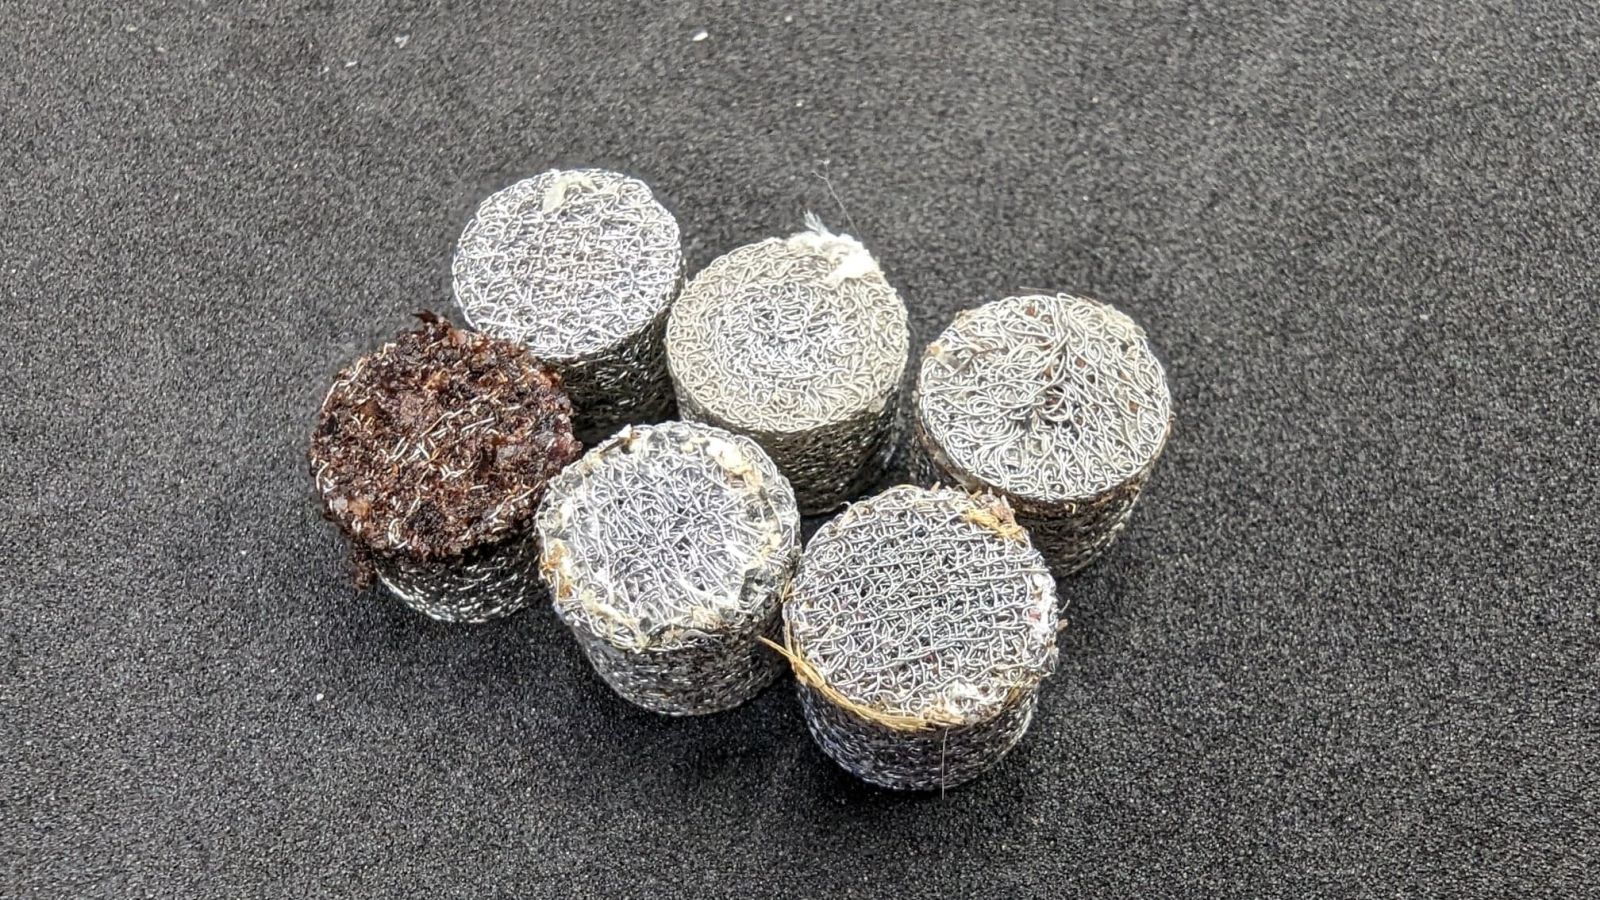
Clogged aerator
A cannon servicing kit can be purchased from our website here:
.png)
1. To access the aerator, start by pushing out the small silver pin located on the side of the front nozzle, using a small allen key or screwdriver. You will find it easier to push out from of the sides, so don’t try to force it in one direction only.
2. The blue nozzle should now slide freely off the front of the cannon.
3. Gently pinch and roll the rubber O rings on the shaft, out of the way. Grab your two spanners (22mm and 24mm) and turn them against each other to crack the seal (or put the cannon in a vice).
4. Inside the nozzle, you will find the mesh aerator. Take a small allen key or something similar and push the aerator out from the front.
5. Use a wire brush, or a paperclip to clean out the inside of the brass nozzle, taking special care to make sure the threads are clear of any debris.
6. Gently slide your new aerator into the nozzle, being careful not to damage it.
7. Using a thread sealant or plumbers tape, reassemble the cannon in reverse order to how you disassembled it, being sure not to use too much tape/sealant which can cause blockages in the future.
Here is an example of aerators that need to be replaced. Keep in mind that the aerator might look okay from the outside, but can be clogged inside.