Auto One - Clean Fun Bucket
Wax Wash
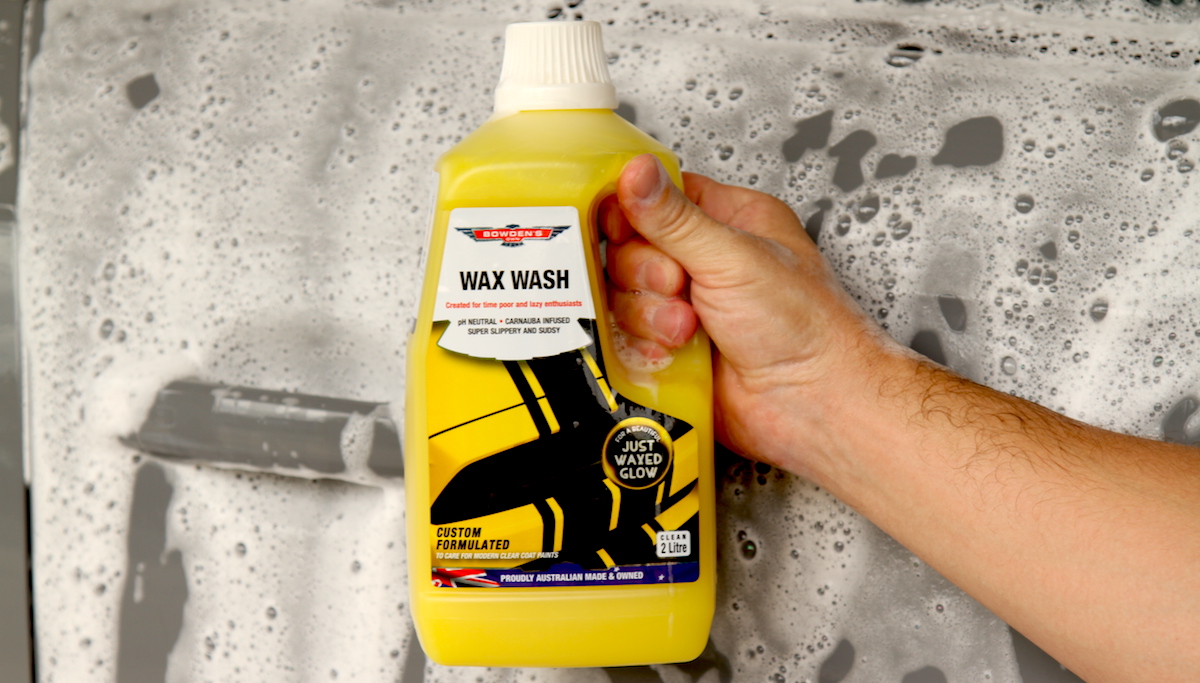
Grab your Wash bucket and fill it 3/4 full of water. We'd also recommend grabbing a Rinse bucket available separately if you wish, and insert the Great Barrier Thingy into the bottom. We strongly recommend 2 buckets - one for clean rinse water, and one for your wash water. The idea here is to dip your wash tool into the wash water, wash a section of the car, then bring your wash tool back to the clean rinse water and ring it out in there, before going back into the wash water and washing the next section, to stop dirt and contamination going into your wash water as much as possible.
Fill up one capful of Wax Wash and pour it into the bucket, giving the cap a good thrash around in the bucket. Agitate the bucket with your pressure washer or the Jet setting on your hose to mix the wash and produce a nice head of suds.
Dip your wash tool into the wash suds and let the suds soak into it for a couple seconds (squeezing it gently can help it absorb the wash suds), then starting at the roof of the car, gently wash in a back and forth motion, then side to side so that you don't miss any spots. We prefer not to go in circles when washing - not because it will create swirl marks, but because when you do small circles, there's always a bit that you miss. When you wash up and down, then back and forth, you are guaranteeing that you don't miss any spots.
After washing the first section, dip your mitt into the clean rinse water and thrash it about and/or squeeze the suds out so that any dirt or grime leaves the wash tool, then dunk it back into the wash suds and do the next section of the vehicle, leaving the lower dirtier sections till last.
Once you've washed the whole car, rinse the suds off thoroughly (NOTE: if you're washing in the sun, rinse the suds off periodically - don't let them dry on the paint).
Lazy Wax
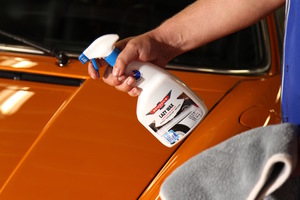
Work on one panel or section of a larger panel at a time (like 1/2 a bonnet or roof etc), initially evenly mist 12 to 15 sprays of the Lazy Wax directly into a folded plush Drop Bear towel. Wipe it with a microfibre cloth (our plush Drop Bear cloth folded into halves is perfect for this) into the surface in a side to side motion, east/west and then north/south to get an even coverage of it across the surface.
Let it sit for 15 to 30 seconds before removing the residue by lightly buffing it with a second, clean and dry Drop Bear microfibre cloth. Be sure to turn this cloth to a fresh side frequently.
For the following applications, only mist 2 to 3 sprays into the now wet side of the first folded Drop Bear towel and repeat as above.
Once done, you should step back and check out that stunning, deep glow to the paint. Enjoy a cold beverage if one is handy.
Vinyl Care
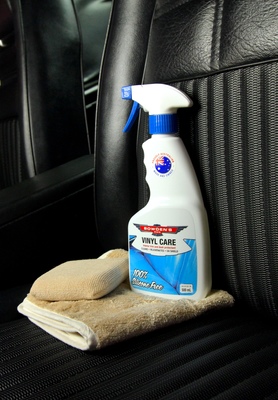
Spray 4 or 5 sprays into our special interior applicator, the Square Bear. Apply to the surface you're cleaning with a circular motion, working in smaller sections at a time and be sure to get it in every little nook and cranny. It's got great cleaning power, so check the pad often to make sure it's not getting too dirty. If it is, rinse the pad out in water while wiping the dirty surface with your hand to release the dirt from it. Wring it out, so it's slightly damp (not saturated), spray more Vinyl Care into it and then continue your cleaning.
Remove the product before it can dry! Especially important if the surface of your applicator has been showing a bit of dirt in it. The Vinyl Care liquid suspends dirt and grime that has been cleaned and lifted off from the surface, so if you let it dry it will bond back onto it. Simply remove it by buffing it away with the non-plush side of our Plush Daddy interior cloth.
Naked Glass
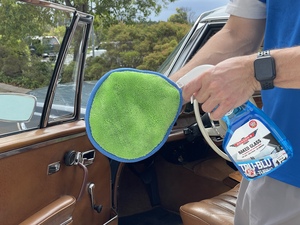
Lightly mist 1-2 sprays of Naked Glass into the green twist pile side of the Inta-Mitt cloth (use less product when it's cooler and more when it's warmer), and apply to the glass. DO NOT drench the cloth, a spray or two is always enough. Always keep the purple textured side dry for the final wipe off. Wipe over a section of glass, (1 window or half a windscreen), in a north-south, then east-west direction.
Be more careful around wiper arms and any other sharp surfaces on the edge of the glass, as it could grab and pull out the threads of the green twist pile side of the cloth.
We say to spray into the Inta-Mitt and apply so you don't get over spray everywhere, saving you time in cleaning up later. Only if the glass is really, really dirty is it a good idea to spray a little bit extra directly onto the glass.
Spin the Inta-Mitt to the dry purple textured side and gently buff the residue away to a perfect finish. This side is a low drag, unique type of microfibre, that will leave a smear free finish.
If your Inta-Mitt is feeling wet, or you begin to notice slight streaking, it’s time to turn it inside out and use the opposite side. It's imperative the Inta-Mitt is dry to get the perfect finish.