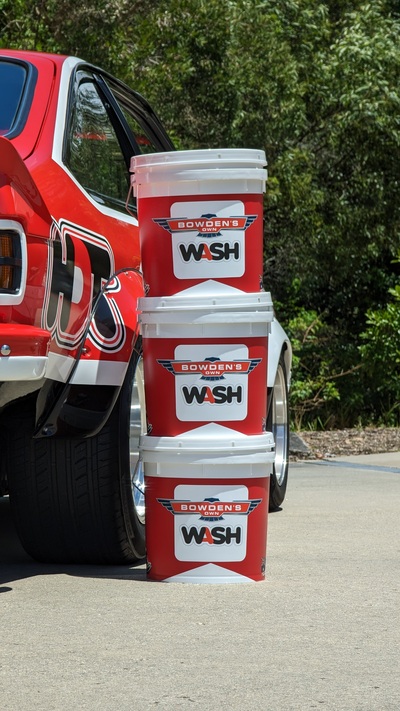
How to use your Mountain Edition Bucket - 2022
An extra helping this year
We've got three different buckets this year. Read below for more info on each one, their contents, and where to grab the bucket that best suits you.
We've made 2 custom products for these buckets: Red Stuff & Green Dreams, which are included in each bucket, with the other products in each bucket bringing a unique set of uses.
After we made Green Stuf last year and from all the good feedback we had from that product, we've made another unique version for this years buckets called Red Stuff. Red Stuff is a beautifully slick and effective pH-neutral wash that’s great for all vehicles, with the same famous lubricating suds we've come to know and love from the Green Stuf wash. It also incorporates the latest anti-rust additives, it's salt and silicone-free, has effective but gentle cleaning and is pretty forgiving to use in the sun too.
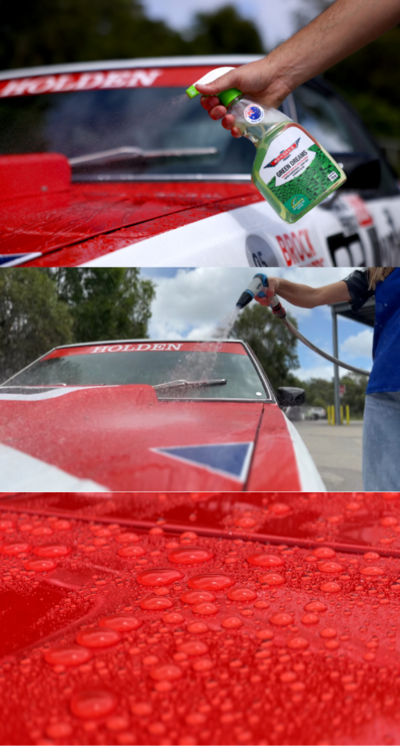
Green Dreams is a super hydrophobic spray on, rinse off sealant. Taking what we learned from Wet Dreams and creating something with a unique colour and a bump in hydrophobic protection, shine, slickness and longevity - this is one we love using at HQ and something we will likely incorporate into Wet Dreams down the track.
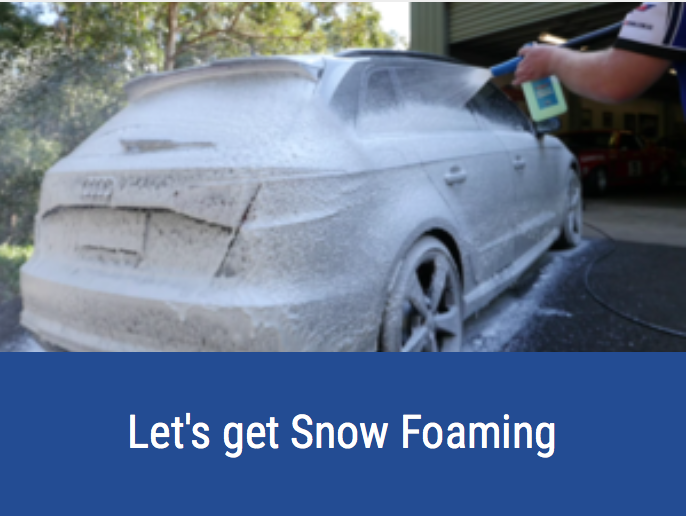
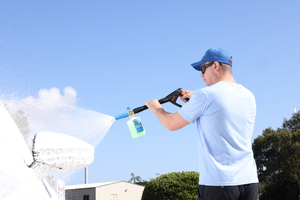
Snow foam pre wash
We'd recommend giving the car a pre-clean first, either with our Snow Blow Cannon and Snow Job/Mega Snow Job, or simply rinse down thoroughly with the pressure washer or the Jet setting on your hose end, to remove the heavier dirt and grime which reduces the risk of scratching your paint when you start washing. Our full article on snow foaming can be found here:
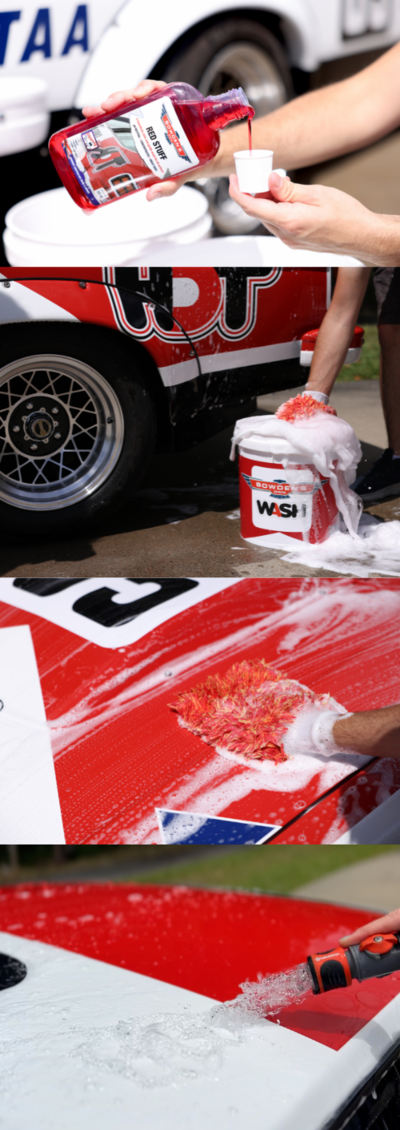
Red Stuff
Grab your Mountain Edition bucket and fill it 3/4 full of water. We'd also recommend grabbing a Rinse bucket available separately if you wish, and insert the Great Barrier Thingy into the bottom. We strongly recommend 2 buckets - one for clean rinse water, and one for your wash water. The idea here is to dip your wash tool into the wash water, wash a section of the car, then bring your wash tool back to the clean rinse water and ring it out in there, before going back into the wash water and washing the next section, to stop dirt and contamination going into your wash water as much as possible.
Fill up one capful of Red Stuff wash and pour it into the bucket, giving the cap a good thrash around in the bucket. Agitate the bucket with your pressure washer or the Jet setting on your hose to mix the wash and produce a nice head of suds.
Dip your wash tool into the wash suds and let the suds soak into it for a couple seconds (squeezing it gently can help it absorb the wash suds), then starting at the roof of the car, gently wash in a back and forth motion, then side to side so that you don't miss any spots. We prefer not to go in circles when washing - not because it will create swirl marks, but because when you do small circles, there's always a bit that you miss. When you wash up and down, then back and forth, you are guaranteeing that you don't miss any spots.
After washing the first section, dip your mitt into the clean rinse water and thrash it about and/or squeeze the suds out so that any dirt or grime leaves the wash tool, then dunk it back into the wash suds and do the next section of the vehicle, leaving the lower dirtier sections till last.
Once you've washed the whole car, rinse the suds off thoroughly (NOTE: if you're washing in the sun, rinse the suds off periodically - don't let them dry on the paint).
Green Dreams
Green Dreams can be used to top up and maintain protection of our other sealants like Bead Machine, or it can be used as a stand-alone sealant with 2-3 months of protection on good condition paint. It works best when used in the shade on cool panels, and the panel needs to be wet. It's got a very similar usage to our Wet Dreams, but cures even faster for some instant bead porn.
After washing the car, rinse it down thoroughly from the top down. Grab your Green Dreams and a damp Big Softie cloth, working in small sections (e.g., one quarter of a bonnet, one door), mist Green Dreams over the section and gently wipe it in with the Big Softie to ensure even coverage (don't wipe too hard or you'll wipe the product off the paint - we're just spreading the product evenly across the panel). IMMEDIATELY rinse off with your pressure washer or the Jet setting on the hose - Green Dreams bonds almost immediately, so you should see instant bead porn. Continue around the car using this same technique until it's done, making sure to keep the rest of the panels wet to avoid water spotting.
Once complete, take the end off your hose and flood the panels with water - the new found surface tension will force the water to clump together and sheet away in one go which means less drying time for you!
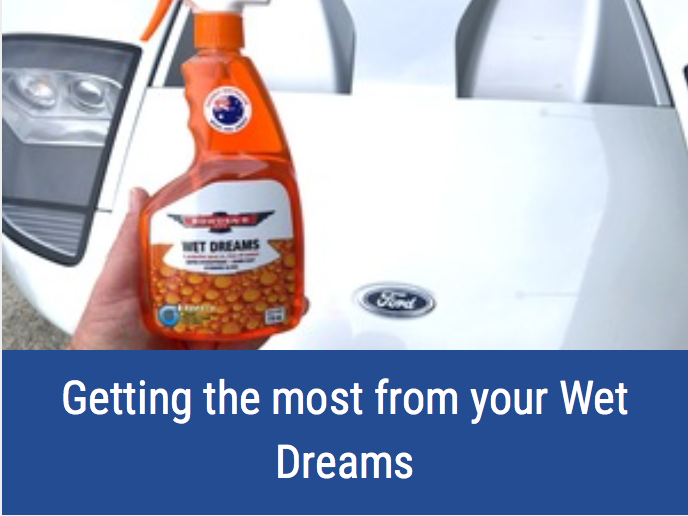
For a detailed guide on getting the most from Green Dreams, see our Wet Dreams detailed guide below:
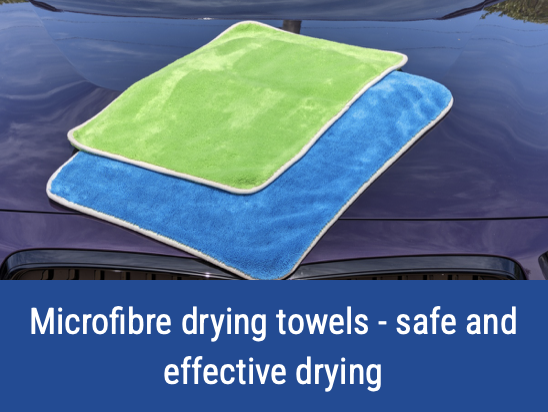
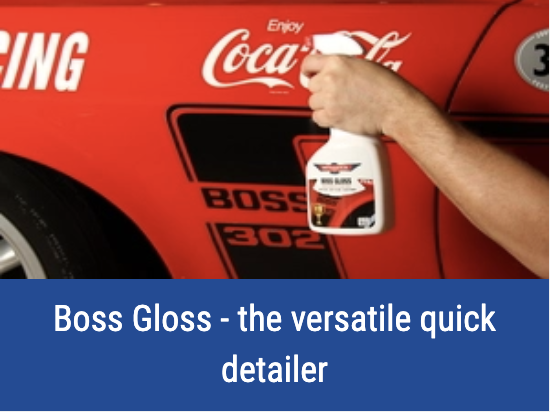
Safe drying
The Twisted Pro Sucker and Big Green Sucker are our dedicated drying towels, and are used with Boss Gloss to enhance the drying experience. All of these can be purchased separately.
Spray 4-6 sprays of Boss Gloss into each side of either the Twisted Pro Sucker or The Big Green Sucker and start drying your vehicle from the top, working your way down the car, drying any glass that may be in the sun first, to avoid getting water spots on the glass. There's no need to add any more Boss Gloss to the cloth, and you won't need to wring the cloth out either. If you find the cloth becomes waterlogged, it could be that you need to flood the panels a bit more, to remove more water before drying the car. We usually find we can dry 2-3 average sized cars with a single Twisted Pro Sucker or Big Green Sucker, without needing to wring them out.
We also recommend drying the wheels and tyres for the next step - give them a quick wipe over with a dedicated microfibre cloth like our Dirty Deeds to remove excess water.

autObarn/Autopro - All Aussie Bucket
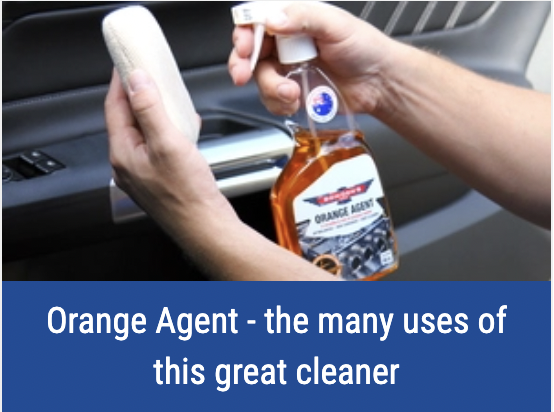
Deep Cleaning with Orange Agent
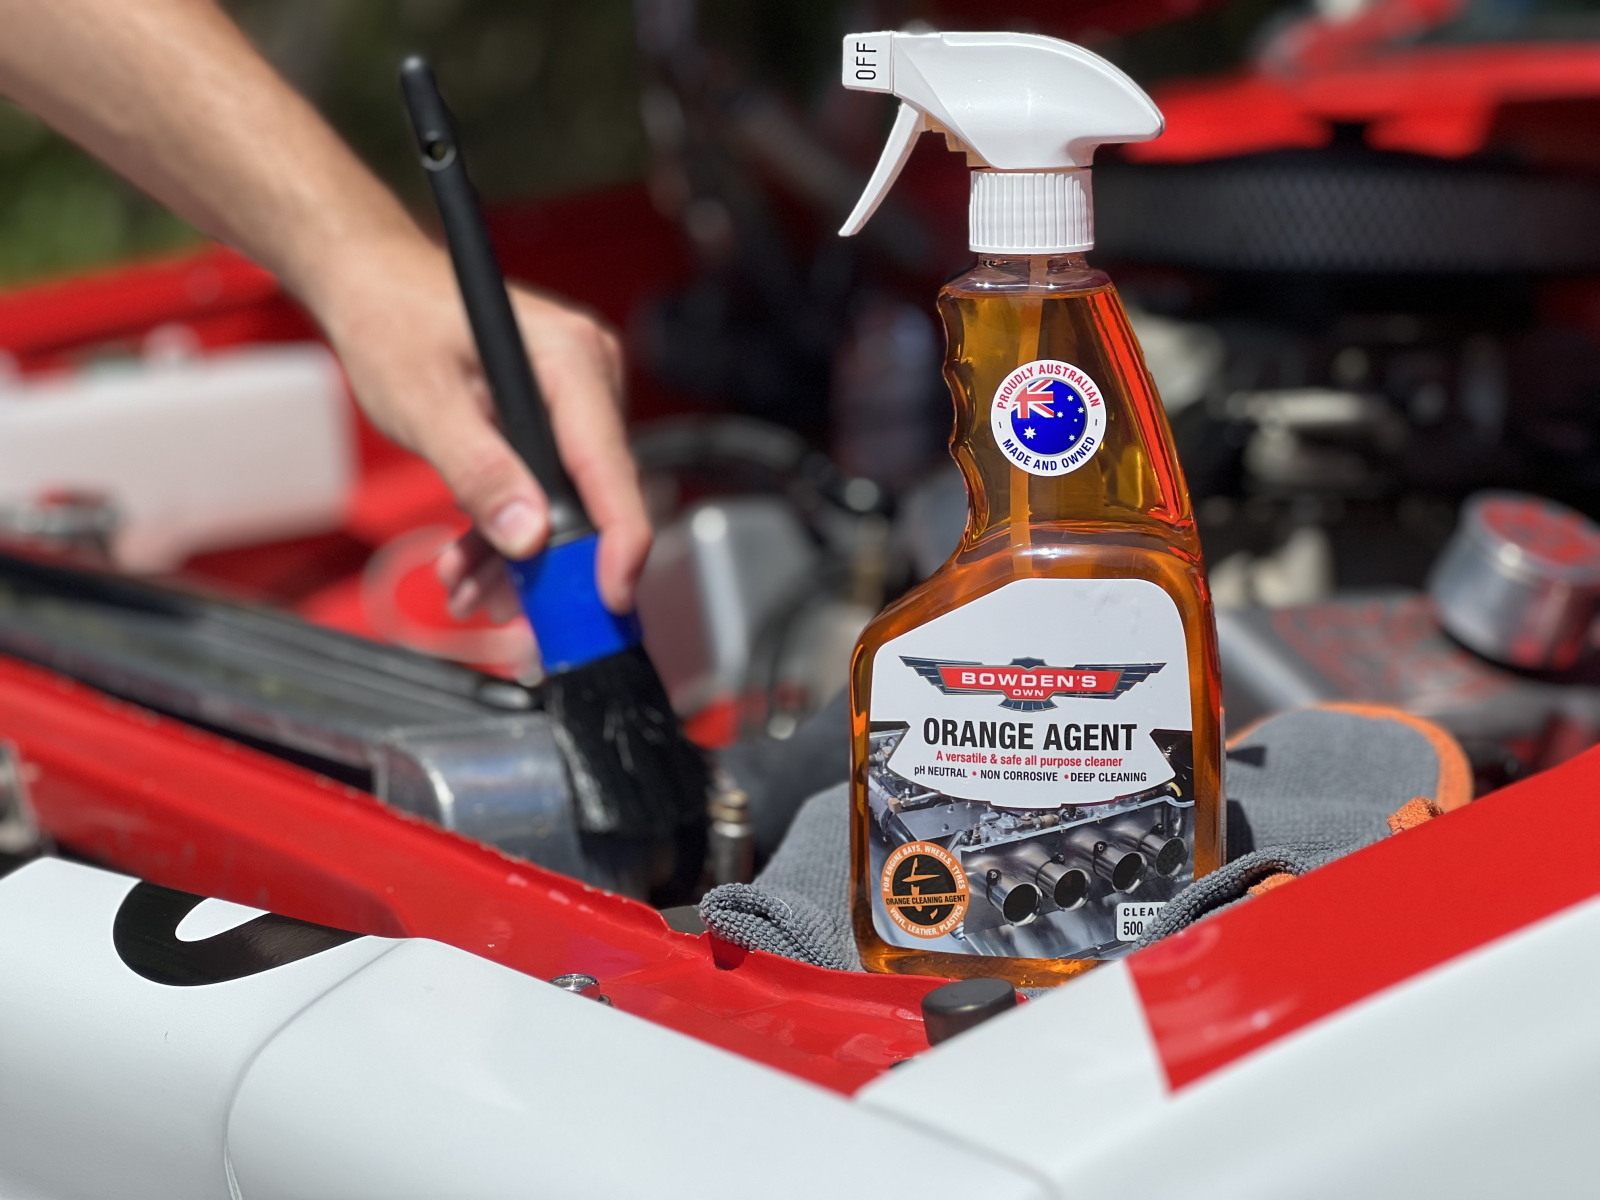
Orange Agent can be used in a variety of ways for deeper cleaning around your vehicles interior or exterior.
To use, spray some Orange Agent all purpose cleaner into a brush (like a Nuts & Guts brush from our Foursome brush set, which is sold seperately), or a cloth like our Dirty Deeds cloth and agitate all over the area you want to clean. Then, rinse the area down with the hose, or gently wipe the areas with a damp Dirty Deeds cloth, making sure the Orange Agent never dries, especially on rubber hoses - where the technique is to spray on, quickly agitiate and then rinse off right after, one hose at a time.
Once all done, get a small air blower and use it with a few dry microfibre cloths (again we use the Dirty Deeds cloths) to wipe down and remove the water, especially if it's sitting in engine crevices like around the manifold.
Orange Agent can also be used on your interior for deeper cleaning dirtier leather and vinyl. Spray a few sprays into your Square Bear applicator, and gently wipe back and forth over the section you are cleaning. Grab a folded Plush Daddy cloth and wipe off immediately, do not let it dry. Follow up with either Vinyl Care or Leather Love/Leather Guard to add some protection, as Orange Agent will leave a stark finish.
Our full Orange Agent usage guide can be found here:
Interior Detailing with Far Cough
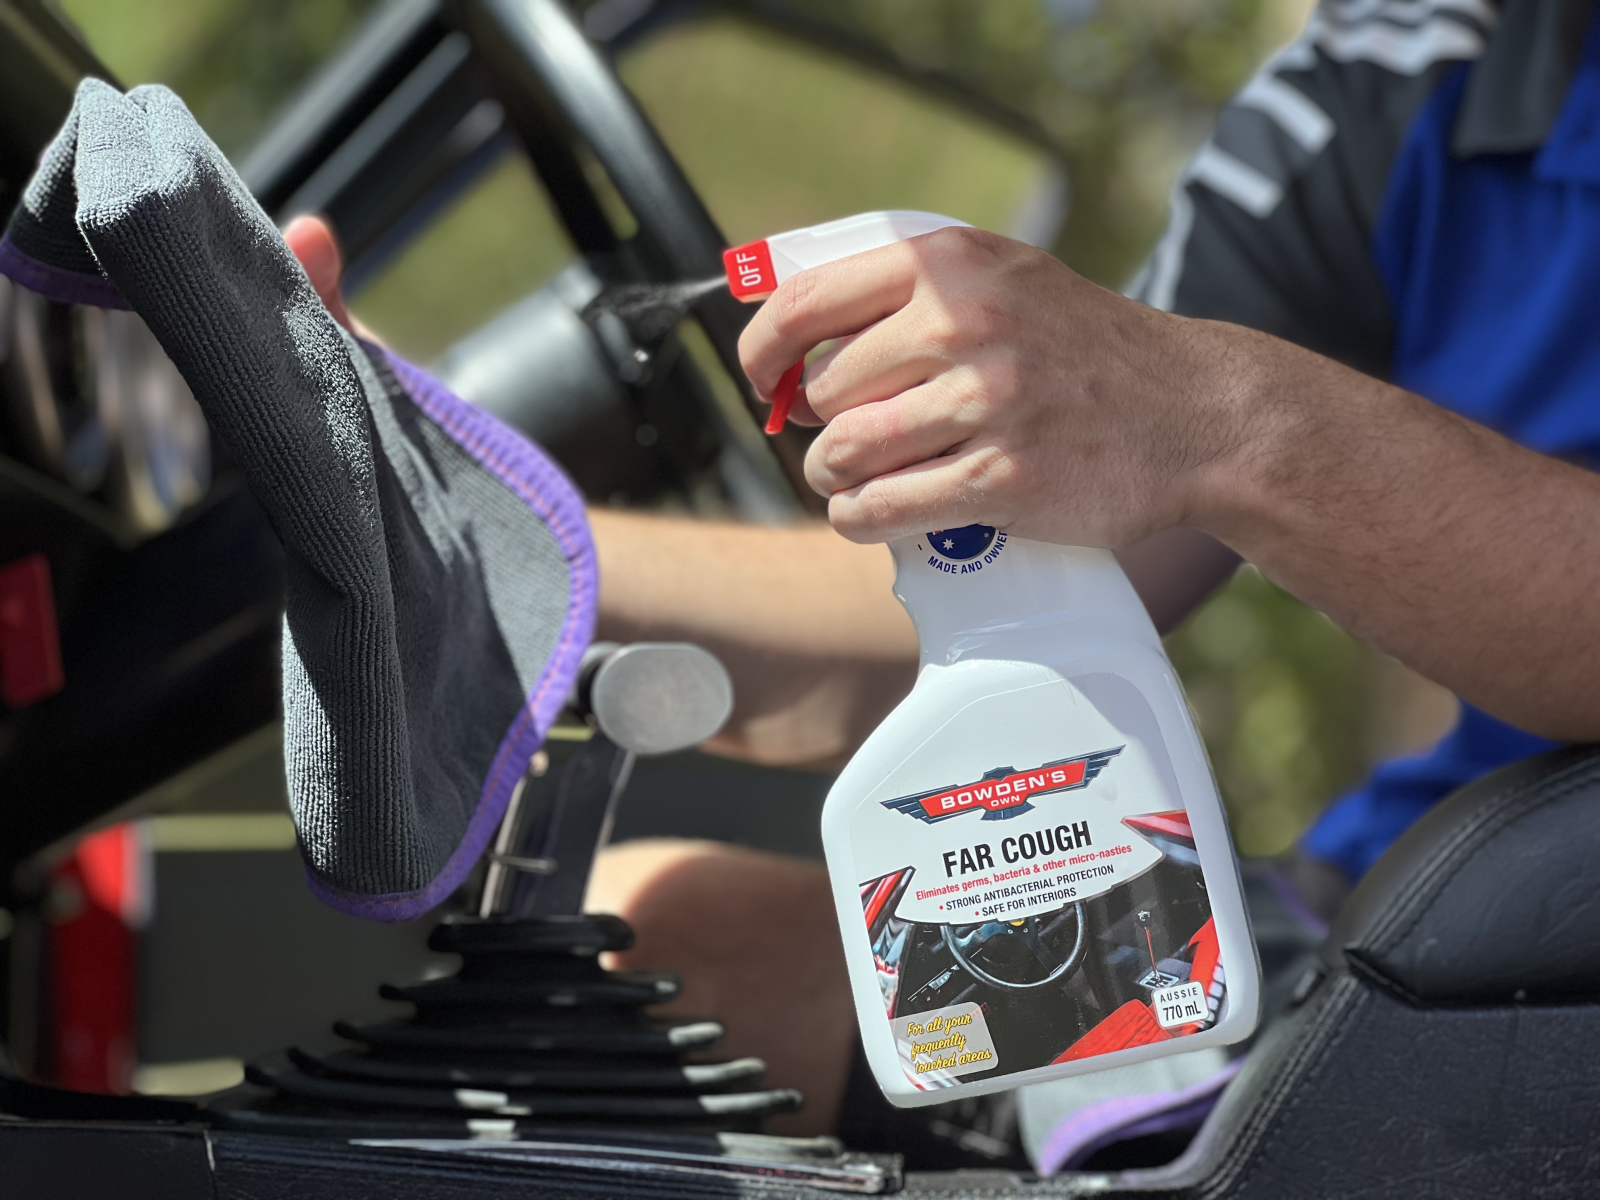
Our Far Cough antibacterial spray is ideal to use on all interior and exterior surfaces for the home or car as it will inhibit further bacteria growth on any hard, non-porous surfaces.
Grab the Far Cough and spray a few sprays into a clean and dry Dirty Deeds cloth, then wipe over all of the surfaces in your car you want to protect. No need to over saturate, just a nice, even coat. Allow this to sit on the surfaces for 10 minutes while it works away, then come back and wipe over all of the surfaces once more with the damp cloth, then finish up with a final wipe with a clean and dry Dirty Deeds cloth.
Cleaning up stank with Pong-Go
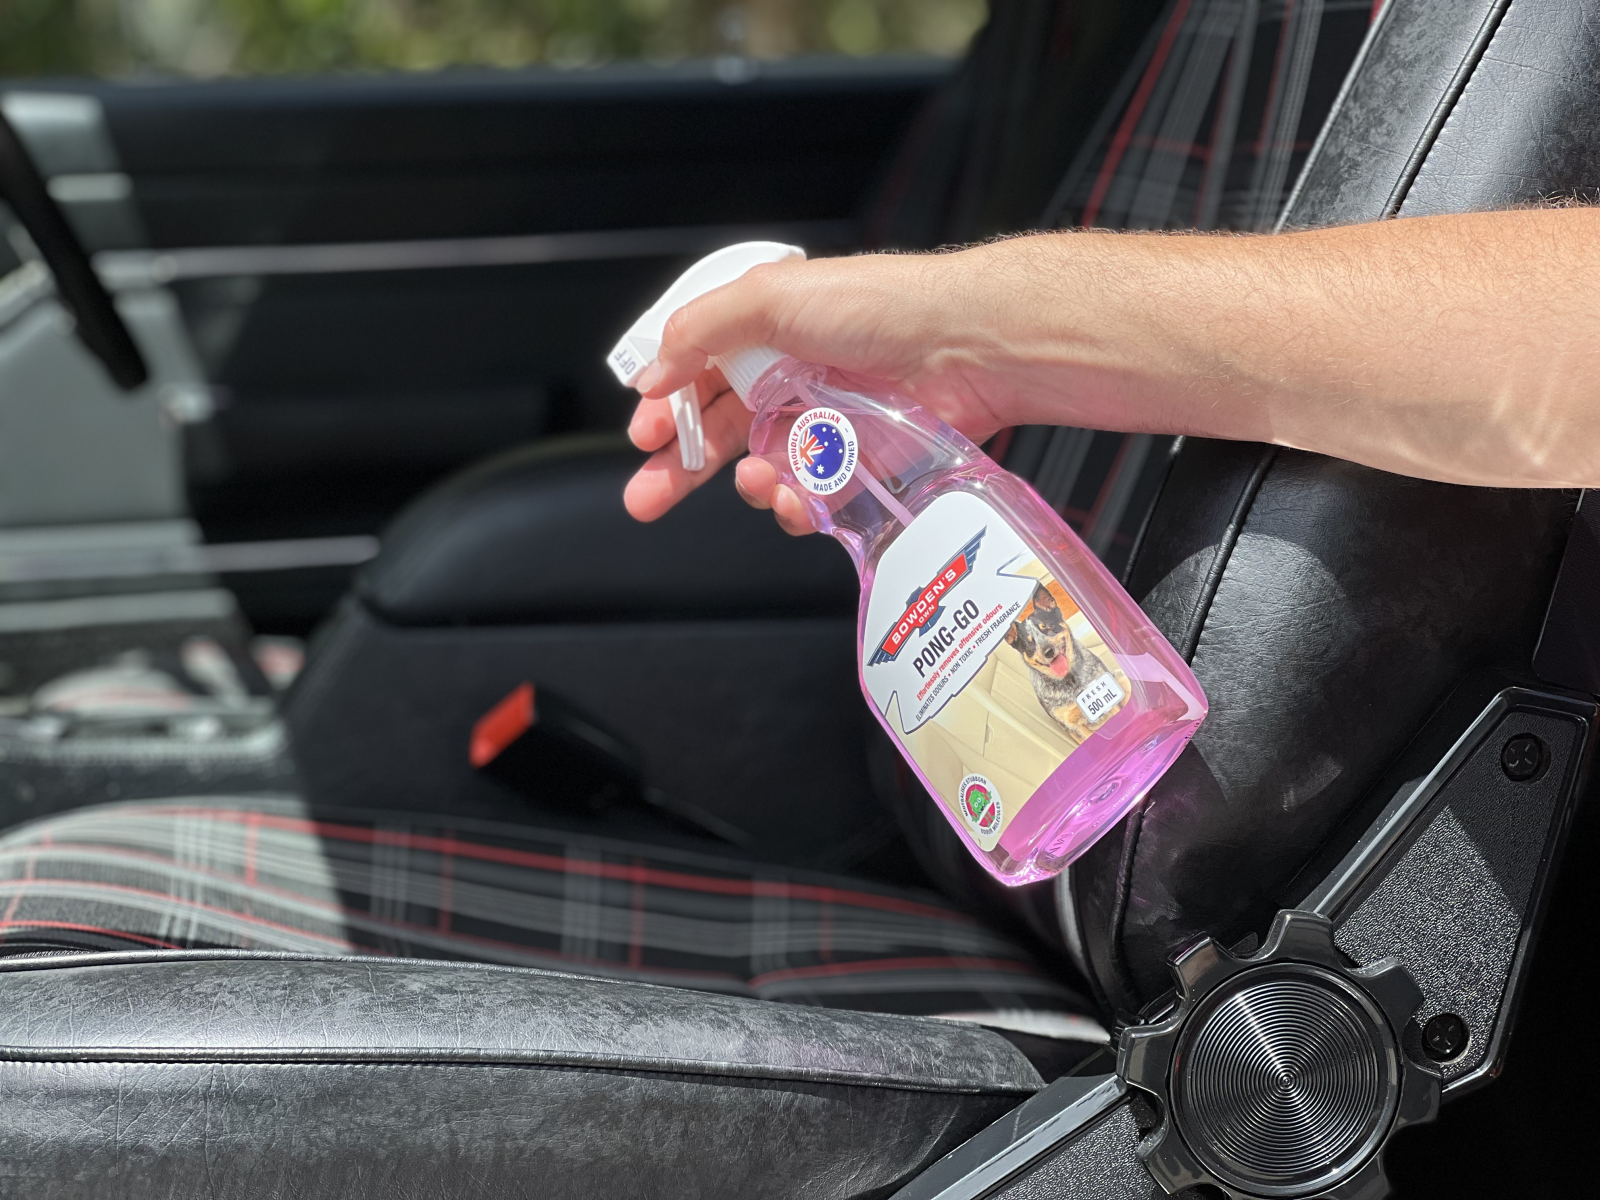
To get the best from our odour eliminator Pong-Go, you will need to thoroughly clean the offending area first. Start by removing any larger objects like dropped pies, damp clothes etc, and then give the area a thorough vacuum. Then, follow up with Fabra Cadabra to deep clean the surface and remove as much of the smell as you can.
Follow up afterwards with Pong-Go, lightly misting over the affected area, being sure not to over saturate the material. Then close all the windows and doors and allow it to dry for 20-30 minutes. Re apply Pong-Go if the odour persists.
Finishing strong with Hand Relief
Once you've finished detailing your pride and joy, chances are your hands will be quite dirty. Wet your hands under a tap, apply a good dollop of Hand Relief and rub them together, while singing the following:
Do you come from the land down under?
Where women glow and men plunder?
Can't you hear, can't you hear the thunder?
You better run, you better take cover.
Whistle the final tune, then rinse off well with fresh water.
Repco - Red Passion Bucket
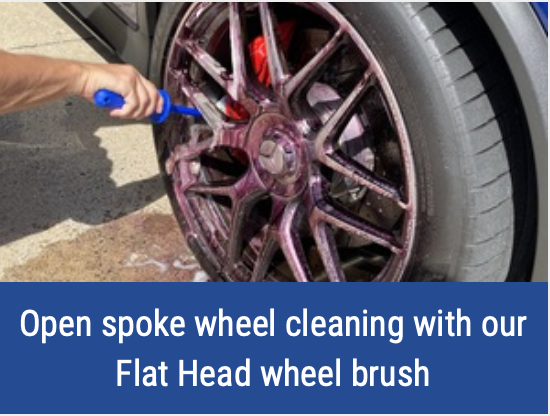
Wheely Clean

Half fill your Wheels bucket with water (Wheels bucket is available separately), then add a capful of Red Stuff and froth the mixture up inside the bucket with a short blast from the pressure washer to properly mix it up. If you don't have a pressure washer, use the "Jet" setting on your hose end.
With your Wheels bucket set up next to the wheel, and with your brushes handy in the bucket, spray the Wheely Clean directly onto the wheel. Leave it to dwell for only a short time (30 seconds or so), then scrub the wheel with the Little Chubby brush. If you'd like to clean the inside barrel of the wheel, use the Flat Head brush, and get in there around the inside of the wheel barrel. Rinse the brushes out in the Wheels bucket as needed.
For the smaller or intricate areas around the wheels (wheel nuts etc), use the Nuts and Guts brush from the Foursome brush set, which is available separately.
Once the wheels and tyres have been cleaned, you can spray a few sprays of Green Dreams straight onto the wheel face, then pressure wash or hose it off, to add some super easy protection and a lovely shine in one step. This will make it more difficult for brake dust to stick to the surface, making your next wash just that little bit easier.
For a detailed guide on wheel cleaning, see our guide below:
Applying Tyre Sheen
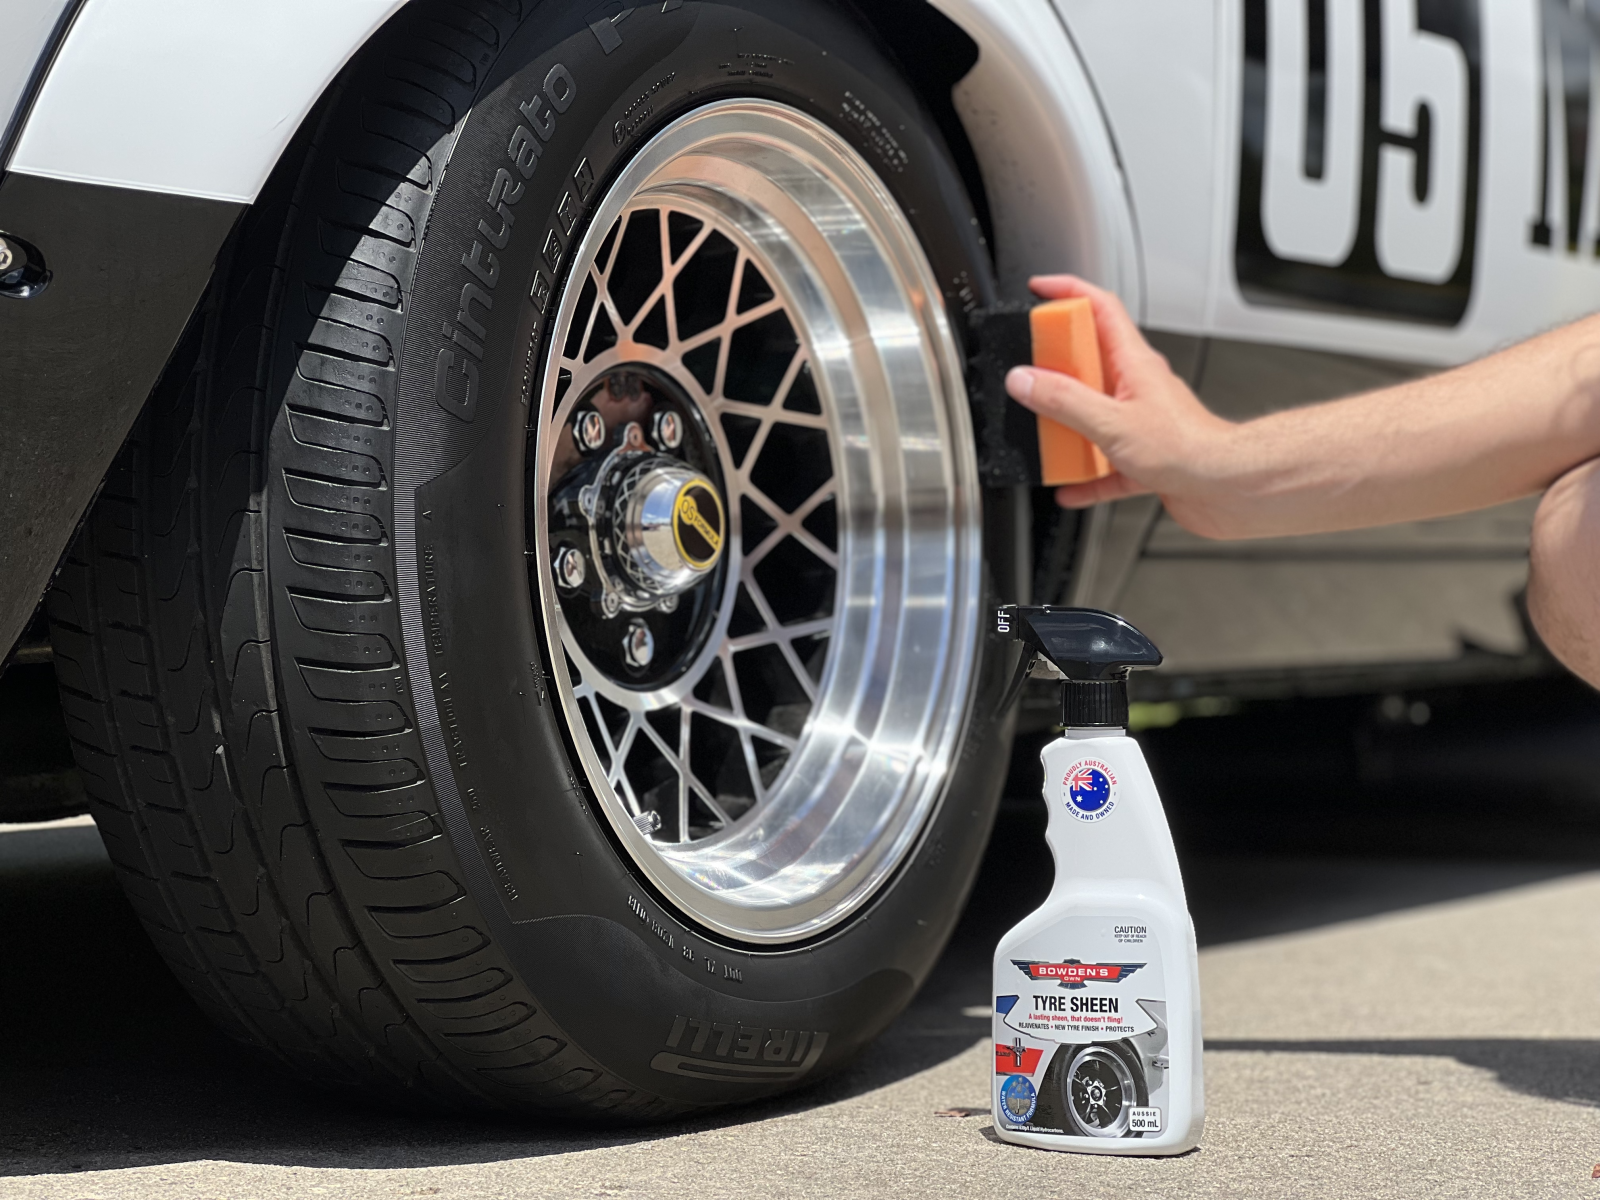
Now it's time to get the tyres looking nice. Nothing too shiny or over the top, just a lovely mid sheen like our Tyre Sheen gives.
The All Sorts applicator is great for applying our Tyre Sheen, and can be purchased separately. With the tyres now dry and preferably out of direct sun, spray a few sprays of Tyre Sheen straight into the All Sorts applicator, then apply to the rubber and wipe it over the tyre face until a nice and uniform finish is achieved. For a shinier finish, you can apply a second coat of Tyre Sheen after allowing the first coat a few minutes to bond.
No need to wash the All Sorts applicator out, simply store it in a plastic bag of some sort until the next time you wish to use it.
Interior Detailing with Far Cough
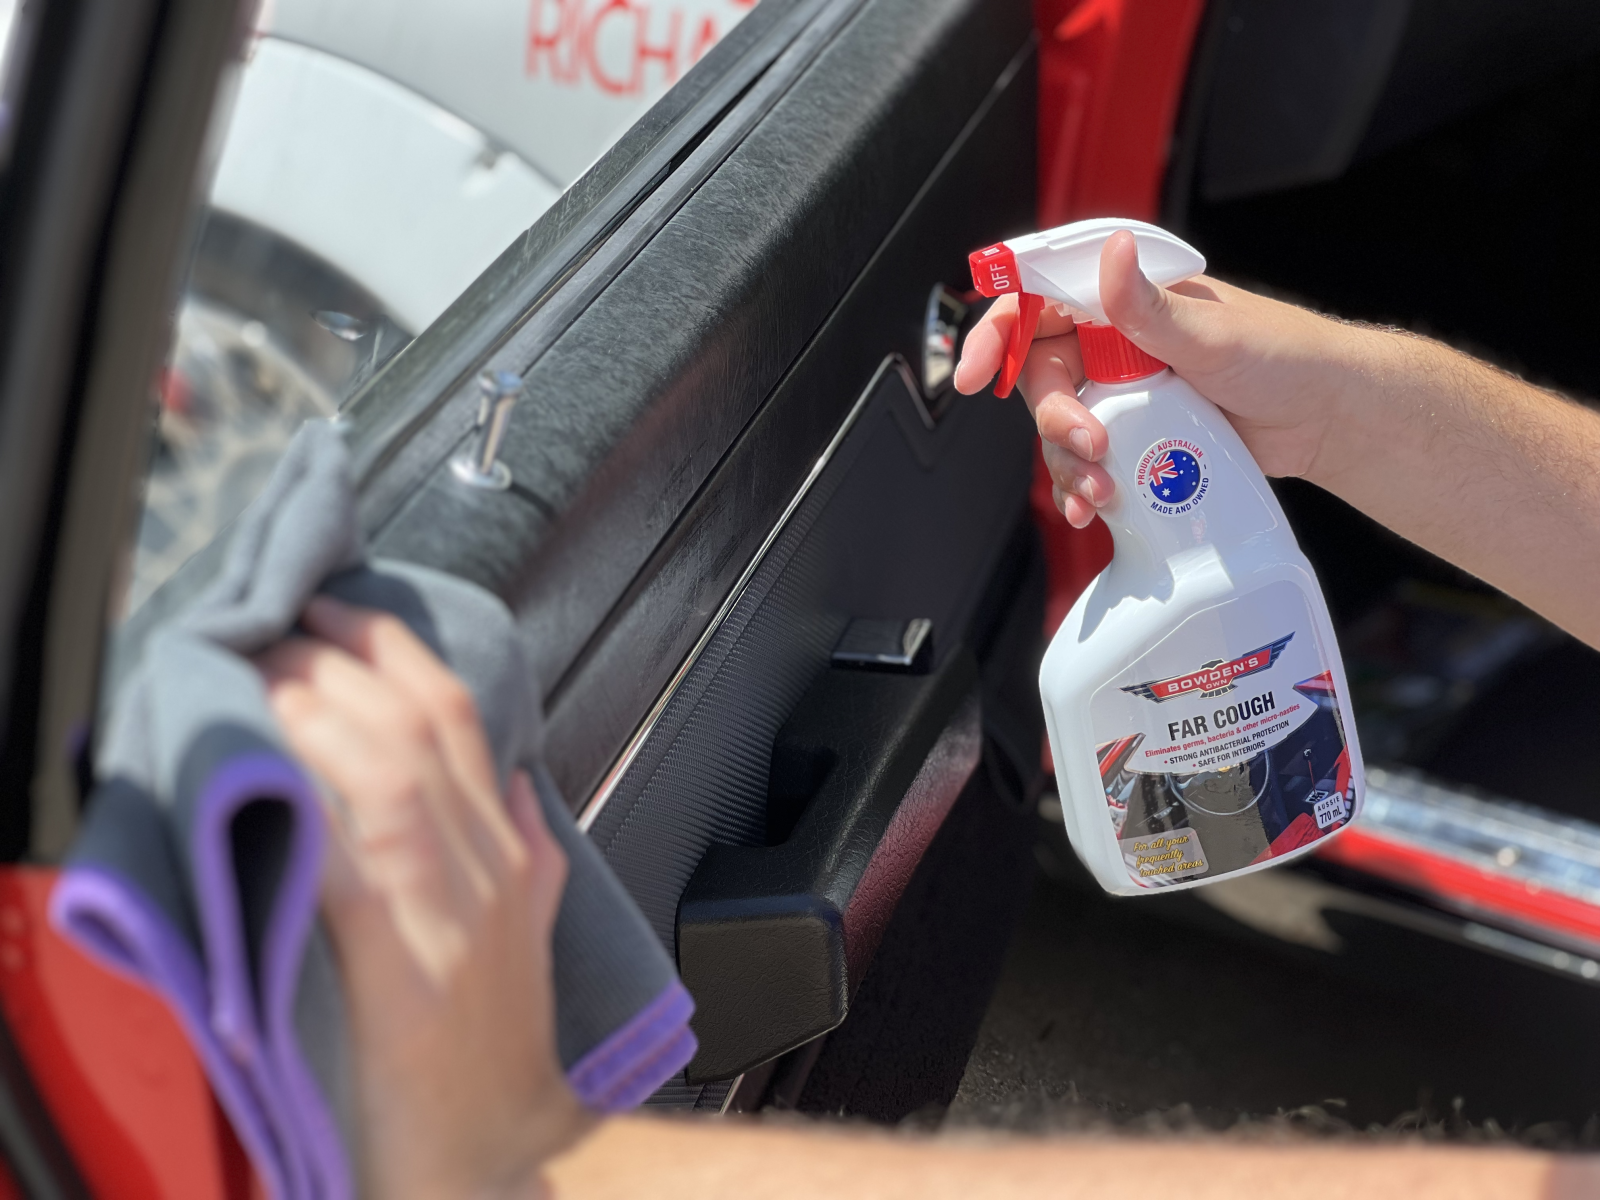
Our Far Cough antibacterial spray is ideal to use on all interior and exterior surfaces for the home or car as it will inhibit further bacteria growth on any hard, non-porous surfaces.
Grab the Far Cough and spray a few sprays into a clean and dry Dirty Deeds cloth, then wipe over all of the surfaces in your car you want to protect. No need to over saturate, just a nice, even coat. Allow this to sit on the surfaces for 10 minutes while it works away, then come back and wipe over all of the surfaces once more with the damp cloth, then finish up with a final wipe with a clean and dry Dirty Deeds cloth.
Supercheap Auto - Aussie Holiday Detailing Kit
Wheely Clean
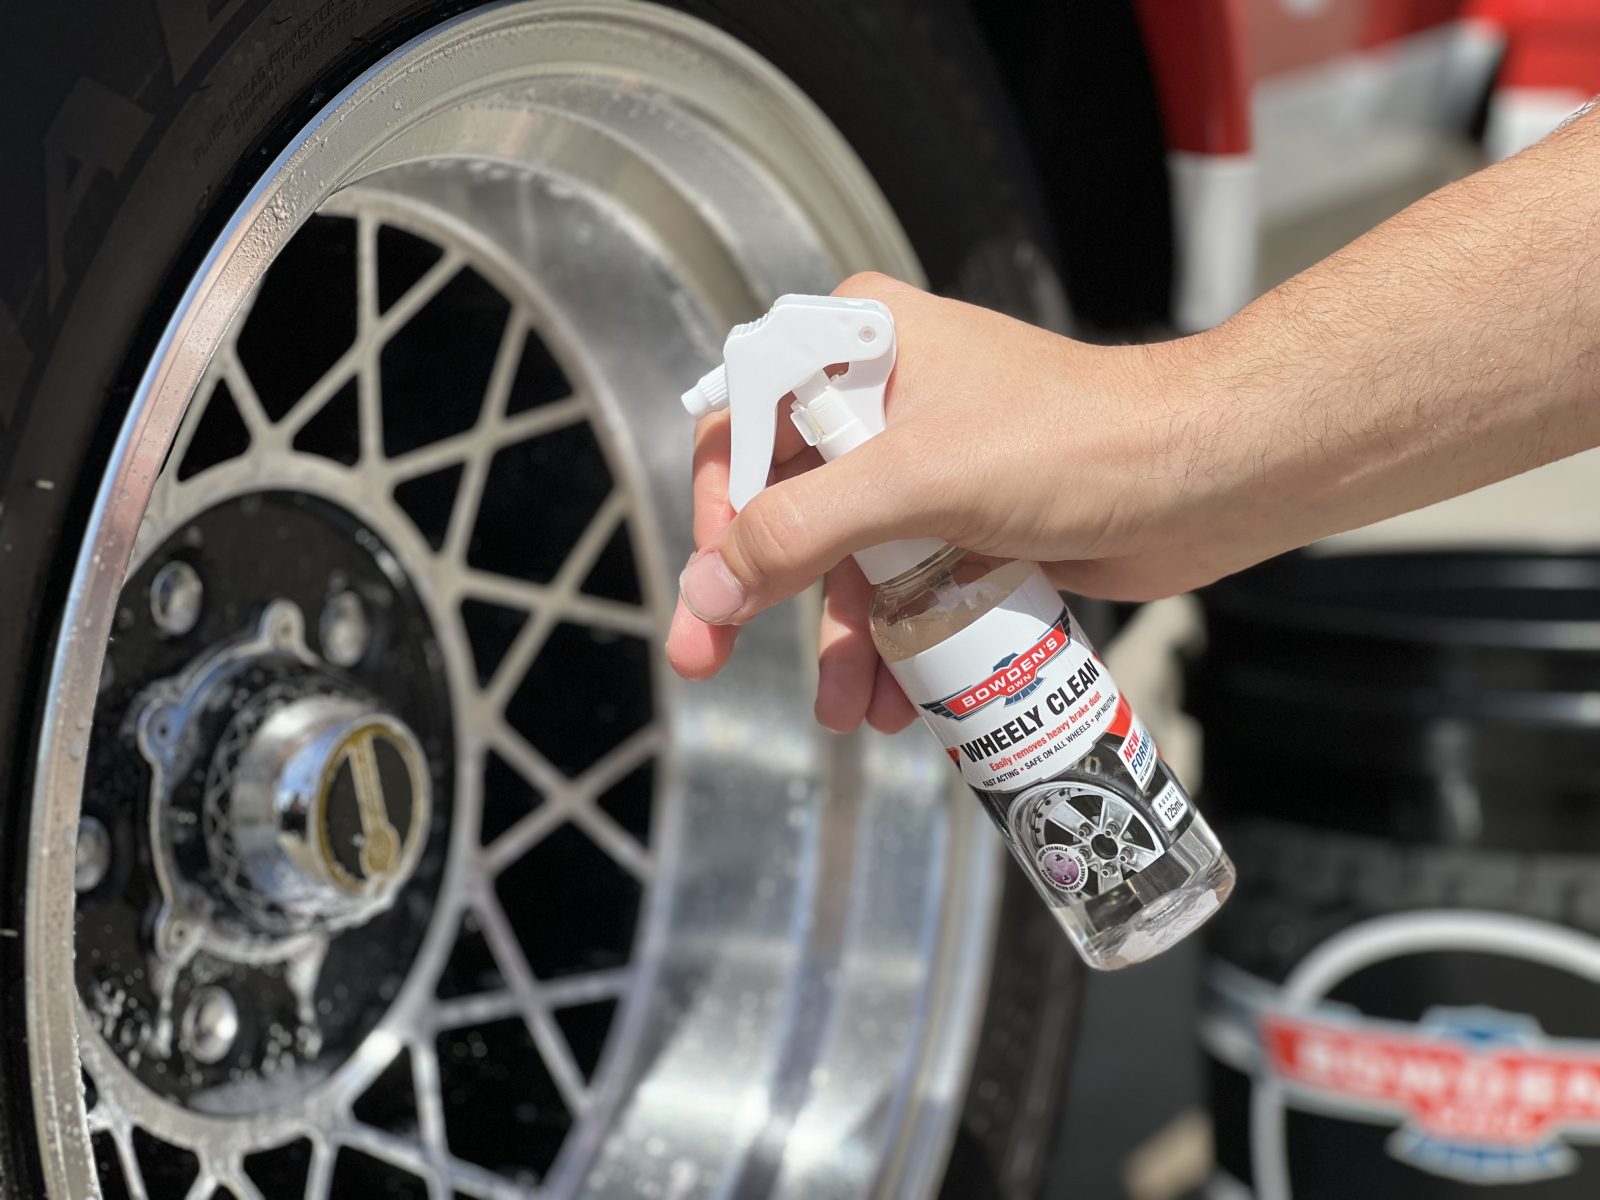
Half fill your Wheels bucket with water (Wheels bucket is available separately), then add a capful of Red Stuff and froth the mixture up inside the bucket with a short blast from the pressure washer to properly mix it up. If you don't have a pressure washer, use the "Jet" setting on your hose end.
With your Wheels bucket set up next to the wheel, and with your brushes handy in the bucket, spray the Wheely Clean directly onto the wheel. Leave it to dwell for only a short time (30 seconds or so), then scrub the wheel with the Little Chubby brush. If you'd like to clean the inside barrel of the wheel, use the Flat Head brush, and get in there around the inside of the wheel barrel. Rinse the brushes out in the Wheels bucket as needed.
For the smaller or intricate areas around the wheels (wheel nuts etc), use the Nuts and Guts brush from the Foursome brush set, which is available separately.
Once the wheels and tyres have been cleaned, you can spray a few sprays of Green Dreams straight onto the wheel face, then pressure wash or hose it off, to add some super easy protection and a lovely shine in one step. This will make it more difficult for brake dust to stick to the surface, making your next wash just that little bit easier.
For a detailed guide on wheel cleaning, see our guide below:
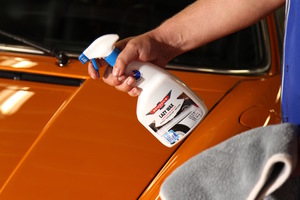
Adding the shine with Boss Gloss
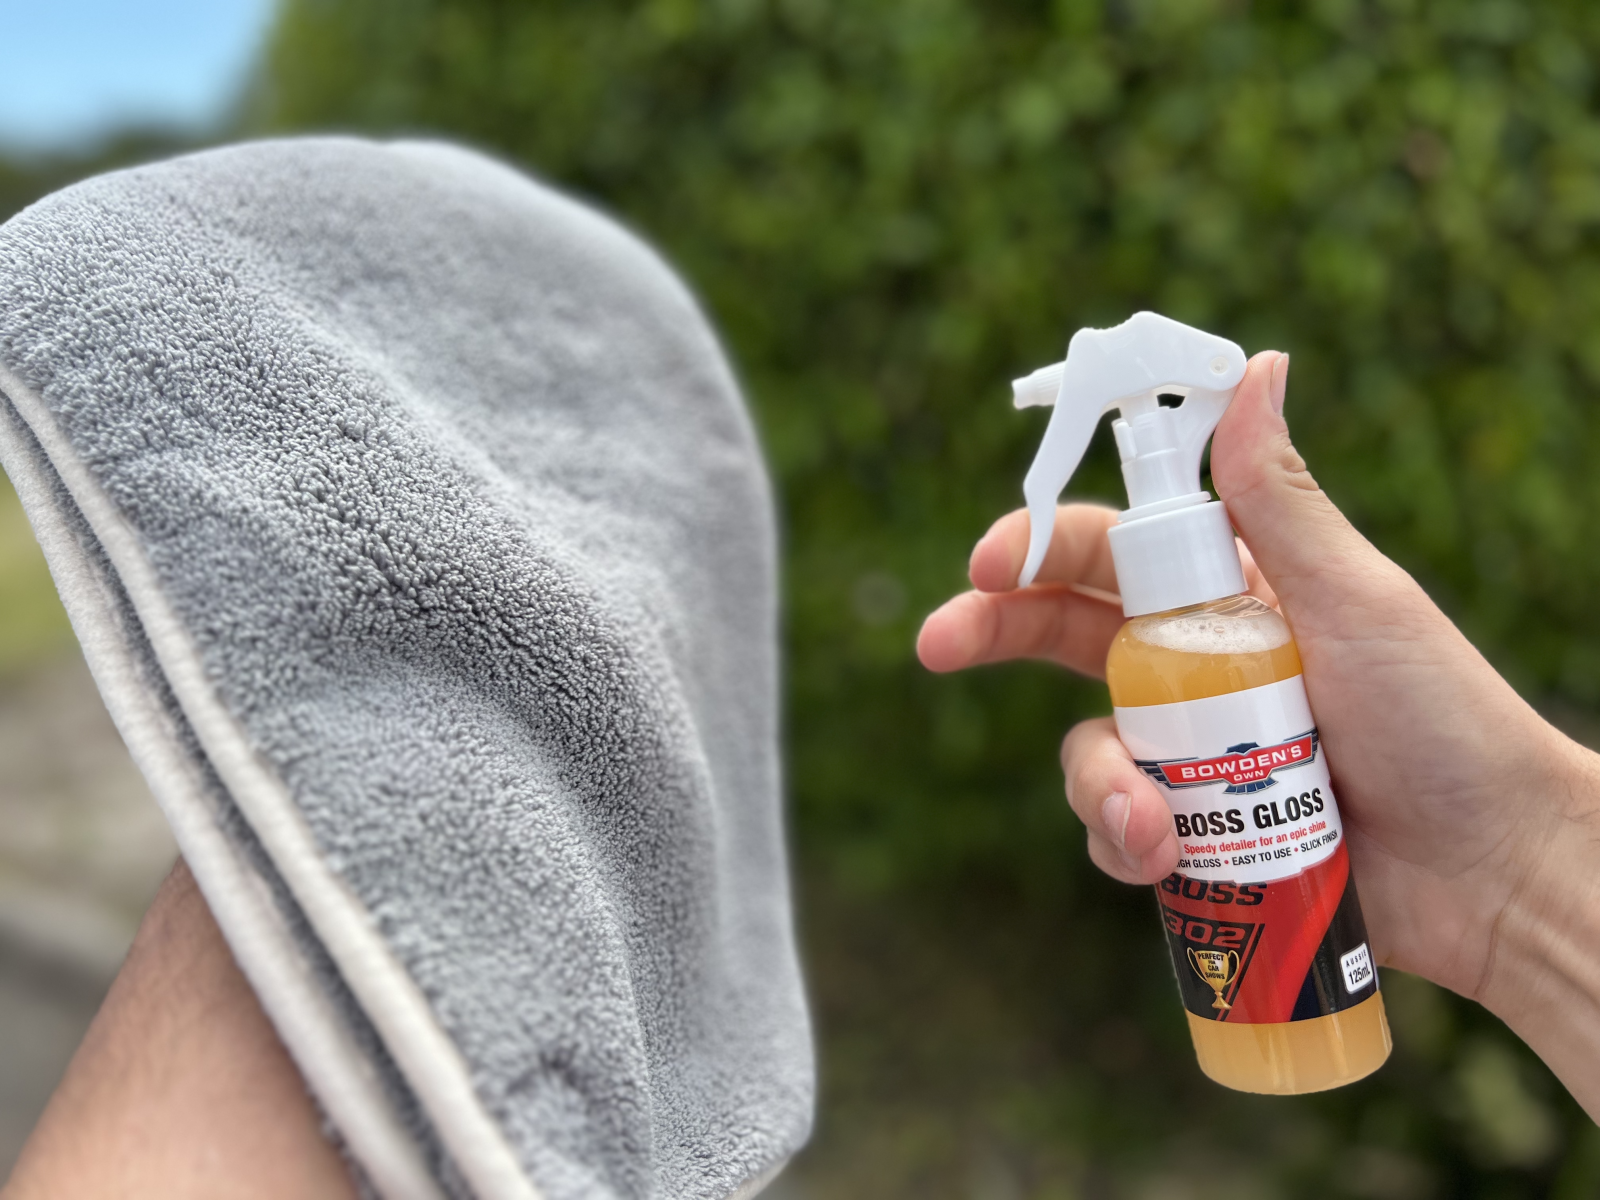
Boss Gloss can be used as a drying aid with the Big Green Sucker, or as a standalone detailer to add a brilliant shine to your paintwork. Grab two folded Drop Bear towels, and spray 8-12 sprays into one side of the first cloth. Then gently wipe over the vehicle in a section at a time (e.g a door, half the bonnet). Grab your second clean and dry Drop Bear and immediately buff off to reveal a beautiful shine and slick feeling. Continue round the car till it's all finished. Check out our full guide for Boss Gloss here:
Glass Cleaning with Naked Glass
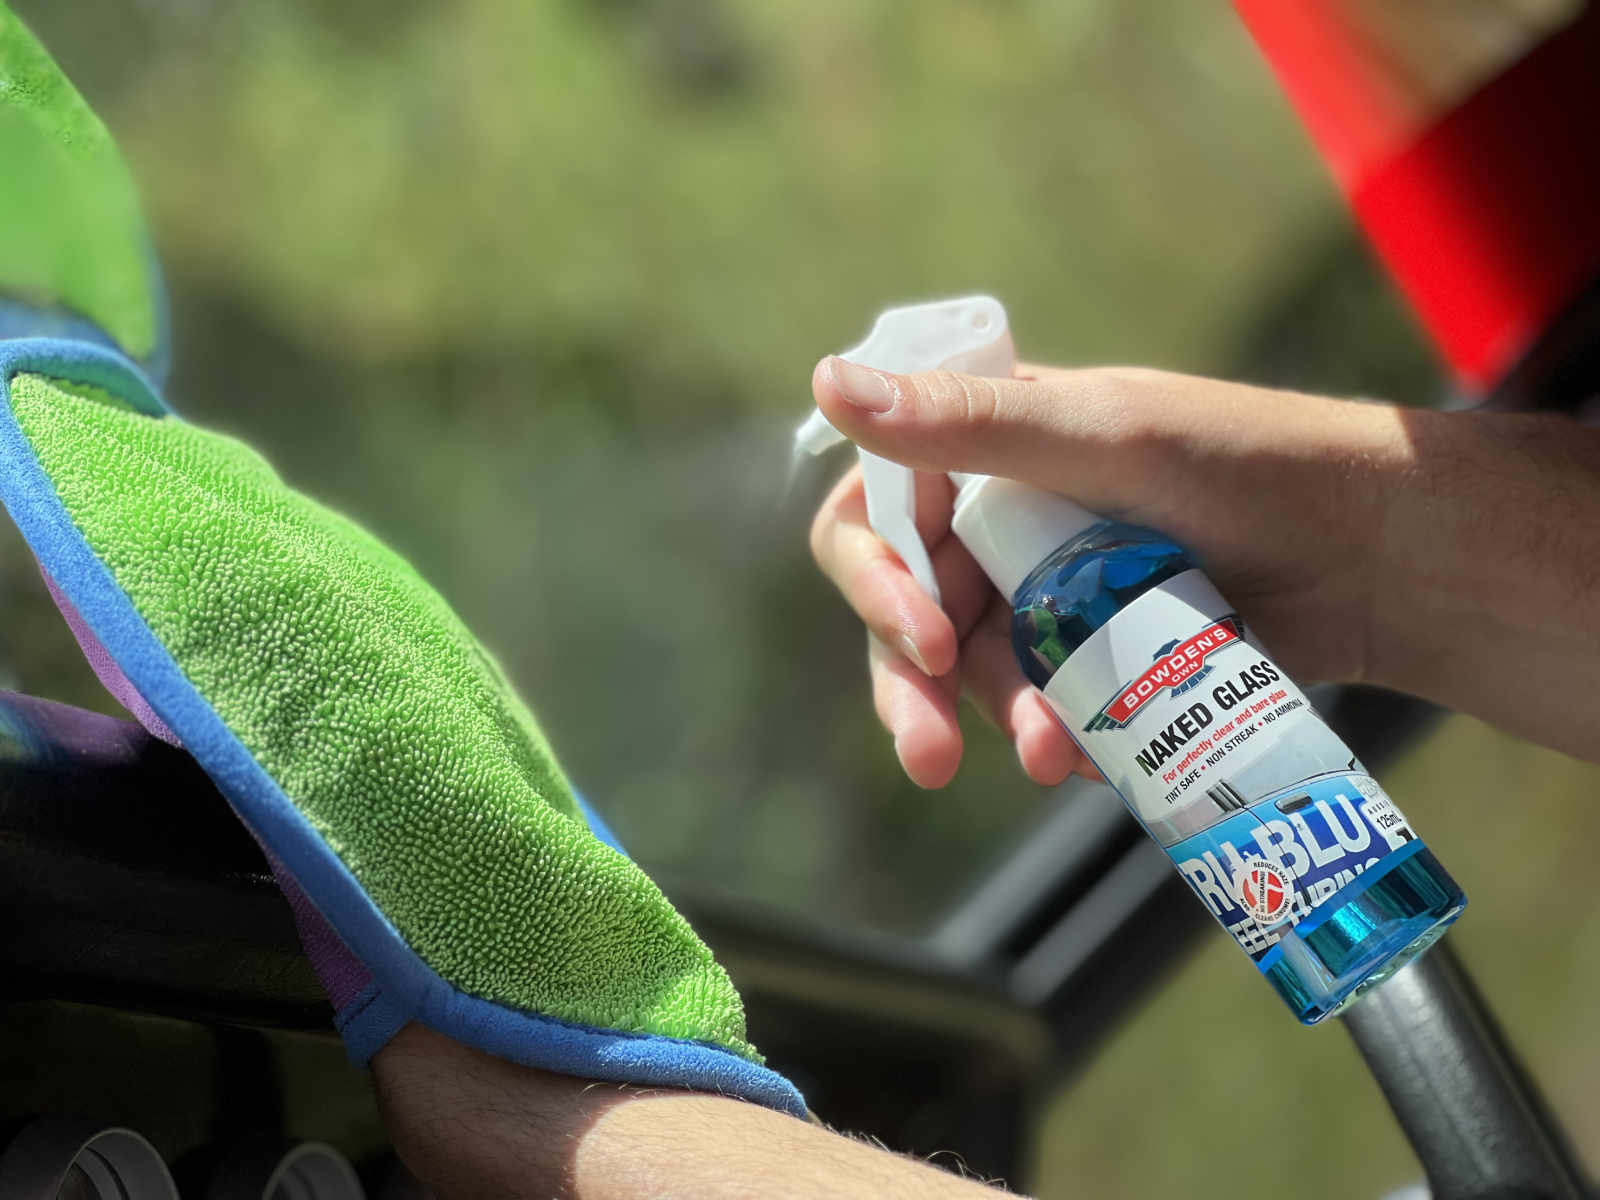
For the best glass cleaning experience, we recommend using Naked Glass with our specialised glass cleaning cloth; the Inta-Mitt.
Use 1-2 sprays only of Naked Glass into the green side of the Inta-Mitt (if it's cold, use less, and if it's warmer, you may need to use a little more Naked Glass). Gently wipe up and down, then back and forth over the glass until you see any marks in the glass disappear and the Naked Glass start to flash off. Turn the Inta-Mitt to the purple side and gently buff over the entire glass surface to remove any remaining product and to remove any haze from the glass.
If the glass is very dirty, or you have stubborn marks on there, you can spray the Naked Glass directly onto the glass, leave it for 10-15 seconds before using the Inta-Mitt in the same way as described above.
For a more in-depth look at glass cleaning and the Inta-Mitt, see our article below:

Auto One - Clean Fun Bucket
Wax Wash
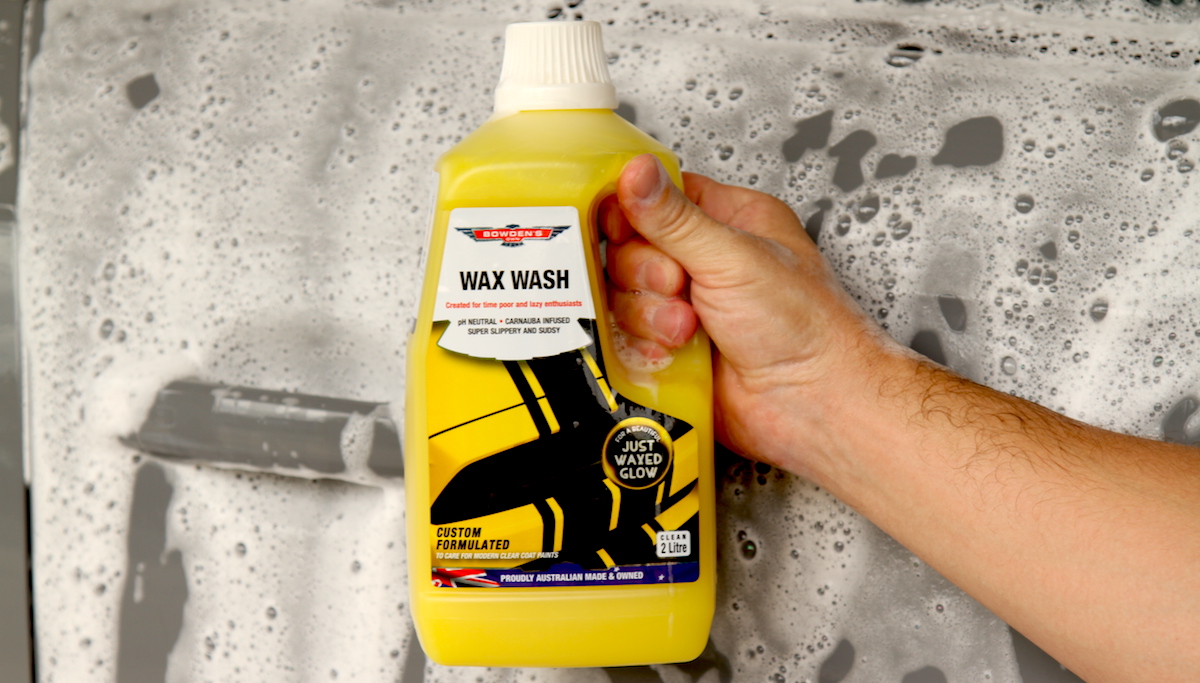
Grab your Wash bucket and fill it 3/4 full of water. We'd also recommend grabbing a Rinse bucket available separately if you wish, and insert the Great Barrier Thingy into the bottom. We strongly recommend 2 buckets - one for clean rinse water, and one for your wash water. The idea here is to dip your wash tool into the wash water, wash a section of the car, then bring your wash tool back to the clean rinse water and ring it out in there, before going back into the wash water and washing the next section, to stop dirt and contamination going into your wash water as much as possible.
Fill up one capful of Wax Wash and pour it into the bucket, giving the cap a good thrash around in the bucket. Agitate the bucket with your pressure washer or the Jet setting on your hose to mix the wash and produce a nice head of suds.
Dip your wash tool into the wash suds and let the suds soak into it for a couple seconds (squeezing it gently can help it absorb the wash suds), then starting at the roof of the car, gently wash in a back and forth motion, then side to side so that you don't miss any spots. We prefer not to go in circles when washing - not because it will create swirl marks, but because when you do small circles, there's always a bit that you miss. When you wash up and down, then back and forth, you are guaranteeing that you don't miss any spots.
After washing the first section, dip your mitt into the clean rinse water and thrash it about and/or squeeze the suds out so that any dirt or grime leaves the wash tool, then dunk it back into the wash suds and do the next section of the vehicle, leaving the lower dirtier sections till last.
Once you've washed the whole car, rinse the suds off thoroughly (NOTE: if you're washing in the sun, rinse the suds off periodically - don't let them dry on the paint).
Lazy Wax
Work on one panel or section of a larger panel at a time (like 1/2 a bonnet or roof etc), initially evenly mist 12 to 15 sprays of the Lazy Wax directly into a folded plush Drop Bear towel. Wipe it with a microfibre cloth (our plush Drop Bear cloth folded into halves is perfect for this) into the surface in a side to side motion, east/west and then north/south to get an even coverage of it across the surface.
Let it sit for 15 to 30 seconds before removing the residue by lightly buffing it with a second, clean and dry Drop Bear microfibre cloth. Be sure to turn this cloth to a fresh side frequently.
For the following applications, only mist 2 to 3 sprays into the now wet side of the first folded Drop Bear towel and repeat as above.
Once done, you should step back and check out that stunning, deep glow to the paint. Enjoy a cold beverage if one is handy.
Vinyl Care
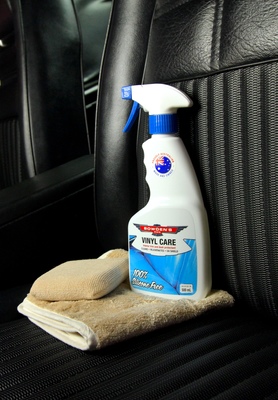
Spray 4 or 5 sprays into our special interior applicator, the Square Bear. Apply to the surface you're cleaning with a circular motion, working in smaller sections at a time and be sure to get it in every little nook and cranny. It's got great cleaning power, so check the pad often to make sure it's not getting too dirty. If it is, rinse the pad out in water while wiping the dirty surface with your hand to release the dirt from it. Wring it out, so it's slightly damp (not saturated), spray more Vinyl Care into it and then continue your cleaning.
Remove the product before it can dry! Especially important if the surface of your applicator has been showing a bit of dirt in it. The Vinyl Care liquid suspends dirt and grime that has been cleaned and lifted off from the surface, so if you let it dry it will bond back onto it. Simply remove it by buffing it away with the non-plush side of our Plush Daddy interior cloth.
Naked Glass
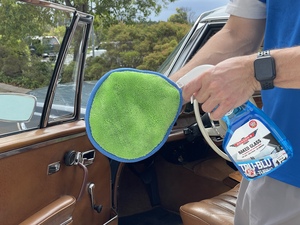
Lightly mist 1-2 sprays of Naked Glass into the green twist pile side of the Inta-Mitt cloth (use less product when it's cooler and more when it's warmer), and apply to the glass. DO NOT drench the cloth, a spray or two is always enough. Always keep the purple textured side dry for the final wipe off. Wipe over a section of glass, (1 window or half a windscreen), in a north-south, then east-west direction.
Be more careful around wiper arms and any other sharp surfaces on the edge of the glass, as it could grab and pull out the threads of the green twist pile side of the cloth.
We say to spray into the Inta-Mitt and apply so you don't get over spray everywhere, saving you time in cleaning up later. Only if the glass is really, really dirty is it a good idea to spray a little bit extra directly onto the glass.
Spin the Inta-Mitt to the dry purple textured side and gently buff the residue away to a perfect finish. This side is a low drag, unique type of microfibre, that will leave a smear free finish.
If your Inta-Mitt is feeling wet, or you begin to notice slight streaking, it’s time to turn it inside out and use the opposite side. It's imperative the Inta-Mitt is dry to get the perfect finish.
Any questions?
The All Aussie Bucket for 2022 is available exclusively through your local autObarn store in limited numbers. To find your closest store, click this link - Store Finder.
You can find the links to each of the bucket kits at our retailers below.
.png)
.png)
.png)
.png)

Thank you for your continued support and allowing us to keep making great car care products!
If you have any questions around any of the Mountain Edition buckets, send us an email - info@bowdensown.com.au or Free call 1800 351 308.
Happy detailing,
Brett Hobbs