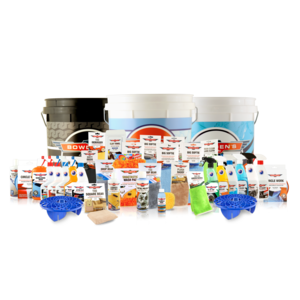
Holy Humongous Kit
Congratulations!
Congratulations on your purchase! This Holy Humongous Kit was created for the person who wants absolutely everything! This guide will give you a run through of the products in your new kit, how to use each product and what order to use them in to get the most out of them all. We have a good selection of products here to get you started and help look after your car - everything from washing and drying, to protecting to your paint, to looking after your microfibre.
Time to wash
The Wash & Rinse buckets and Great Barrier Thingy is a match made in heaven. Place your Great Barrier Thingy into the bottom of your Wash & Rinse buckets before you start washing your car to make sure you’re going to be trapping as much dirt as possible in the bottom of your buckets. Also included is the Wheels bucket to go with this kit, keeping the dirty job of cleaning the wheels well away from your Wash and Rinse buckets.
Bug Removal
There are a few different and effective ways to use our Bugger Off, but we find the easiest way is to spray Bugger Off on the affected areas at the front of the car before you do any other steps, leave it to dwell for around 1 minute, then pressure wash it off, or cover it with Snow Job at this stage as part of your pre wash system. To make the job even easier, use our DeBugger cloth to help loosen the bugs from the surface.
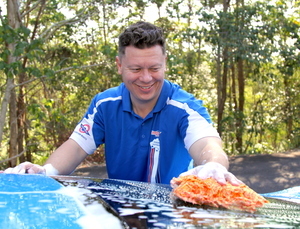
Washing
Always do any car washing in the shade, with the paint cool to the touch for best results. Not doing this can cause the water and the wash suds to evaporate faster than you'd like, possibly leading to water spots on the glass and paint!
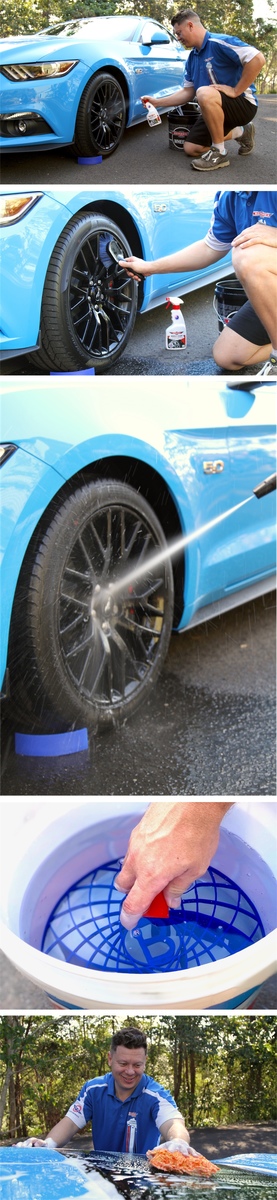
We like to start by cleaning our wheels first, as they are generally the dirtiest part of the car, and the grime off them is not what you want going onto your freshly washed car. Also, it's more time efficient to wash afterwards, so you don’t have the rinse water sitting on your cars panels for a longer period after washing.
We've always liked using pressure washers to help detail our cars, and they help a lot with wheel cleaning. If you don’t have a pressure washer, and you’re using a hose, or your wheels needed some extra cleaning after the pressure washer, we recommend our dedicated Wheels bucket (place a Great Barrier Thingy in it if you like) Add half a capful of Nanolicious Wash and then fill it to the desired level and suds it up using the hose or pressure washer. Get the bucket situated next to the first wheel you are going to clean.
Grab the bottle of Wheely Clean and spray 6-8 sprays all around the surface of the wheel. Using your desired Wheel Woolie or wheel brush, dip it into the Wheels bucket mixture and wash the wheel face and dish thoroughly. Rinse the dirty brushes out to clean off the grime and dirt and then go back to the Wheels bucket and continue cleaning. This will keep your wash water clean and effective. Once you're happy the wheel is clean, rinse it clean with your pressure washer or hose and move onto the next wheel. Continue this procedure on each wheel till the job is done.
With your Great Barrier Thingy in the Wash & Rinse buckets, fill the Rinse bucket with approximately 10-12L of water. Add 1 capful of Nanolicious Wash to the Wash bucket and then froth it up nicely with either the jet function of your hose, or preferably with a pressure washer.
Start by pressure washing the car down, or giving it a good blast with the jet function on your hose. We do this to remove any heavier bits of dirt and other contamination. Put your Shagtastic Wash Pad into your suds solution, giving It a gentle squeeze while it’s in there to really suck up all the suds it can. Then, starting from the top of the car first, gently wash the whole car, being sure to wipe the Shagtastic Wash Pad over the Great Barrier Thingy when it goes back into your Rinse bucket, to ensure any dirt and grime picked up from the car goes to the bottom of the bucket and is trapped by The Great Barrier Thingy.
Once washed, rinse the whole car off with a nice gentle stream of water from the hose. At this point we want to flood the panels with water to help remove as much water from the surface as possible, so there’s less to dry.
Decontamination
We've found for the most effective decontamination, use Three Way as the lube for our new Claying Rubber. This is a very specialised rubber compound that we’ve found to be super fine and won’t ever micro scratch or marr even the softest paints. It has replaced our older Clay Towels as it lasts longer, is more effective, as well as being just as fast and easy to use on larger panel areas.
Step 1:
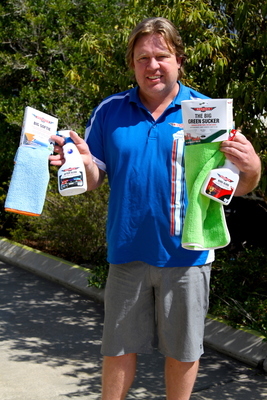
Wash and dry the vehicle safely. We'd recommend to wash with one of our lubricating washes; Nanolicious Wash, Wax Wash or Auto Body Gel using a Shagtastic Wash Pad, Love Glove or Muffy Sponge. We recommend to use a double solution of your favourite wash to make sure you're getting rid of as much dirt, oils and grease as possible. After you've washed the vehicle, dry it safely with the Big Green Sucker. Don't use any Boss Gloss or other detailing sprays on your Big Green Sucker during this drying process, as it can affect the next steps, and it'll also be a waste of product!
Step 2:
Make sure the vehicle you're decontaminating is in the shade and the paint is cool to touch. A well ventilated area outside in the shade is ideal.
Put on some gloves. Although the product doesn't smell of death, the gloves will make sure that your hands don't smell afterwards. Spray Three Way directly onto a panel, or half a panel depending on how big the area is. Do this one section at a time and allow 1 minute for the purple reaction to begin. This reaction is the ingredients in Three Way reacting with the iron particles on your paint, and safely breaking them down into a water soluble solution. With these particles now broken down, they will not scratch or mark your paint under the Claying Rubber.
Step 3:
Spray a few sprays of Three Way into the Claying Rubber and GENTLY apply to the paint in straight lines over the lubricated area (DO NOT USE ON AN UNLUBRICATED AREA). You will feel the surface go from rough to smooth as the rubber polymer removes the bonded contamination from your paint. Once the paint is smooth, you know you're done and you can move onto the next section.
Apply more product as needed to keep each section well lubricated. You will notice as you work the product more, it will start to lather up. This is really deep cleaning the paint surface and removing the waxes and sealants. If the Claying Rubberbecomes full of contamination (you will hear it sounding rough and not clearing up), then it's time to give it a rinse. Rinse it out in fresh, clean water, and then go right back to claying.
Step 4:
Wait another 1 minute for any further iron reaction (the product will keep reacting with any iron particles present during this whole process), then rinse the area thoroughly with water.
Repeat this same method on all the remaining panels, making sure to rinse the Claying Rubber as you go to remove the contamination from the surface. Do this until the entire vehicle is done.
Step 5:
Wash and dry the vehicle again safely to remove any remaining residue left over from the claying process.
If your vehicle has extremely bad iron contamination, you may need to repeat this process.

Drying
Boss Gloss - Grab The Big Green Sucker and mist each side of the cloth with 3-4 sprays of our Boss Gloss detailing spray. We use Boss Gloss, as its formula is amazing for this job. It adds more lubrication for the towel to make it glide over the surface, it also helps draw more water into the cloth as well as helping the light trailing water spots evaporate faster and cleaner too. It also leaves a pretty stunning finish!
After Glow - Get two of our Big Softie cloths. Using clean, fresh water, completely drench and then wring out one cloth, so it’s lightly damp. Fold the damp Big Softie into quarters with the low pile side of the cloth on the outside. Spray 3 to 4 sprays of After Glow into the cloth and then apply to the wet surface of the car. Work on a panel at a time, wipe in side to side motions, east west and then north south. Leave it to sit and dry for at least one minute, then buff off the remaining residue with the 2nd dry Big Softie cloth, again folded to the low pile side. Fold and turn this cloth often,
Now for the next application, wring the first wet cloth out, apply 2 more sprays into it and then continue doing the car as per above. Use the same technique of 2 sprays and then wringing it out once full, until it’s all done. It's important to inspect the leading damp cloth often for any dirt it may pick up that was missed in washing. If you see some, fold the cloth to a fresh, clean side and don't use that side again. Now its time to step back from the car, preferably with your favourite cool beverage and admire your work. That warm satisfied feeling is a real After Glow.
Cleansing
Once the car is washed and dried, it’s ready for cleansing. We do that with our Paint Cleanse & Restore. This will deep clean the paint and prepare it for the wax. Place a 50c sized dollop of Paint Cleanse & Restore onto the Circle Work pad, then rub it into the surface till there are no more dry spots in the pad. Do a section of the car at a time (maybe 1/4 of the bonnet). Work the product in an up and down, then side to motion till it begins to go opaque. Once this occurs, buff off the remaining residue with a Big Softie cloth and then move onto the next section of the car until it is all done.
Waxing
At this point, you have 2 options for waxing with your Holy Humongous Kit – Carnauba Body Wax (cream wax) or Lazy Wax (spray wax).
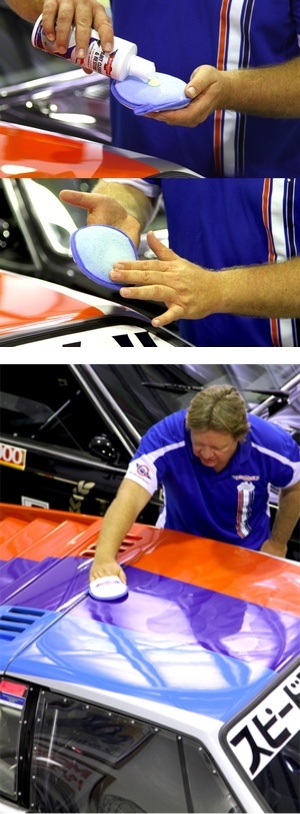
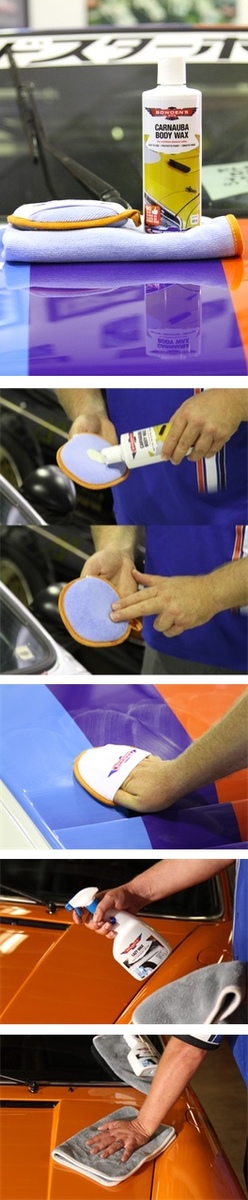
Carnauba Body Wax –
Ensure the cars' surface is out of direct sunlight and cool to touch. Remove any rings, belt buckles, chains or anything else from yourself as they can potentially scratch your paint. Shake the bottle really well and apply a 50-cent size amount of Carnauba Body Wax to our orange edged Circle Work applicator pad, then smother it over the pads surface, so there are no dry sections.
Work on one area of the car at a time using a slow and gentle circular motion. You can go circular with out fear of leaving swirl marks as our wax has no abrasives and the Circle Work pad is designed with materials that can never leave micro-scratches. Always ensure you're working indoors when using this technique. If you're working outdoors, or you're afraid of dirt or dust blowing onto the car, always work in straight lines instead of circular. Try and spread the wax as far as possible. The less you use, the better the results; it only needs to be lightly spread on. This way, it's easier to remove and your dollar stretches much further. Remember this simple rule; Less is Best!
Let the Carnauba Body Wax dry for around a minute, till it forms a light, dry haze. Remove it with a folded orange edged Big Softie microfibre cloth (to the low pile side). Do a final, close inspection of the car to ensure all the residue is buffed away, then tidy up any remaining residue with a final wipe of the Big Softie cloth, folded into quarters to the higher pile, plush side.
Lazy Wax -
Get your Drop Bear cloth and fold it in half. Spray 6-8 sprays of Lazy Wax into the folded Drop Bear cloth, and then spread the product onto one section of the car at a time, the same as before (1/4-1/2 of a bonnet etc.). Once the product has been spread, give it 10 seconds or so until you see it flash off, then flip your cloth over to the dry side and buff off any remaining residue. It’s that easy! For an even more protective finish, we recommend topping the Lazy Wax with a coat of Fully Slick or After Glow. Let the wax cure for 3-4 hours, and then apply a good layer of Fully Slick in the same manner as the Lazy Wax with the Drop Bear cloth. After Glow gets applied with a damp Big Softie cloth, then a second clean and dry Big Softie cloth to remove any remaining residue.
More protection
With our Carnauba Body Wax and Lazy Wax being more organic, it will take a few hours for its layer to fully harden and cure. So we recommend waiting 2 hours in the summer months and 3 to 4 hours if it’s colder or wet before applying Fully Slick.
Fully Slick gets applied with 2 Drop Bear cloths. Spray the Fully Slick straight into 1 Drop Bear, wipe over the surface of the paint one section at a time (half a bonnet or so), then with the second Drop Bear cloth, buff off any residue as you go.
You can add multiple layers of Fully Slick with approximately 1 hour cure time between each coat. We find that two coats gives the very best shine and protection possible.
Use After Glow as a quick and easy 1 step mission before a car show or a hot date. Simply wash the car, then dry it using After Glow to get that awesome shine and gloss, without the extra steps of waxes or detailing sprays like you'd do previously. At the show you can also top up the gloss with Boss Gloss if you wish.
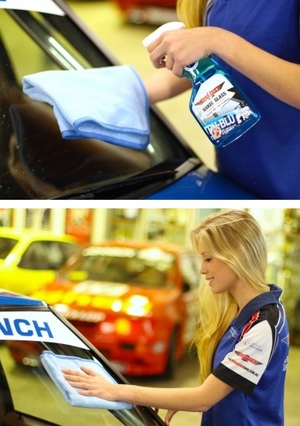
Glass cleaning
Grab your other Big Softie cloth and fold it into quarters with the short pile side facing the outside. Spray 2-3 sprays only of the Naked Glass into the cloth, then lightly apply it to the glass and gently work it side to side, up and down, till you see it start to flash off. Turn your Big Softie to the high pile side of the cloth and give the glass a final buff for a perfect, streak free finish.
The Green Clean Glass Cloth is to keep in your car to remove the haze on the inside of the windscreen that’s sometimes visible when driving into the afternoon sun. Keep it handy in your glove box or centre console and whip it out when needed.
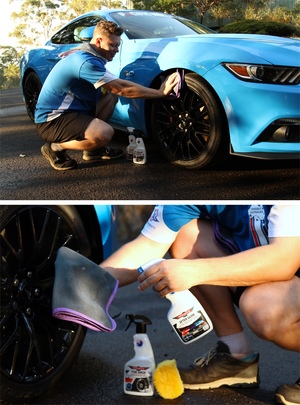
Wheels and tyres
Wheels and Tyres are lucky last. Dry the tyres first with a clean and dry Dirty Deeds cloth. Then, spray 3-4 sprays of Tyre Sheen into your All Sorts applicator, then wipe over the tyre, covering all the rubber surface, getting it into the lettering on the tyres. If you like a shinier look on your tyres, you can apply a second layer of Tyre Sheen after the first layer has dried. We aim for a mid sheen on the tyre, just better than a new tyre; that's the finish we get with this applicator.
To add some protection to your wheels, you can apply Fully Slick with a Dirty Deeds cloth, or After Glow with a damp Dirty Deeds cloth. This will help protect the wheels, and help brake dust come off easier next time you clean them.
TIP: If you're working in the sun, you would dry your wheels earlier in the process to avoid water spots.
Tar removal
Wash and dry the car first. Spray Ta Ta Tar straight onto any tar affected and leave it to dwell for around 2 minutes until you see the tar start to bleed brown. Once this reaction has occurred, wipe the area clean with a damp Dirty Deeds cloth, or rinse it thoroughly with a hose or pressure washer. More baked on or heavier tar deposits may need a second application. After using Ta Ta Tar, always be sure to seal the area with either Fully Slick or After Glow to help protect the paint.
Metal polishing
Firstly make sure that the metal surface you are using is suitable for this polish. Don't use it on lacquered metals, fine silver, zinc plating or anodised aluminium. It will remove these coatings from the metal. We find with chrome, you just need to wipe it on and then wipe it off. There is usually no need to buff it in like you do with alloy, stainless and magnesium metals. Less is best - don't use too much product or it will not work as well. For the best results, you have to make sure the metal surface is clean and dry. Shake the bottle well, and apply a small, pea sized dollop to one of our Dirty Deeds microfibre cloths.
Do small sections at a time, wiping the polish all over the surface. Then buff into the metal until the cloth feels smooth to run back and forth over the surface. We find its usually about 10 to 20 seconds for lightly tarnished, dull metals. You will hear the polishes working away on the tarnished surface as you rub it in. When it stops making that noise, the abrasives have broken down and the area should now be nicely polished. For really badly affected surfaces, repeat the process to get better effect (if needed) as opposed to slathering on too much product all at once. If you have really soft and flat faced aluminium, apply in one direction, in a gentle side to side motion to avoid leaving light polishing marks in the material.
If you're only polishing a small area, turn the Dirty Deeds cloth over to a clean side and buff the black residue from the metal to reveal a stunningly shiny surface. If it's a larger area, use two Dirty Deeds cloths, one for polishing and the other for the final buff off. If you have some black residue left in hard to reach spots, be aware you can wash this away with water if it suits you as well now too. Just apply water and wipe it away with a wet cloth. You will now have that beautiful Bowden's Own shine. So smile at yourself in the reflection!
There is an endless list of things you can use our metal polish on - we seem to find something new every day. Try it in the home on things like the sink and taps; however make sure the missus doesn't claim the bottle and cloths! It can even be used on things like the old baileys ladders (for those who are that way inclined), as it brings these up to a beautiful, mirror finish. Boats, planes, trucks and bikes; basically anything with a polishable metal area will benefit from our polish. Try it out and see why we simply regard it as one of the best in the world. Due to the jewellers type rouge in it, you can even use it as a glass polish! You can read more about this in another one of our car care guides.
For an easy clean up afterwards, we have made the new Tru Blu formula so it washes off with just water. Yes that’s right, just water. Feel free to use a gentle soap as well if you really want. This is something you will appreciate if you have used other polishes that seem to have the black residue stay in your hands for days after using them.
The Dirty Deeds microfibre cloths will need to be pre soaked in a bucket with warm water and 50mls of our Microfibre Wash. Give them some agitation and then rinse in fresh water before machine washing them. Make sure to wash them separately from everything else, as the black residue from the polishing will leach into the other cloths they are washed with!
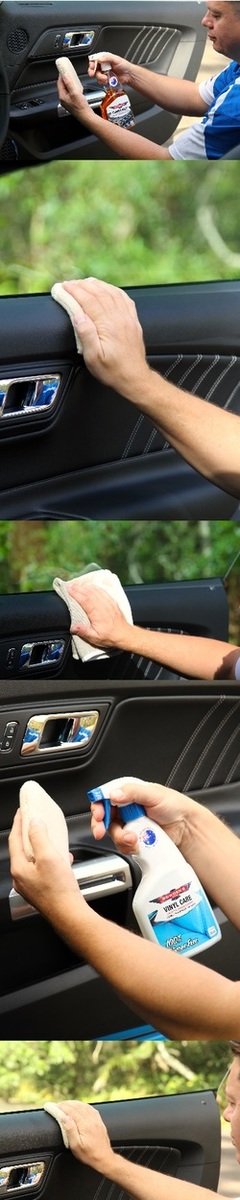
Interior cleaning with Vinyl Care and Orange Agent
If the dash is shiny, has any grime build up, if you've been using other products on it previously, or you're using Vinyl Care for the first time on a car that's new to you, our first step is to deep clean it with our Orange Agent citrus based all purpose cleaner. This is a safe, pH balanced formula that's ideal for a more intensive clean on a lot of surfaces, with vinyl and plastic being some of its best.
Products that leave a shine all use silicones in their formulas, so it's essential to remove this before applying our low sheen Vinyl Care. If you don't do this step, you may get an uneven finish, even a "fish eye" type look as Vinyl Care will not -layer on top of silicones.
To apply, spray Orange Agent to lightly dampen one side of the Square Bear microfibre applicator pad. Work in small sections at a time, applying in a circular motion to the surface, working it in reasonably well. Now this is the important bit; wipe off the Orange Agent with a folded, clean, low pile microfibre cloth like our Plush Daddy or Dirty Deeds while it's still wet. You remove it while wet, so all the grime and silicones you've cleaned off are wiped into the cloth with the cleaning solution, as if you let it dry, it will bond back onto the plastic surface you're trying to clean. Be sure to inspect and then turn/fold this cloth to a fresh, clean side when you begin seeing any dirt and grime building up in it.
If you notice the microfibre applicator getting slightly dirty, (especially when cleaning more grime affected surfaces) you can hand wash it out in fresh water, then wring till it's dry/damp, apply Orange Agent and carry on cleaning.
Continue doing this system of cleaning, till the entire area is done.
It leaves a dry and pretty stark finish, so you'll now need to finish it off with the Vinyl Care.
Get the Vinyl Care and mist about 4 sprays into a fresh and clean Square Bear applicator. You use an applicator to ensure good coverage, as well as for making a lot less work wiping away over-spray if you spray it directly onto the surface. This applicator has special looped material that help a lot with deeper cleaning, while still being gentle enough that they will not damage the surface that is being worked on.
When applying product to the dash with the applicator, work in small sections at a time. Move across the surface in a gentle circular motion, as this gives you the best and most effective clean of the dash, especially if it uses a textured or undulating surface. You want to ensure the product gets into all these areas for the best protection and finish.
Like using the Orange Agent above, it's good to remove the Vinyl Care before it has dried on the surface, which as it dries quick, you'll need to work a bit fast... Use a clean and dry, folded low pile cloth like the Plush Daddy or Dirty Deeds cloth. We find when using this technique that it leaves a perfect finish on the more difficult textured or plain flat surfaces when used this way. It also further helps using this technique if you're using the product by itself, without the pre-clean of Orange Agent, as its more gentle cleaning solution won't dry with any grime back on the dash's surface.
For any fabric or leather surfaces, we strongly recommend to grab a Fabric Refresher Pack or Leather Care Pack. We have guides for fabric and leather cleaning on our website in the Interior How To section.
Microfibre cleaning
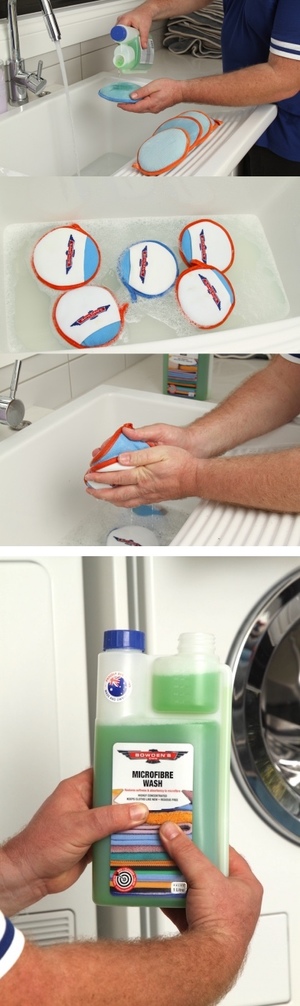
Probably the most important and overlooked part of detailing is keeping your cloths clean. We made our own microfibre wash to break down detailing chemicals from the fibres of the cloth and allow the fibres to rinse free, meaning your cloths will continue to work like new for years to come. For the Circle Work pad that you used with the Paint Cleanse & Restore, put a few MLS of the Microfibre Wash directly onto the pad and massage it around with your fingers to help release the product, then give it a good rinse under some warm water before putting it into the wash. This same method applies for any heavier stained cloths or applicators. You can also put approximately 10-20ml of Microfibre Wash into a bucket with some warm water and let the applicators and cloths soak in there for 30 minutes prior to putting them through the wash.
Put all your cloths and pre soaked dirtier applicators into the washing machine on a normal cycle, on the warm water setting. Put 20ml of Microfibre Wash in the machine (DO NOT USE FABRIC SOFTENERS) and away you go. Once they’re washed, tumble dry the cloths on the cool setting and then store them in an air tight container if possible, ready for their next use.
Any questions?
This gives you a good overview of the products in your new kit, and a step by step guide on how to use them and in what order to use them in.
If you have any questions, please email us info@bowdensown.com.au or call our office on 1800 351 308.
Happy detailing!
Brett Hobbs
Products Used


Nanolicious Wash
Our dream wash just got dreamier! New formula created for the very fussiest of fanatics.
$24.99