How to use your All Aussie Bucket - 2020
What's in it?
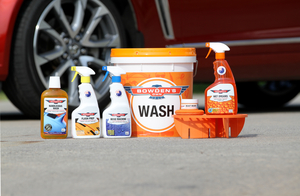
The All Aussie Bucket for 2020 is a pretty sweet grouping of some of our best and most popular locally made products, including something all new that's sure to please those of you whom enjoy a high quality paste wax. The contents here are a good collection for washing and super hydrophobic protection - a bunch of Aussie made goodness. Team these products with some of our microfibre cloths and other available wash tools for a full washing, drying and protection system.
The 2020 All Aussie Bucket includes:
- Custom 15L Wash bucket with Summer Australiana graphics and Orange lid
- Gulf Orange coloured Great Barrier Thingy
- Nanolicious Wash
- Flash Prep
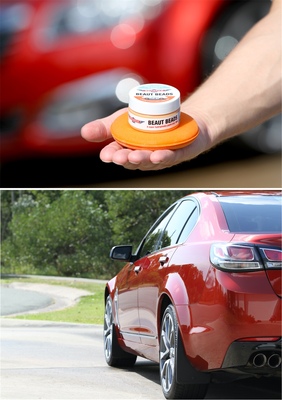
- Beaut Beads paste wax + applicator
- Bead Machine
- Wet Dreams
Easy washing
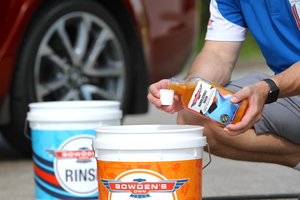
Place the Great Barrier Thingy in the bottom of the Wash bucket, then 3/4 fill the bucket with water. Put a capful (30ml) of Nanolicious Wash into the bucket, then hit it with the jet setting on your hose to froth it up and get the wash mixed nicely inside the bucket.
Place your wash tool into the suds, and starting at the top of the car, start washing in straight lines, moving down towards the lower sections of the car as you go, leaving the dirty lower sections of the car till last. It's recommended to have a separate Rinse bucket filled with clean water to clean your wash tool out in after washing each section of the car as you go.
After you've finished washing the whole car, take the end of the hose off and flood the panels of the car to rinse all of the wash suds off. You will see how the Nanolicious Wash allows the water to pool together and run off the car easier.
Once you're done, empty the buckets and give them a good rinse out. You don't want to be storing any wash water for use later!
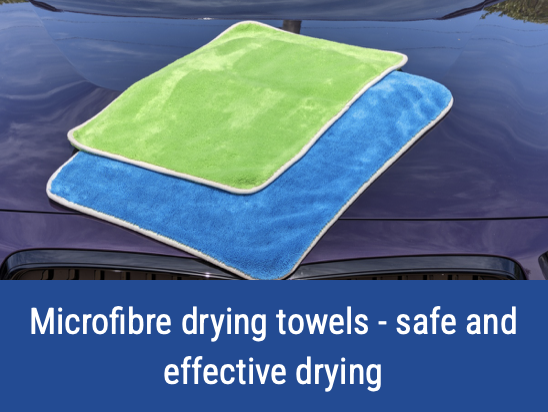
Safe drying
With the water all rinsed off the car, dry the car safely. We'd recommend either the Twisted Pro Sucker or The Big Green Sucker with a few sprays of Boss Gloss for the job at this stage.
If you normally use After Glow to dry the car, this is also fine, but the extra advantage of After Glow with its protection will be removed with the next step here, so just stick to either the Twisted Pro Sucker or The Big Green Sucker with Boss Gloss.
Prep it up
With the vehicle washed, rinsed and dried, now we want to clean up the surface as best as we can to get the most out of our protective waxes and sealants.
If the paint feels rough, or is in need of decontamination, then use our Three Way and Claying Rubber at this stage, then wash and dry the car again. If you're going to use the Paint Cleanse & Restore, you can also do this prior to waxing and sealing, and you would do this at this stage of the detail. For more info on this, click here.
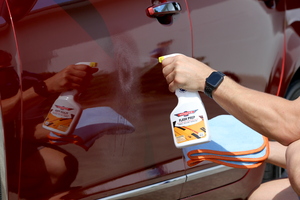
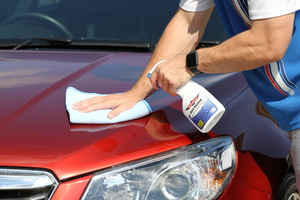
Now onto the Flash Prep. This is an esssential step to the process here, as it will remove any oils, silicones, dirt etc that could potentially stop the wax from bonding well to the paint. During our testing, we found that the wax lasted longer, and gave more impressive results when the surface was first wiped down with Flash Prep.
Work on small sections at a time (1/4 - 1/2 of a bonnet for example). Spray Flash Prep liberally straight onto the surface, then with a Big Softie cloth, gently wipe the product back and forth, then up and down, then finish off with a second clean and dry Big Softie cloth to remove any remaining residue. For a super thorough clean, do each section a second time.
Beaut Beads - a modern, super hydrophobic paste wax
Beaut Beads is a totally Aussie made paste wax, combining T1 grade Carnauba Wax with other high quality waxes, and some pretty amazing synthetic ingredients. This combination of ingredients has allowed us to make something that not only gives that deep warmth and shine that a natural wax gives, but we were also able to incorporate some epic protection from the more durable synthetic ingredients. To read more in-depth about Beaut Beads, its creation journey and more, see here.
Using it couldn't be easier. Grab your included applicator and "dab" the foam into the jar, working your way around the applicator until you get a decent amount on there. Apply a very THIN coat to the surface of the paint, one section at a time. Apply it in a north-south, then east-west overlapping motion so you don't miss any spots. You can also apply it in small circles if you wish. A little goes a long way here, so just dab the applicator back into the jar as needed. Go around the entire car using this method and then allow the wax to cure on the surface for 20-30 minutes. (NOTE: avoid getting the wax on black plastics or rubbers. If you do, wipe it off straight away with a cloth and some Flash Prep. Tape off plastics and rubbers if you wish).
After the wax has had 20-30 minutes to bond, wipe off the excess with a super soft Drop Bear cloth, flipping and turning the cloth often. Sit back and marvel at the amazing shine and glow your paint now has - dark or light coloured cars, Beaut Beads will bring out the best in the paint.
A lot of paste waxes can be a right pain to remove. We spent a lot of time during the development of Beaut Beads to formulate it to be super easy to remove, so when doing this part, you will really appreciate this aspect of the product.
Once all of the wax has been removed, leave it to cure for a minimum of 4 hours before getting it wet or leave it overnight for best results.
Bead Machine - additional protection
If your vehicle is a weekend driver, or special occasion vehicle, then the Beaut Beads will be plenty to give good protection. If you have a daily driver and want extra protection, you can also top the Beaut Beads with Bead Machine - these two products work extremely well together, making Bead Machine a great sealant to put on top of the Beaut Beads wax. This combination of products will give you an epic, super hydrophobic finish that provides great protection and will make your maintenance that much easier.
Mist 4-6 sprays of Bead Machine into a clean, dry and folded Big Softie cloth and apply to a small section of the vehicle. Then with a separate dry and clean Big Softie cloth, buff off any residue. For the next smaller section, only mist 2 more sprays into the Big Softie and continue around the vehicle like this doing smaller sections at a time. Allow the Bead Machine 2-4 hours to cure before getting it wet.
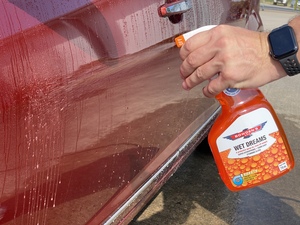
Maintaining protection with Wet Dreams
When needed (every couple of months or so), use the Wet Dreams spay on, rinse off sealant, to boost the protection and shine.
After washing and rinsing the vehicle, with the panels still wet, mist the Wet Dreams onto a section (eg. half a door), then immediately hose it off using the strong jet setting on the hose, or pressure rinse it off if you're using a pressure washer.
Other information
How often should I apply Beaut Beads? - This will depend on many different factors like paint quality, how the vehicle is stored and parked during the day etc. For a daily driven car, we recommend you apply Beaut Beads once every 6 months, Bead Machine once every 4 months and top with Wet Dreams as needed (once every couple months), for that lovely, smooth finish. For a weekend or special occasion vehicle, Beaut Beads can be applied annually and topped with Bead Machine every 6 months.
Will Beaut Beads come in a bigger jar? - Yes. We were set back due to making our own jars right here in Australia and having to wait for the specific plastic we needed. We're hoping to start production in early 2021.
Can I wash the applicators out? - Yes. You can massage the wax out of the applicator with a small amount of Microfibre Wash and some warm water. Put it up on a shelf somewhere to dry until you want to use it again.

Questions?
The All Aussie Bucket for 2020 is available exclusively through your local autObarn store in limited numbers. To find your closest store, click this link - Store Finder.
Thank you for your continued support and allowing us to keep making great car care products.
If you have any questions around the All Aussie Bucket, send us an email - info@bowdensown.com.au or freecall 1800 351 308.
Happy detailing,
Brett Hobbs.