Caring for your matte or satin finish
Matte/satin (satin finishes will fall under this category too, so if your vehicle has a satin finish, and not strictly a matte finish, then this article is also for you!) paint jobs and wraps are becoming increasingly popular with some of the major manufacturers offering this type of finish from factory. This type of finish requires a totally different style of care so as to not add shiny spots on the paint and ruin the look. In this guide we'll go over how to wash and care for your matte finish, run you through how to protect the paint from the elements, and give you some important information on the do not's when it comes to matte finishes.
Flat Out Finish
When working with matte finishes, it's very important to not use any products that are designed to add gloss - this includes washes, detailing sprays, polishes or cleansers, waxes and sealants etc.
You will also need to avoid any kind of extended rubbing or buffing using any kind of product, which rules out the Clay Bar and Claying Rubber, or any other clay mediums as these will wear away the matte surface and leave shiny spots underneath.
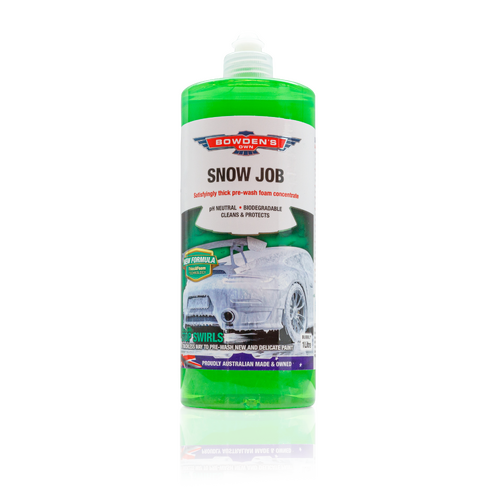
In our range of products, we can recommend using Snow Job or Mega Snow Job for a prewash, Auto Body Gel as your bucket wash, Three Way can be used touchlessly for iron decontamination, Clean Detail for general wipe downs of finger prints and some light dust, and finally Flat Matte to add ceramic protection to the paint.
This is a BMW M4 CSL in Frozen Brooklyn Grey.

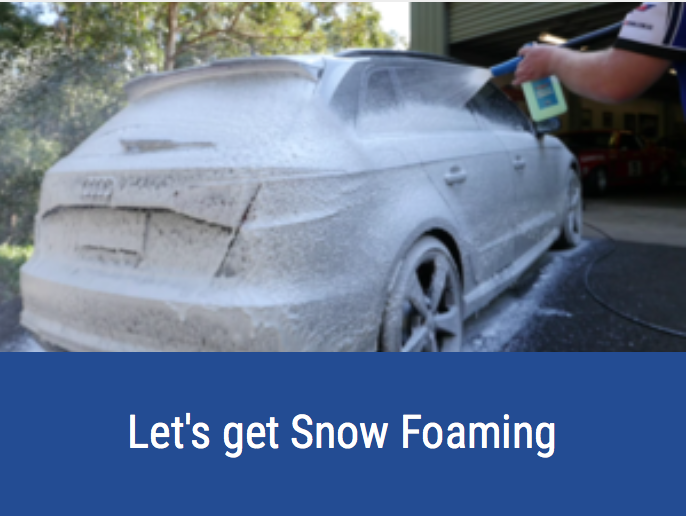
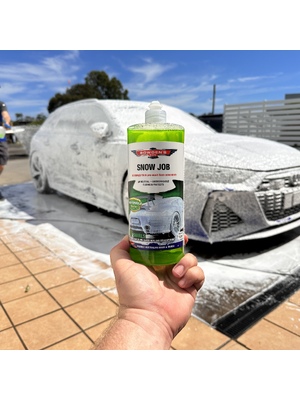
Snow Foam Pre Wash
The Snow Job pre wash is an important start to any detail. This step is vitally important in helping to reduce the chance of putting swirls and scratches in your paint by laying a thick blanket of foam over your vehicle, helping to break down heavier dirt and grit, before pressure washing it off. If the car is particularly dirty, you need a deeper clean or the car has built up road grime, our Mega Snow Job will be better suited with its extra cleaning ability.
Start foaming at the back of the car, on the dirtier lower sections first, moving up to the roof last to allow the foam the longest dwell time on the dirtier sections of the car.
For a detailed how-to guide on using the Snow Blow Cannon and Snow Job, see the guide below -

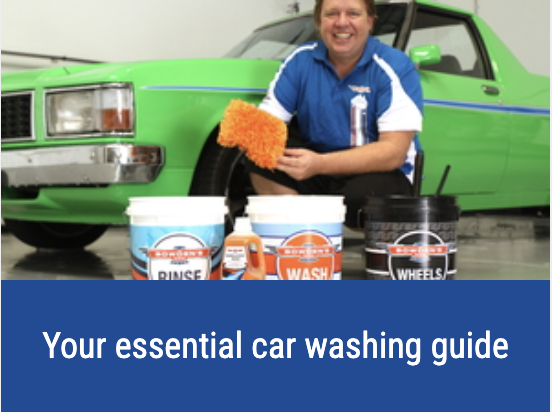
Hand Washing
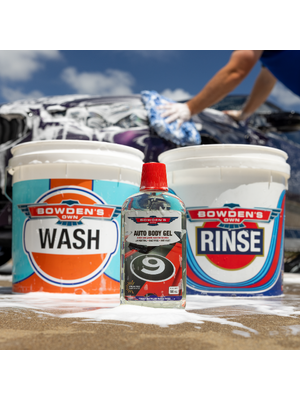
Now that you've removed the heavier dirt and grit from the car, it's time for a two bucket hand wash with Auto Body Gel. We use this wash as it's a pure wash and won't leave any extra elements that aren't suited for matte finishes on the paint after its use. All of our other washes will leave protection behind that isn't suitable for a matte/satin finish. Grab your Wash and Rinse buckets with Great Barrier Thingy's in them and your favourite wash tool (we love The Wash Pillow). Put one capful of the Auto Body Gel wash into the Wash bucket with approx 10-12L of water, and froth it up with your pressure washer or hose.
Wash sections of the vehicle at a time, starting at the top, and working your way down to the dirtier lower sections last. After each section (quarter of a roof, bonnet etc), dip your wash tool into the Rinse bucket to get any dirt and grit out of it, then go back into your clean wash suds bucket and continue around the rest of the car, doing small sections at a time.
Once the whole car has been washed, take the end of your hose off and flood the panels with water to help remove all the suds, and as much water as possible from the surface. Start at the top of the car and work your way down.
Once you're done, empty the buckets and give them a good rinse out. You don't want to be storing any wash water for use later!
For a detailed look at this process, and all things washing, check out our guide below -

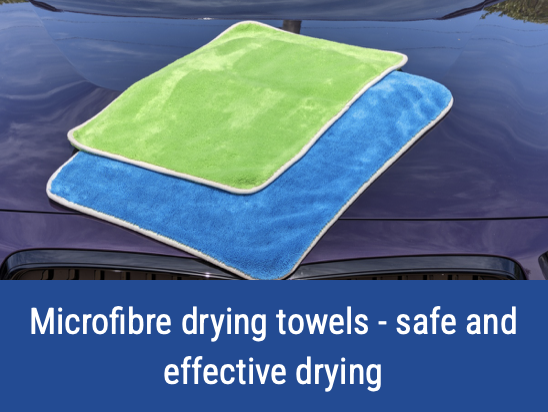
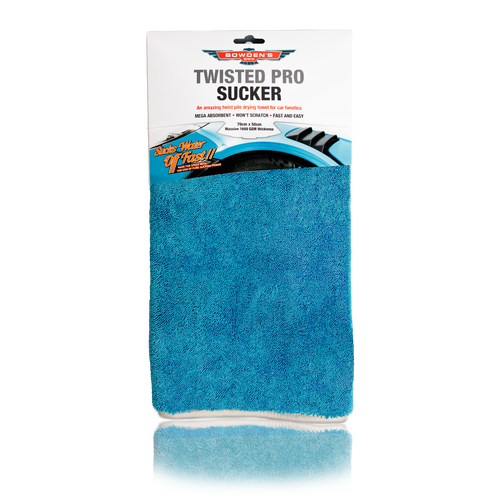
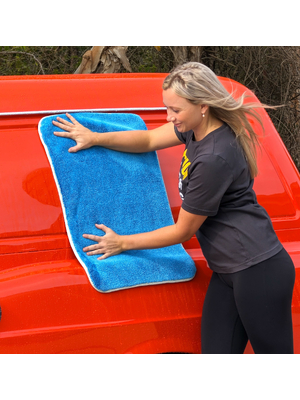
Drying
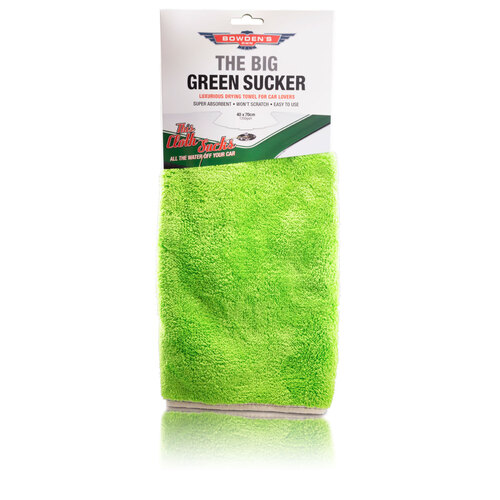
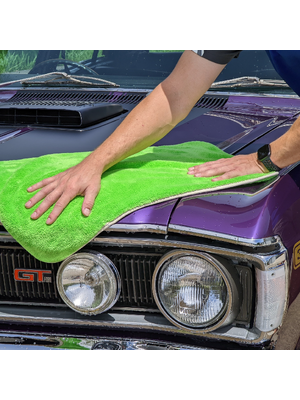
With the pre wash and hand wash completed, it's time to dry the car. At this stage, we're using The Twisted Pro Sucker, but please note any of our drying towels will be suitable here. After Glow is NOT suitable to use on a matte/satin finish. Normally we would use Boss Gloss as a drying aid at this stage to help the cloth absorb water a bit better and leave a nice shine, but we don't want to add shine to the finish so we won't be using it.
Start by drying the glass first to avoid getting water spots. After doing the glass, start from the top and work your way down to the lower sections of the car last.
For all the water that sits in wing mirrors, door handles etc, it's always a good idea to get a small battery powered blower, and go around and blow all of the water out of these spots, then wipe it up with the Twisted Little Suckers, to avoid getting any water spots on the paint.
For more information about our drying towels and how to use them, see our guide below:

Paint Decontamination
If you have a vinyl wrap over the entire car, we do not recommend the use of Three Way.
Make sure the vehicle you're decontaminating is in the shade and the paint is cool to touch. A well ventilated area outside in the shade is ideal.
Spray Three Way directly onto the painted surfaces (don't stress if you get it on headlights, plastics, etc, as it's 100% safe for all of these surfaces) one panel at a time, and allow 1 minute for the purple reaction to begin. This reaction is the ingredients in Three Way reacting with the iron particles on your paint, and safely breaking them down so they can be rinsed away. You will notice this reaction will be stronger on the bonnet, roof and rear of the car, as these are the panels that will see most of the fallout on them.
After 1-2 minutes (no more than 3-4 minutes), rinse the panel thoroughly. If you're worried about water drying on the panels, dry the panel before moving on. Move onto the next panel and use the same method on each subsequent panel, until the whole car is done.
Now re-wash the whole car with around 50-100mL of Orange Agent in the mix to remove any residue left by the Three Way, then dry the car again.

Flash Prep
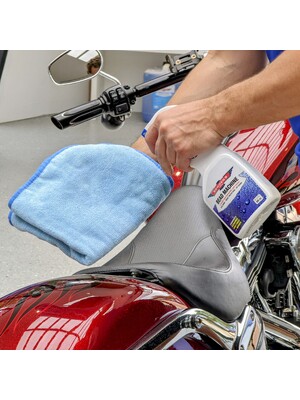
If you're wanting to get the best results out of Flat Matte, you will need to clean the paint with Flash Prep to remove any leftover residues, oils, etc, so that it has a perfectly clean surface to bond to.
Flash Prep is a really simple one to use - with 2 Big Softie cloths folded in quarters to the low pile, spray Flash Prep directly onto the paint surface in small sections (1/4 - 1/2 of a bonnet) at a time. Wipe the product in with your lead cloth - up and down, side to side, so that the product has time to work into the paint properly and remove silicones, oils etc, then give it a final buff with your second cloth. It will flash off nicely right in front of your eyes, leaving a beautifully clean surface for Flat Matte to bond to.
.jpg)

Flat Matte application
Work on small sections at a time, in the shade on surfaces that are cool to the touch. Break the car up into small sections (1/4 - 1/2 of a bonnet for example). Grab 2 fresh, dry and clean Big Softie cloths folded to the low pile side. One of these cloths will be your application cloth, and the other will be your cloth for the final buff.
Step 1 -
Shake the bottle well and mist 4-6 sprays of Flat Matte into the low pile side of a folded, clean & dry Big Softie microfibre cloth. Wipe the product evenly over the surface in an overlapping up and down, then side to side motion.
Step 2 -
Immediately use the second clean and dry Big Softie cloth and buff off any residue. Fold and turn the cloth often for a nice, even finish.
Step 3 -
Mist 1-2 more sprays only into the application Big Softie cloth for each subsequent section, and continue the above process till the whole car is completed.
Allow at least 4 hours to cure before it gets wet for best results.
Once you've finished the whole car, put both of your cloths into a bucket like our Microfibre bucket, half filled with water and throw 10mL of Microfibre Wash in there and thrash it around to release the super hydrophobic polymer from the fibres of the cloth. Keep them wet and then put them in the machine wash together with the other microfibre cloths you've used in the process.
.jpg)

Maintenance
When you notice the beading and water sheeting begin to diminish, you can boost Flat Matte by reapplying it after a wash. For best results, use Flash Prep first, but just make sure the paint is clean and dry before reapplying Flatt Matte. Please note that our other super hydrophobics; Bead Machine, Wet Dreams and Happy Ending are not suitable to use on these matte/satin finishes.
For your weekly washing you can use our Snow Job foams as well as our wash: Auto Body Gel.
For drying you can use any of our super absorbent microfibre drying towels like The Twisted Pro Sucker, but just keep in mind to not use any drying aids like Boss Gloss or After Glow. A really cool added bonus of having the ceramic Flat Matte on your vehicle is that the Snow Job snow foams will become more effective and clean better, and the paint will become much more slippery and smooth, and easier to clean, dry and maintain.
For quick clean ups of bird droppings, finger prints, light dust etc, Clean Detail is the spray in our range that's suitable to use on matte and satin finishes.
.jpg)

Water spots?
If you've got water spots on your matte or satin finish, it can be very difficult to remove them, this is because you can't polish a matte or satin finish the same as you would a normal gloss finish to remove water spot marks. When you see rain or water that's dried on the paint, always wash the car as soon as you possibly can to help prevent the water marks from staining the paint more permanently.
We are working on a dedicated water spot removal product, but for the time being, the best thing you can use to try and remove the water spot marks is our Dirty Times Wash. Primarily targeted at the 4WD crowd, Dirty Times Wash contains mega amounts of mineral removal ingredients, designed specifically to remove the types of minerals that make up water spots on car paint.
The best way to do this is to foam the car with the Dirty Times Wash in the Snow Blow Cannon, mixed at the normal 9:1 ratio. Allow that to sit for a good 5 minutes (but don't let it dry). Pressure wash that off, then lightly foam the car again with the same mix, then also wash the car with the Dirty Times Wash mixed in your wash bucket with a double solution (2 capfuls). The chelating agents in the foam and wash mixture work to break down the minerals in the spots on the paint so they can be washed and rinsed away safely.
Any questions?
Should you have any questions about anything mentioned in this article, or have questions about other products and processes, feel free to get in touch on 1800 351 308, or shoot us an email to info@bowdensown.com.au
Happy detailing,
Brett Hobbs

Products Used
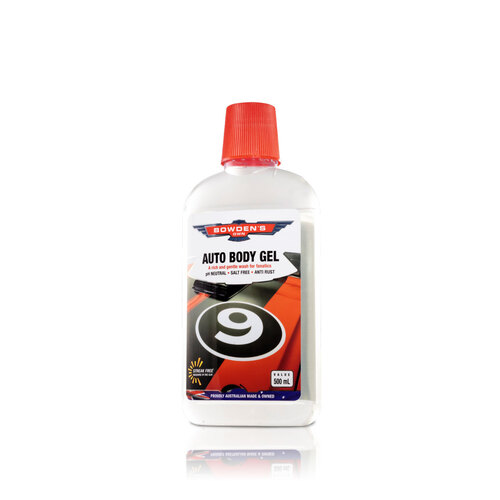
Auto Body Gel
The original salt-free wash, for a rich and gentle clean, even in the direct hot sun!
$19.99

Twisted Little Suckers
Handy-sized, twist-loop mini-drying towels for intricate & fiddly areas or smaller vehicles & bikes
$28.99


Twisted Pro Sucker
A great-sized, super absorbent, twist loop microfibre towel - for the fastest drying experience.
$51.99
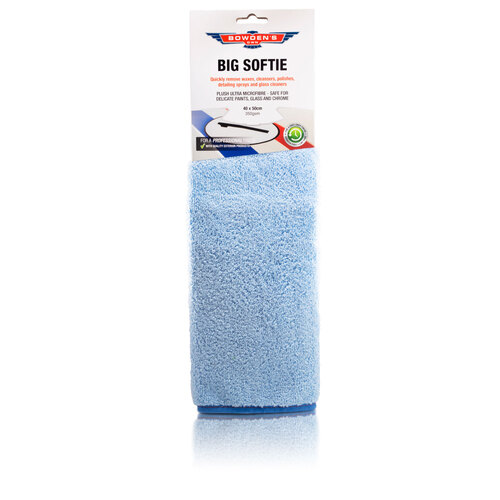
Big Softie
This plush cloth cuts time in removing waxes, cleansers, glass cleaners and detail sprays.
$16.99