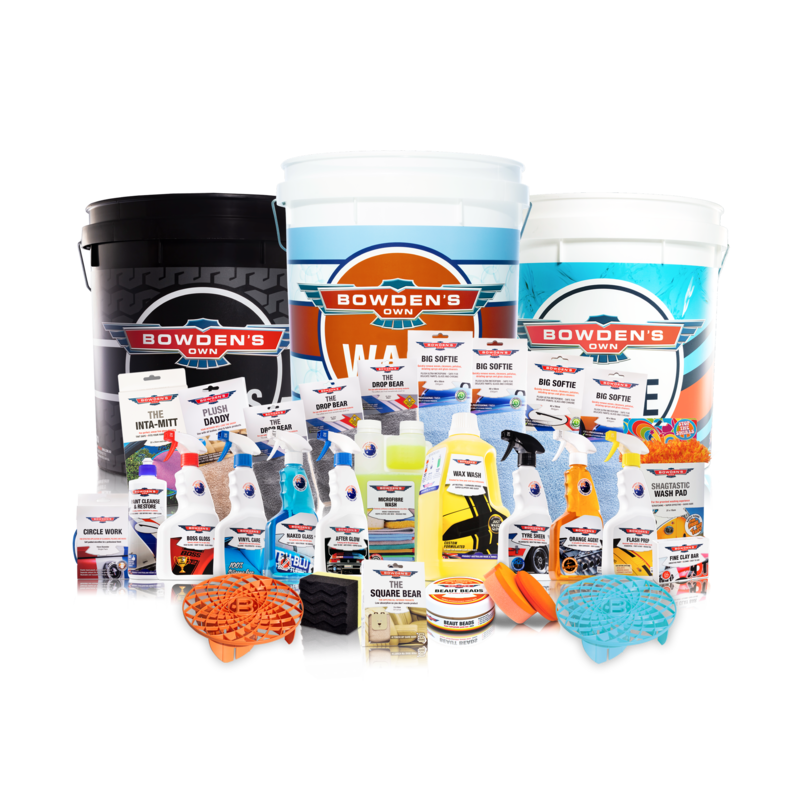
Classic Fanatics Kit
Congratulations!
You're all set to look after your classic! This kit contains everything you need to safely wash and care for your classic car, and this guide will run you through the process for using these products. Classic cars are treated a little differently than modern ones, so make sure to take care and pay special attention while you pamper your 4 wheeled friend.
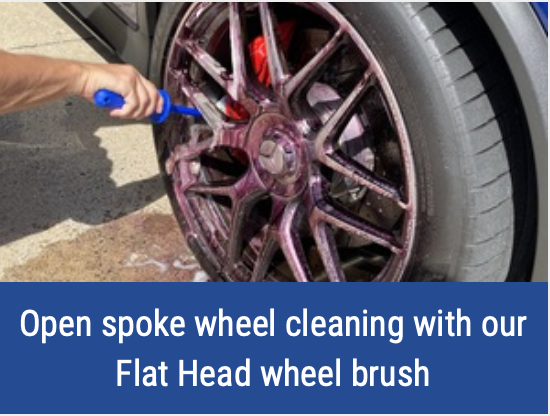
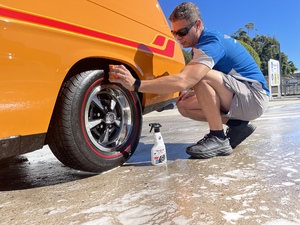
Wheel and Tyre Cleaning
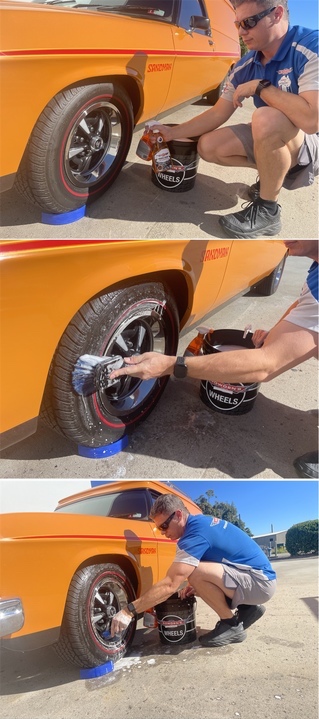
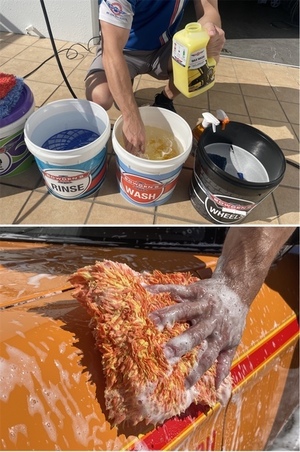
Half fill your Wheels bucket with water, then add a capful of Wax Wash and froth the mixture up inside the bucket with a short blast from the pressure washer. This ensures the Wax Wash is well mixed, and creates a lovely micro emulsion of suds that smells a bit like a banana milkshake!
Spray the Orange Agent directly onto the wheel. If you'd like to clean the tyres at the same time, spray Orange Agent directly onto the rubber too. Leave it to dwell for only a short time (30 seconds or so), then start by scrubbing the tyre then move onto cleaning the outside face of the wheel with a combination of brushes like our Little Chubby or Foursome. Rinse the brushes out in the Wheels bucket as needed.
See our complete wheel cleaning guide here for more tips.
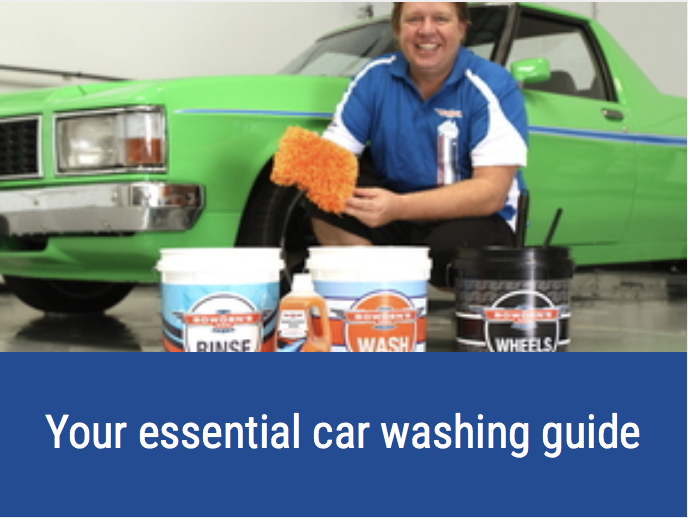
Time to Wash
Get your Wash and Rinse buckets ready and 3/4 fill them with clean water. Add 50mL, or one capful of Wax Wash to your Wash bucket, then froth it up with the pressure washer to get a good head of suds, and enjoy the banana milkshake smell. Thoroughly rinse out your Shagtastic Wash Pad in the Rinse bucket, then dip it into the Wash bucket to soak up a large amount of suds.
Starting at the top of the car, wash in straight lines, flipping the wash tool as needed, going back to the Rinse bucket after each small section to rinse any dirt from the wash tool. Then go back into your clean Wash water and do the next section until the whole car is done. Do the lower sections of the doors last, and any other sections that are quite dirty.
If you're washing in the sun, we'd recommend washing small sections of the car at a time (one door for example), then rinse that panel off before moving onto the next panel, so that the Wax Wash doesn't dry on the paint. Once you've washed the whole car, take the end off the hose, (or use a small attachment like we have here) to flood the water off the panels, making it easier and quicker to dry the car.
To see a detailed explanation on this safe wash method, see our guide here.
Drying Time
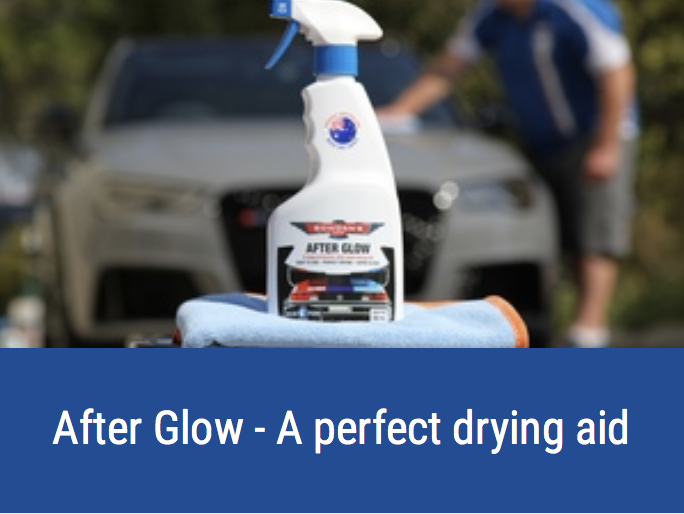
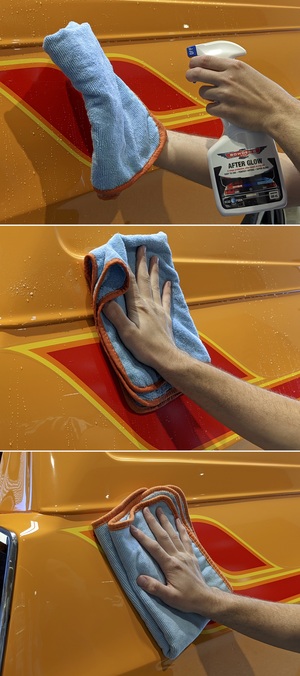
After Glow is a quick way to add a great depth and shine to your paint, while also adding protection and drying the car all in one go. Grab your two Big Softie cloths and dampen one of them. Fold into quarters and spray 3-4 sprays onto one side, then begin drying the car with this side in north-south, east-west motions. Buff off any residue after a minute with your dry cloth. Wring out your wet cloth, apply two more sprays and continue till the car is done.
See our full After Glow guide here.
Paint Decontamination
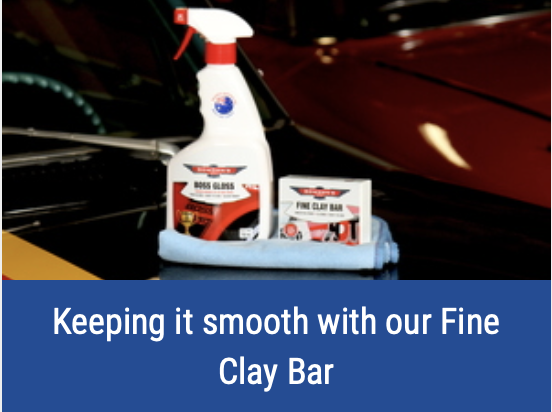
Remove the Fine Clay Bar from its packaging and knead it into a nice, flat piece. Spray a generous amount of Boss Gloss onto a section of the car (a section for us here is 1/4 of the bonnet, so break the bonnet up into 4 parts and do one part at a time). Then also spray a couple sprays of Boss Gloss directly into the Fine Clay Bar to ensure there will be no dry spots when you put the clay onto the paint.
Applying little to no pressure (let the clay do the work), gently work the clay back and forth, then up and down over the lubricated area. You should be able to feel and hear the clay working if there's contamination on the paint, it will start to become smoother as you pass over the area. After doing a small section, knead the clay so that the side you were just using doesn't touch the paint again, then use some more Boss Gloss for lubrication and continue. Periodically wipe the Boss Gloss up after doing a section, with a clean and dry Big Softie cloth.
Continue around the entire car using this method, wiping the Boss Gloss off as you go. Take your time and be patient and methodical.
See the link below for a fully detailed article on how to use our Fine Clay Bar.


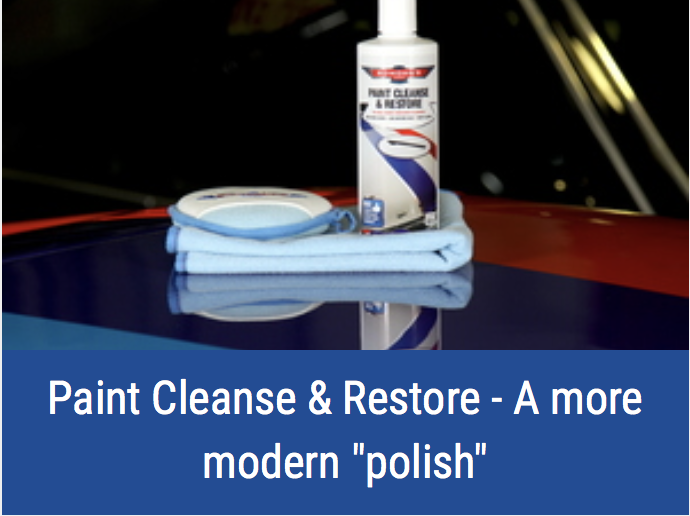
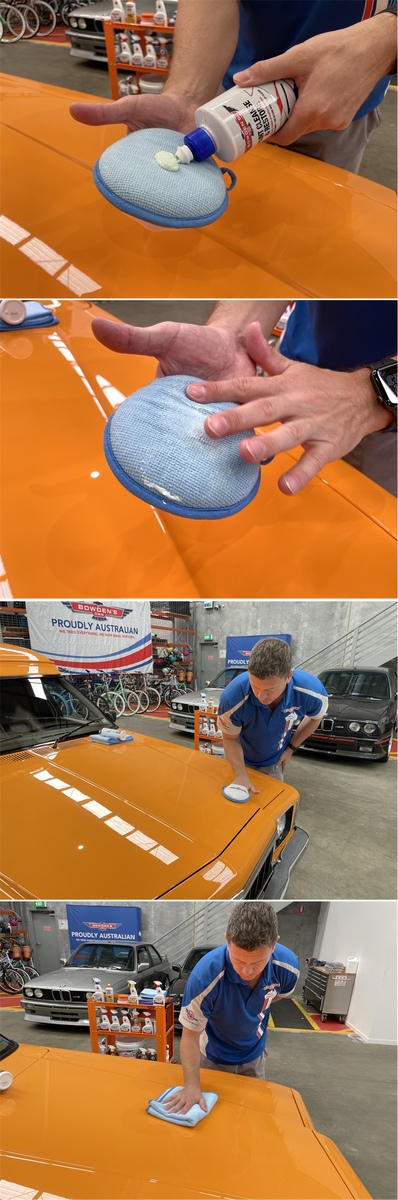
Paint Cleanse & Restore
Grab the Paint Cleanse & Restore and a Circle Work applicator pad. Shake the bottle well and add a 50c sized dollop of the Paint Cleanse & Restore to the centre of the pad, and wipe it in to the surface of the pad with your finger, to ensure there are no dry spots for starting the process.
Working on smaller sections at a time (similar to the clay bar - break the bonnet up into four parts, for example). Using some gentle pressure, work the product into the paint with the pad in an up and down motion, then side to side over the same section, to ensure you don't miss any bits. You'll notice the Paint Cleanse & Restore will begin to go opaque, before going clear after a short work time. Once it's gone clear, it's done all the cleaning it's going to do, so it's time to wipe off.
Using a clean, dry and folded Big Softie cloth (folded to the low pile side), gently buff off the remaining Paint Cleanse & Restore residue, flipping the cloth to a fresh side as needed.
For the next section, and subsequent sections, only add a small amount more of the Paint Cleanse & Restore as needed (usually a smaller 5c or 10c sized dollop will be needed for each new section).
If you have any problems removing the Paint Cleanse & Restore with the cloth after application, spray 1-2 sprays of Boss Gloss straight onto the part that is difficult to remove, then buff off immediately with a Big Softie cloth and this will assist in removing any residue that is difficult.
Click the link below for a fully detailed guide on Paint Cleanse & Restore, including a helpful how-to video.
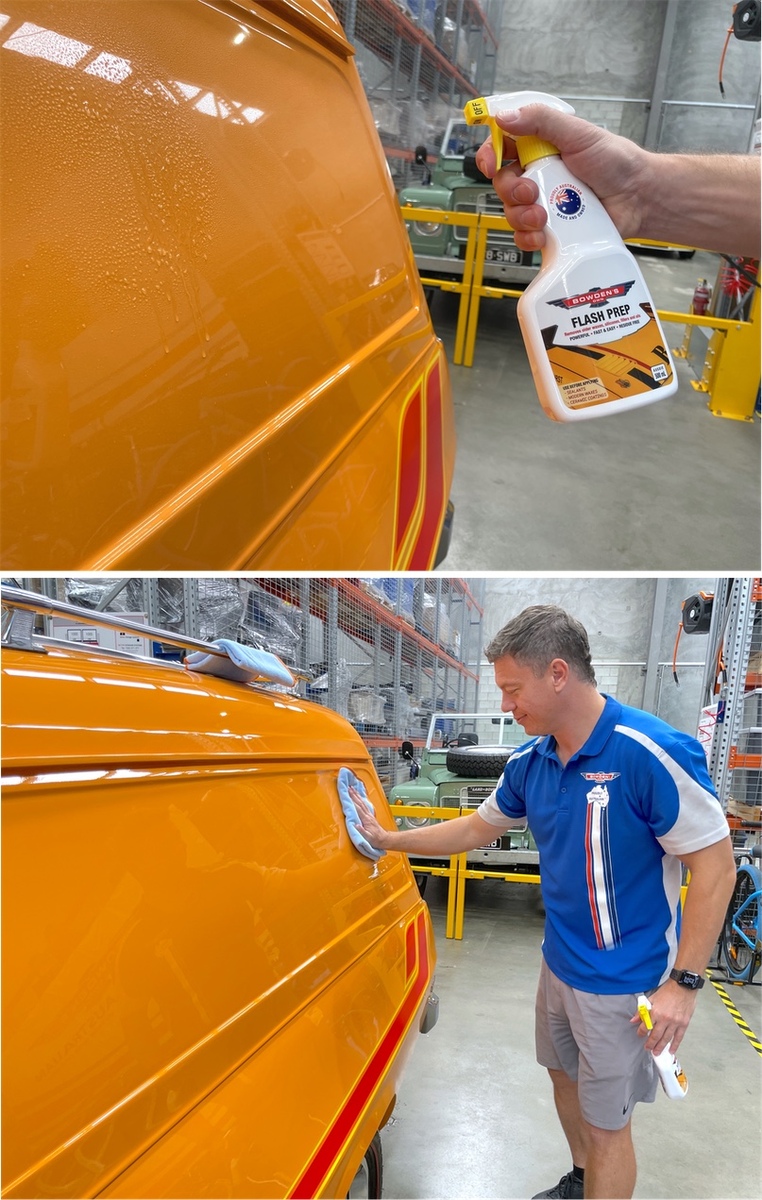
Flash Prep
Flash Prep is our preparation spray that removes polishing oils, light dirt and grime and flashes off for an extremely nice and clean surface. This surface is perfect and critical for applying Beaut Beads.
Working on a section at a time (1/4 of a bonnet or so, the same as before), spray Flash Prep liberally, directly onto the surface, then immediately wipe it into the surface with a folded Big Softie cloth, using the low pile side. Once it's been wiped in adequately to remove remaining oil residue, use a separate dry and clean Big Softie cloth to remove any remaining trailing residue. Flash Prep will flash off to leave a beautiful finish, and is a very easy and forgiving product to use. Continue around the entire car using this method, but spray less product onto the paint as you go around the car, to avoid saturating your lead application cloth. Change to a fresh secondary cloth if needed.
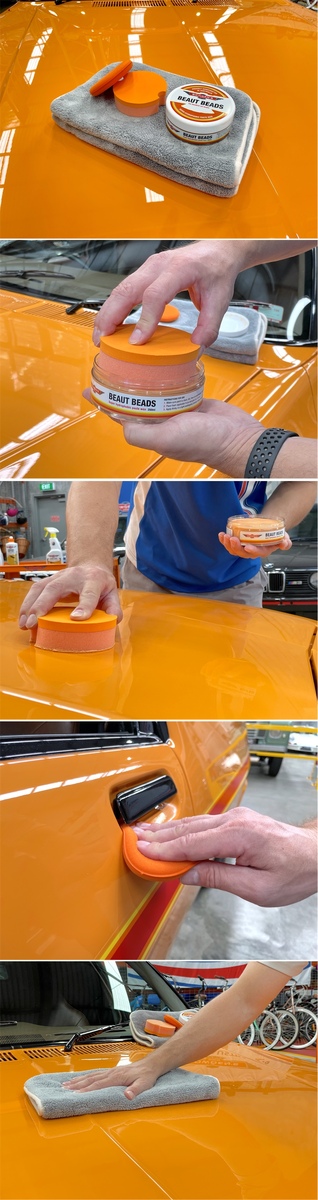
Beaut Beads
With the car now totally clean and free from contamination and oils, it's time to seal the paint.
Beaut Beads is a high end paste wax that is super easy to apply and remove, creates a fantastic glow and gives remarkable depth and shine to your paint, as well as excellent water beading and self cleaning properties.
Grab your Beaut Beads jar and applicator. Place the applicator into the jar with the soft foam side facing down (this will be your application side). Gently twist the applicator side to side a few times, to get some wax on the applicator. You can start off on any section you like (just be methodical) using the applicator in an up and down direction in a small section, then go over the same section in a side to side motion (the opposite way) to ensure complete coverage of the area with the wax. When you apply the Beaut Beads paste wax, less is more - the thinner and more evenly you can apply the product, the better the result you will get, and your overall experience will be a lot nicer (having said that, even if you pile it on thick, this wax is still an absolute dream to remove).
For any more intricate areas like around door handles, wing mirrors, grills, badges etc, there is a smaller foam applicator in the Beaut Beads box that is perfect for these areas.
Avoid getting Beaut Beads on any exterior plastics, as it can leave white marks. If you notice this, use the Flash Prep and a cloth straight away to remove it.
Go around and apply Beaut Beads to the entire car, then leave it on the car to cure and bond for 20 minutes. After this cure time, gently buff off the remaining residue with a Drop Bear cloth, flipping and turning the cloth often as you go. If you notice the cloth start to fill up with wax, switch to a fresh cloth.
Leave the wax now to cure and harden for at least 4 to 5 hours before getting it wet or applying any other products over the wax. Ideally, it should cure and harden for 12 hours (overnight) at least before washing the car again.
Glass Cleaning
For the best glass cleaning experience, we recommend using Naked Glass with our specialised glass cleaning cloth; the Inta-Mitt.
Use 1-2 sprays only of Naked Glass into the green side of the Inta-Mitt (if it's cold, use less, and if it's warmer, you may need to use a little more Naked Glass). Gently wipe up and down, then back and forth over the glass until you see any marks in the glass disappear and the Naked Glass start to flash off. Turn the Inta-Mitt to the purple side and gently buff over the entire glass surface to remove any remaining product and to remove any haze from the glass.
If the glass is very dirty, or you have stubborn marks on there, you can spray the Naked Glass directly onto the glass, leave it for 10-15 seconds before using the Inta-Mitt in the same way as described above.
For a more in-depth look at glass cleaning and the Inta-Mitt, see our article below:

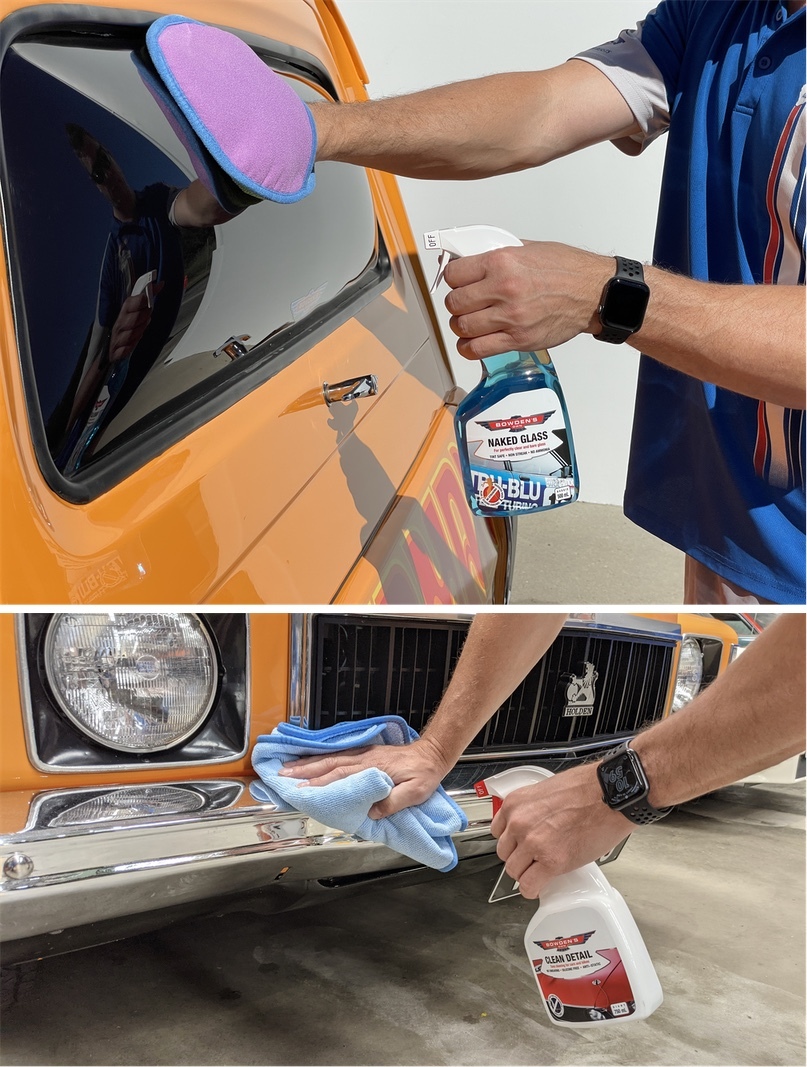
Tyre Sheen
Now it's time to get the tyres looking nice with our tyre shine product; Tyre Sheen. Nothing too shiny or over the top, just a lovely mid sheen like our Tyre Sheen gives.
The All Sorts applicator is great for applying our Tyre Sheen. With the tyres now dry and preferably out of direct sun, spray a few sprays of Tyre Sheen straight into the All Sorts applicator, then apply to the rubber and wipe it over the tyre face until a nice and uniform finish is achieved. For a shinier finish, you can apply a second coat of Tyre Sheen after allowing the first coat a few minutes to bond.
No need to wash the All Sorts applicator out, simply store it in a plastic bag of some sort until the next time you wish to use it.
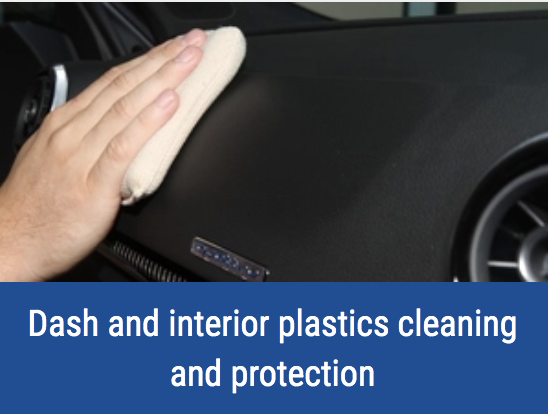
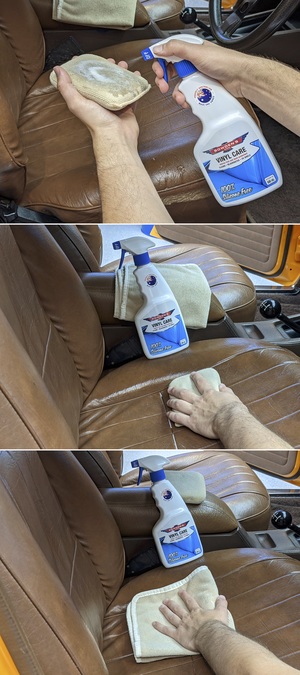
Vinyl Care
Grab the Vinyl Care and mist about four sprays into a fresh and clean Square Bear applicator. Using an applicator to ensures good coverage, as well as for making a lot less work wiping away over-spray if you spray it directly onto the surface.
When applying product to the dash with the applicator, work in small sections at a time. Move across the surface in a gentle circular motion, as this gives you the best and most effective clean of the dash, especially if it has a textured or undulating surface. You want to ensure the product gets into all these areas for the best protection and finish.
Grab your Plush Daddy cloth and fold it into quarters with the low pile side facing out, and gently wipe off the Vinyl Care while it's still wet, for an even finish.
Check out our full guide for Vinyl Care below.
Place your leftover cloths into the Microfibre bucket ready to be washed.
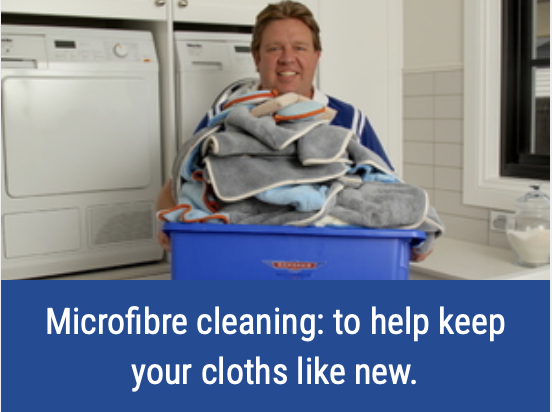
Microfibre Cleaning
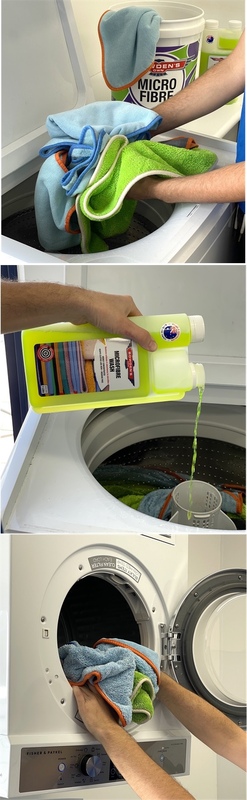
Probably the most important and overlooked part of detailing is keeping your cloths clean. We made our own microfibre wash to break down detailing chemicals from the fibres of the cloth and allow the fibres to rinse free, meaning your cloths will continue to work like new for years to come. For any heavier stained cloths or applicators, put a few mL of the Microfibre Wash directly onto the cloth or pad and massage it around with your fingers to help release the product, then give it a good rinse under some warm water before putting it into the wash. You can also put approximately 10-20mL of Microfibre Wash into a bucket with some warm water and let the applicators and cloths soak in there for 30 minutes prior to putting them through the wash.
Put all your cloths and pre soaked dirtier applicators into the washing machine on a normal cycle, on the warm water setting. Put 20mL of Microfibre Wash in the machine (DO NOT USE FABRIC SOFTENERS) and away you go. Once they’re washed, tumble dry the cloths on the cool setting and then store them in an air tight container if possible, ready for their next use.
For a more detailed explanation of this process, please see our dedicated caring for microfibre guide below.
Any Questions?
This gives you a good overview of the products in your new kit, and a step by step guide on how to use them and in what order to use them in.
If you have any questions, please email us info@bowdensown.com.au or call our office on 1800 351 308.
Happy detailing!
Brett Hobbs