4WD Detailing
We have a large fan base in the 4x4 community who enjoy maintaining their rigs with our great range of detailing products. Whether your 4x4 has just got back from a trip, or you just need to tidy it up for the school run, the fundamental principles still apply for safe washing and drying. There will be some minor adjustments with washing technique around roof racks and the like, but all of our washing and sealant products will be suitable, and offer good UV protection.
This article will run you through the steps for a maintenance wash/detail. For more in-depth articles about decontamination, Paint Cleanse & Restore, paint preparation, and other specialised areas around the car, you can see our more detailed guides here - https://www.bowdensown.com.au/guides/exterior-care
Gear you'll need
Looking after your 4x4 with Bowden's Own products couldn't be easier. From pre-washing with our Snow Job or Mega Snow Job foams, all the way through to protecting your 4x4, to make it easier to wash in the future, give it a great shine and get that nice slick feeling on your paint.
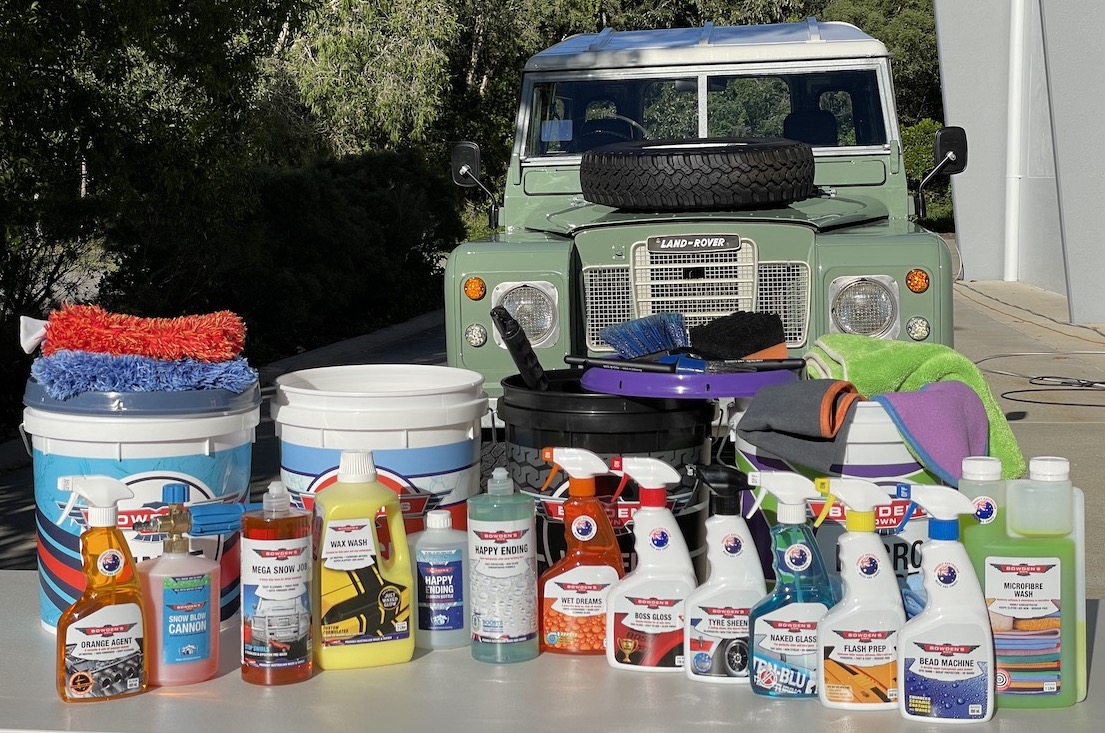
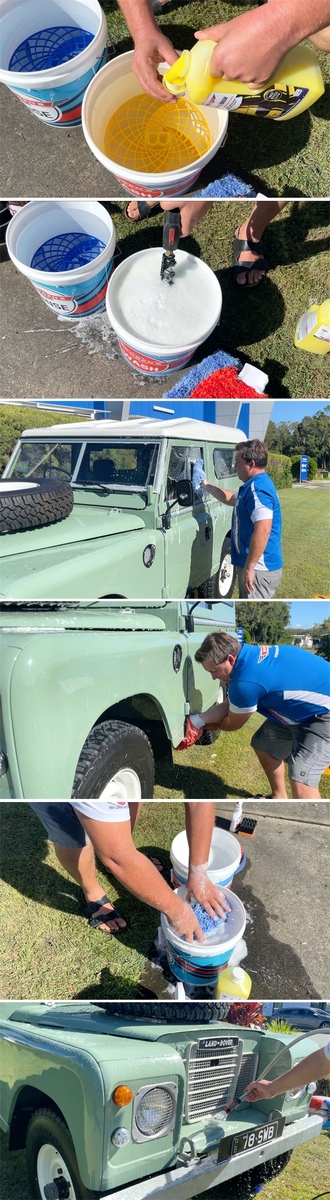
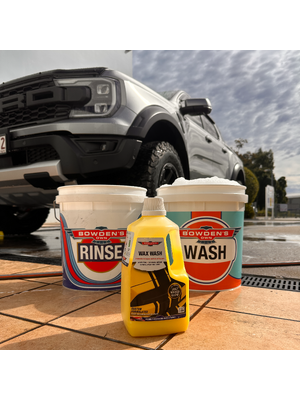
- 3 Buckets - Wash, Rinse, Wheels + Great Barrier Thingy x 2.
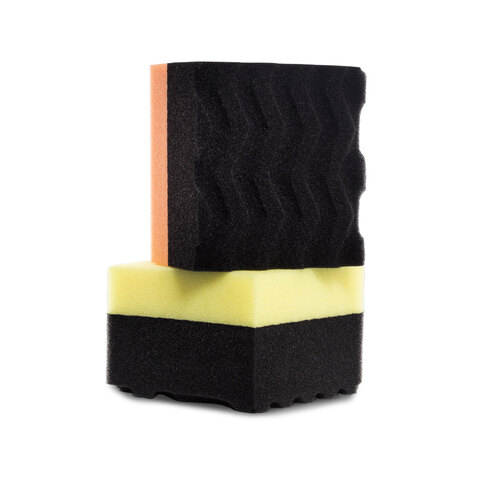
- The Flat Head, Little Chubby, Nuts and Guts and the Big Black One brushes.
- Orange Agent / Wheely Clean.
- Wet Dreams.
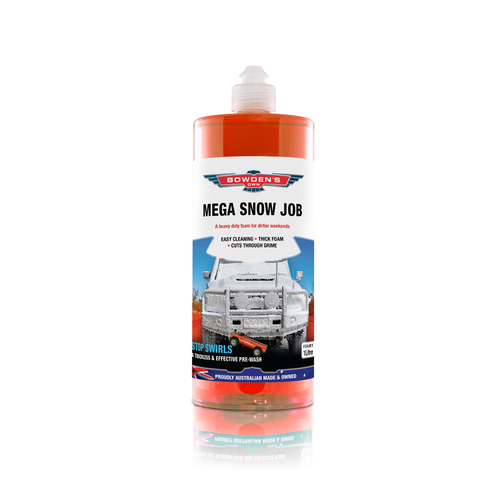
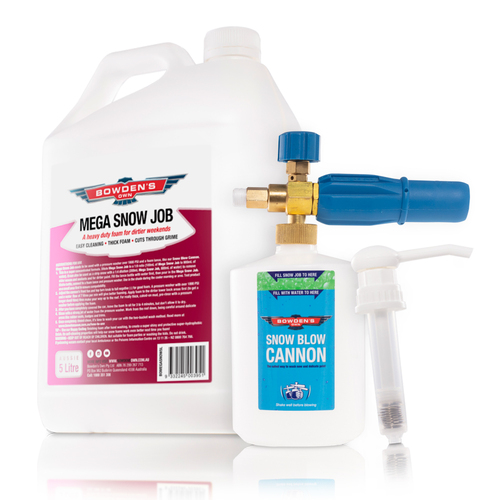
- Snow Job / Mega Snow Job + Snow Blow Cannon.
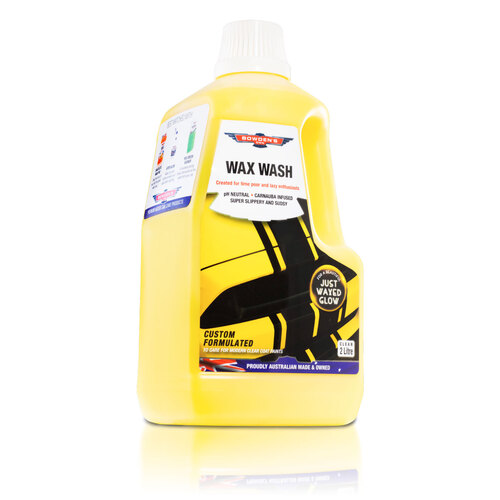
- Auto Body Gel, Nanolicious Wash or Wax Wash.
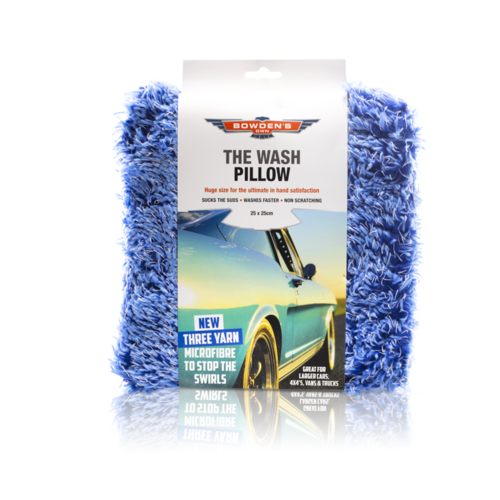
- The Wash Pillow, Shagtastic Wash Pad or Shagamittastic Wash Mitt.
- Flash Prep + Bead Machine.
- Happy Ending + Happy Ending Cannon Bottle.
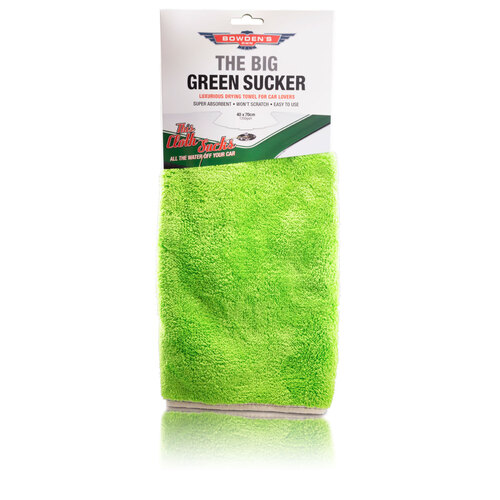
- Big Green Sucker + Boss Gloss.
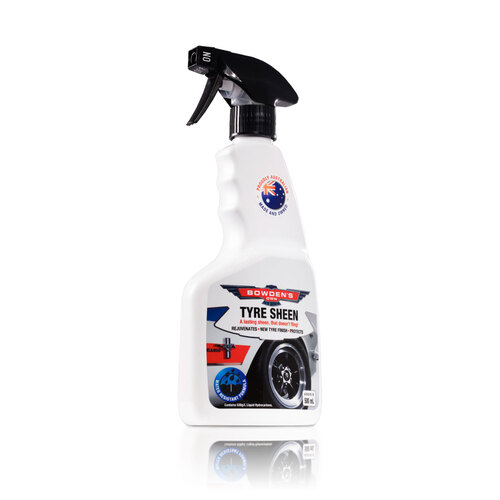
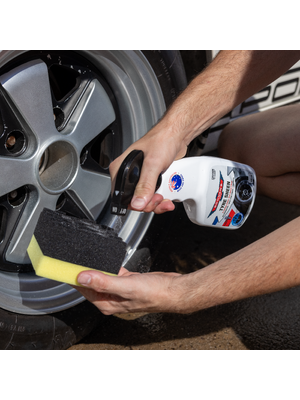
- Tyre Sheen + All Sorts applicator.
- Naked Glass + Inta-Mitt.
- Big Softie cloths.
- Dirty Deeds cloths.
- Microfibre Wash.
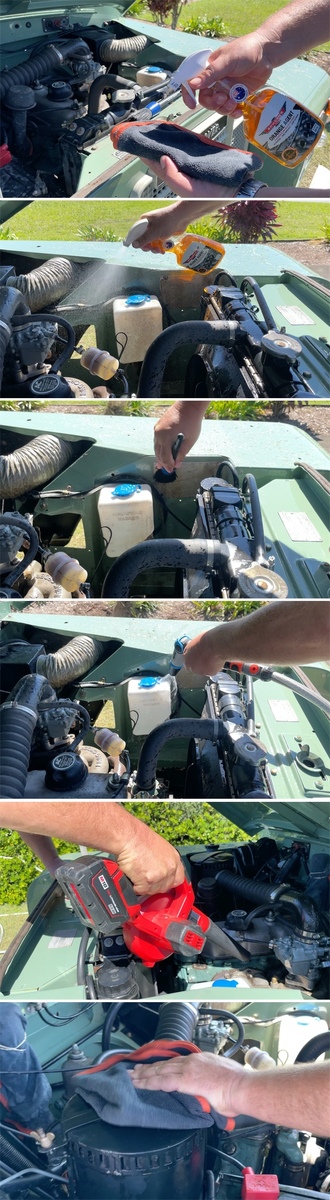
Engine bay
If you've ever gone for a good blast through the mud, creeks etc, you'll know that the mud can get absolutely everywhere, including up inside the engine bay!
It's always a good to quickly clean all this up so it doesn't sit inside the engine bay and cause issues like foul smells, or get in the way when you're trying to swing a spanner.
Doing this first up saves having to dry the car again if you get some water on the body while doing the engine bay. It also gives the engine bay ample time to dry out by the time you've finished the detail and are ready to start the car and take it for a drive.
Grab some Orange Agent, a Nuts and Guts or Big Boy Brett brush, a couple Dirty Deeds cloths and a battery powered portable blower if you have one. Make sure any rubber hoses are cool to the touch before you start.
Dampen your Dirty Deeds cloth and add a few sprays of Orange Agent onto it. Spray Orange Agent directly onto the engine bay on dirty areas. Immediately agitate with one of your bushes, and wipe over any parts that cannot be agitated, with the Dirty Deeds cloth. Rinse thoroughly with low pressure from the hose, taking care around any electrical components, air intakes, alternator, fuse box etc.
After rinsing, blow any remaining water out of nooks and crannies with the blower, then dry the rest of the engine bay down with a clean and dry Dirty Deeds cloth. At this point, you can add some protection to all surfaces with a sealant like our Fully Slick or Bead Machine. You could also use Vinyl Revival on any plastics if you wish. Use these products as per their instructions on the back of the bottle.
The pre rinse
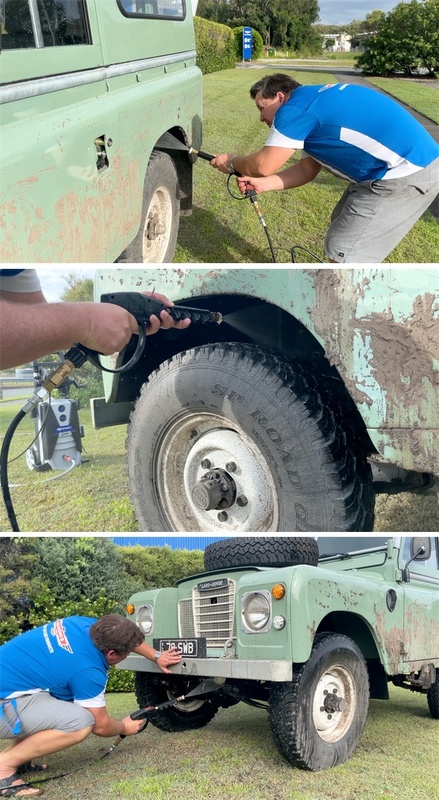
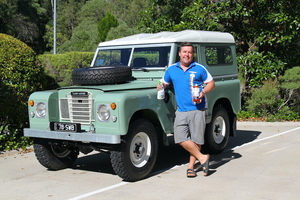
If you're using your 4x4 as it was intended to be used like our Land Rover here, it will have dirt and mud caked onto the tyres and up under the wheel arches and other parts of the body and chassis.
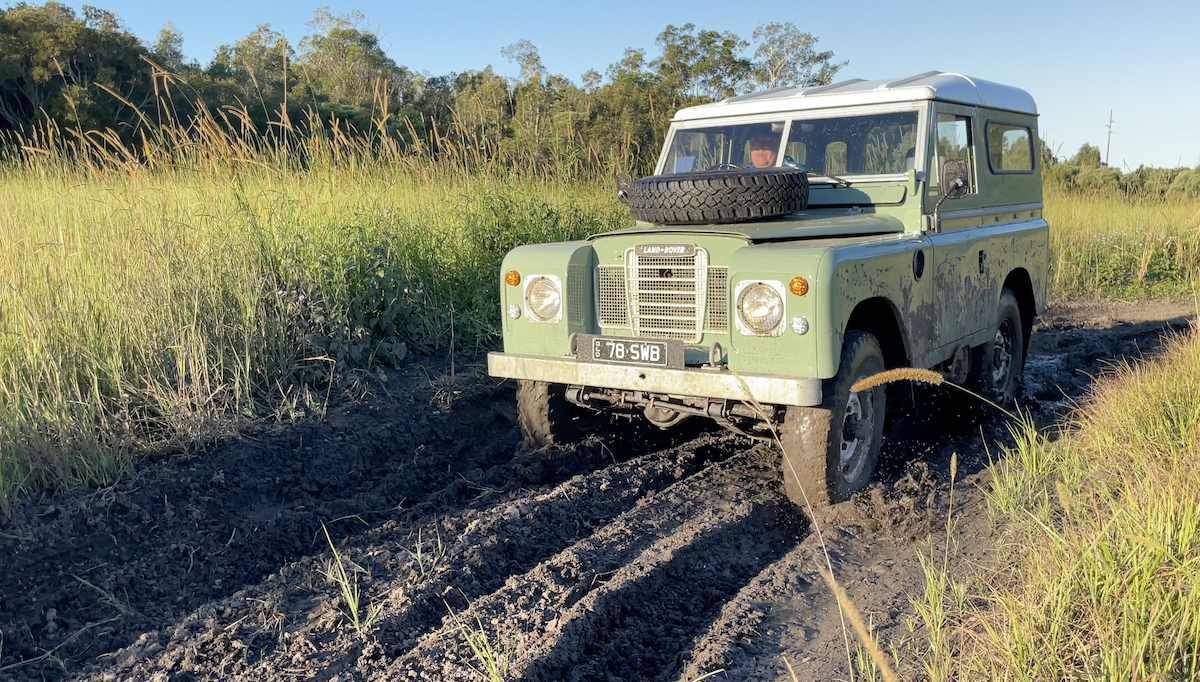
It's always a good idea to remove the bigger chunks of mud, especially from under the wheel arches, undercarriage of the car etc before moving onto any cleaning of the wheels, engine bay or the body work. We do this with a pressure washer, or with the Jet setting on your hose.
Get underneath the wheel arches and the rest of the car as best as you can and blast all of the mud and dirt out. Be thorough as mud likes to hide in all sorts of nooks and crannies. Be smart with the pressure washer, don’t get the tip of it too close to the surfaces, a 15cm to 30cm distance is more than enough with most electric machines, taking extra care around rubbers, suspension seals, bearings, electrical bits and painted parts, also making sure you don’t push mud and grit into where it should not go. Don’t forget to clean off the inside rims too as the mud can make your wheels out of balance. Once this is done we will move onto the engine bay.
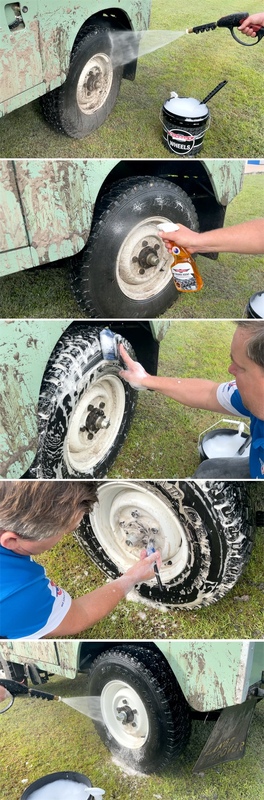
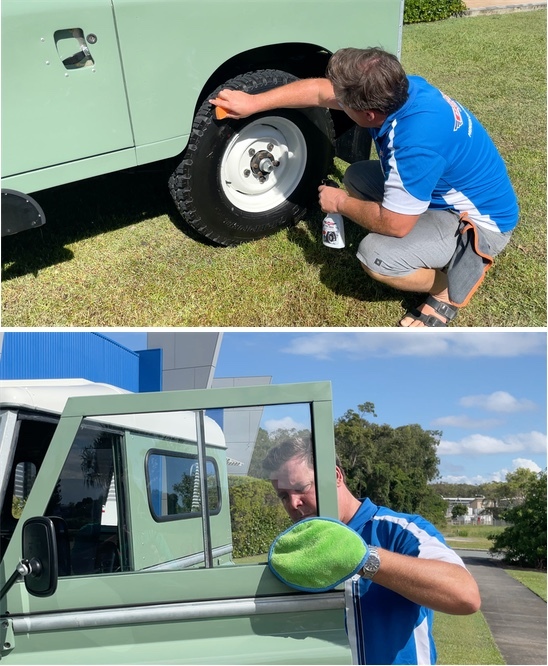
Cleaning tyres + under wheel arches
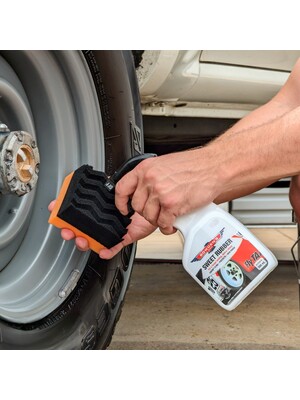
We want to remove as much dirt as we can from the tyres before putting our Tyre Sheen on, and we want to really deep clean under the wheel arches. We do this using our Orange Agent all purpose cleaner and a collection of suitable brushes like our Little Chubby and Foursome brushes.
Get your Wheels bucket and add approximately 8-10L of water. If you want, you can also add a Great Barrier Thingy to your Wheels bucket for that extra element of protection, particularly if you have delicate finish wheels. Add a capful, or even a double solution if the wheels and tyres are super dirty, of your favourite Bowden's Own car wash. Get the Orange Agent and brushes ready.
First, wet the tyre, then spray Orange Agent directly onto the tyre, then scrub it with the Little Chubby brush. When you're finished, pressure wash or rinse it off thoroughly. Repeat this process if necessary.
If you notice browning on your tyres, this is what's called antiozonant. Antiozonant is a compound that tyre manufacturers put into the rubber to help prevent degredation of the rubber. It just so happens that it looks bloody ugly if it rears its head on your tyres too. To remove this, use the method outlined above with wetting the tyre down and scrubbing with Orange Agent. It may need more than 1 application to remove it all, and be sure to properly rinse all of the Orange Agent away.
Follow this same process for under the wheel arches - spray Orange Agent up under there to help break down the dirt and assist with cleaning. If you think it needs it, use either the Big Black One or Little Chubby brushes (whichever fits under the wheel arch better), and give it all a good scrub. Once done, rinse thoroughly and repeat the process if needed.
If any of your brushes get mud/dirt etc in them, give them a rinse with some fresh water either from the hose, or from the pressure washer. Just be careful if using the pressure washer that you don't spray your hands!
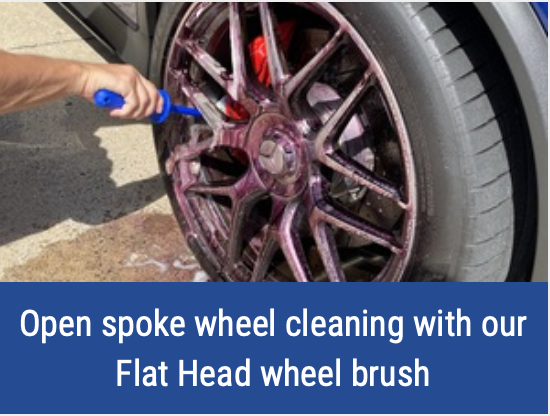
If you have more modern wheels with lots of brake dust, we'd recommend to use the Wheely Clean on them instead, and then finish off with Wet Dreams. See our detailed guide below for wheel cleaning:
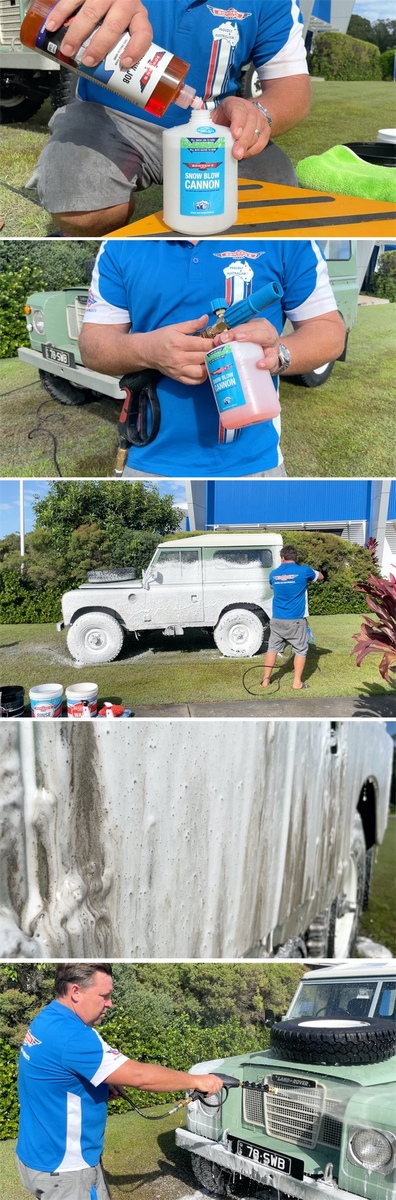
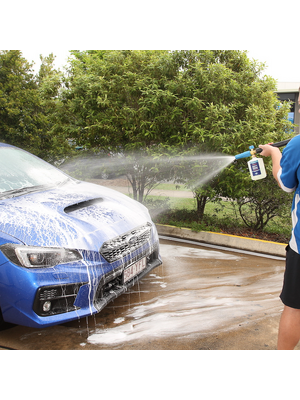
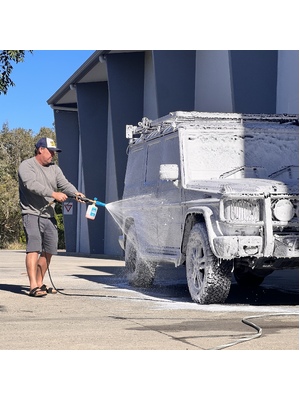
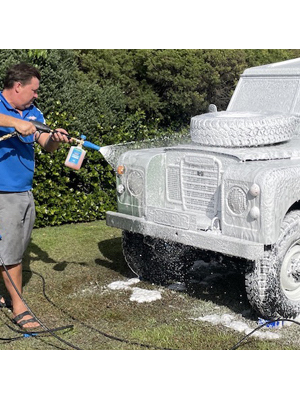
The snow foam pre wash
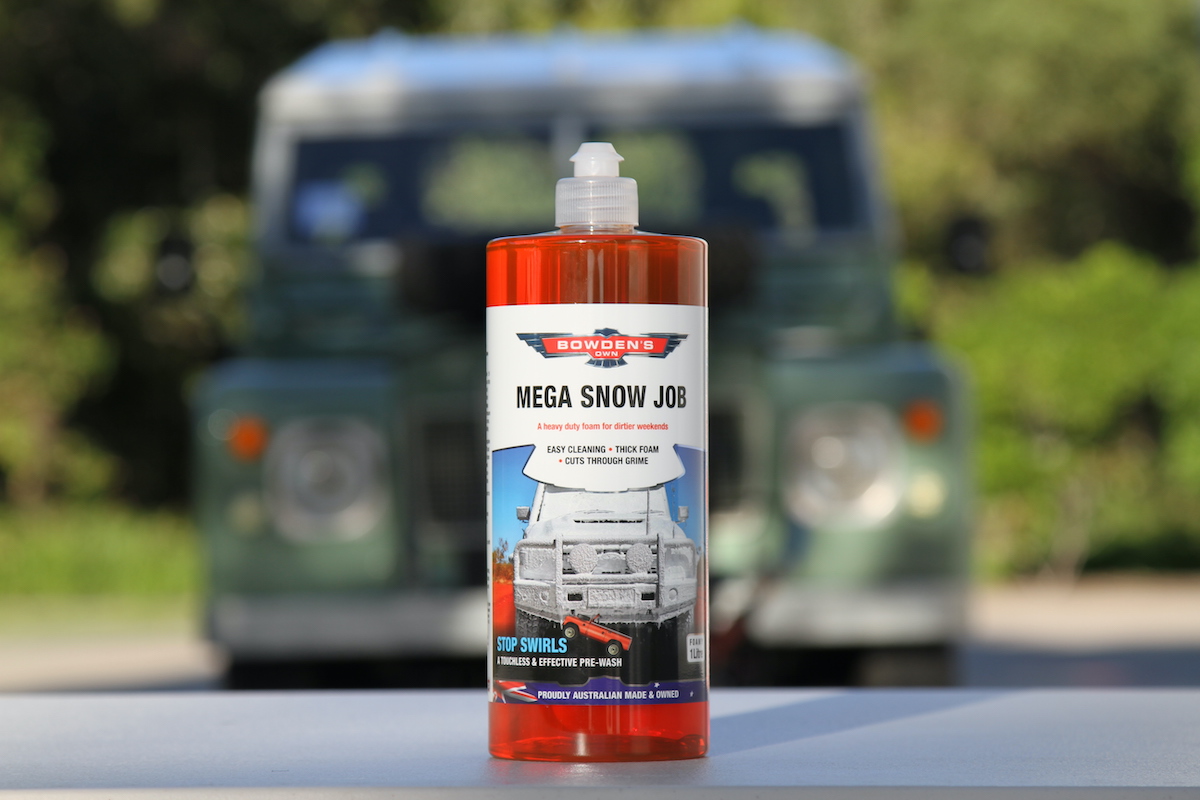
If your 4x4 is super dirty, like it's just come back from a mud park, or has heavy red dirt, or has been up the beach, then you will need to rinse it down first with a pressure washer as mentioned earlier. This is going to be the best way to remove that really bad muck, grime or salt, before you move into the pre wash with the Snow Job or Mega Snow Job snow foams. The Snow Job is pH neutral (pH 7.0) and totally safe for every day use, whereas the Mega Snow Job is a stronger cleaning formula, that's bumped slightly akaline (a pH of 9.0) to aid deeper and more effective cleaning. It's still safe to use regularly, but it can affect carnauba waxes and it will begin to affect weaker sealants over time too, so keep this in mind! Both of them are exceptional at emulsifying and removing salt, getting into all the nooks and crannies throughout the vehicle. The Mega Snow Job in particular has great built in anti-rust attributes as well, so well worth using after a beach weekend.
If you've got caked on mud or dirt on the paint, particularly the lower sections of the doors, you need to keep in mind that this dirt could be in the very acidic or alkaline ranges of pH depending on where you live. This means that the dirt caked on there will dramatically effect any waxes, sealants or coatings you have previously used. It could mean that you have to top up the protection on your 4x4 more often in these areas.
Once that initial pressure wash down is done (if it was needed), it's time to snow foam. If your 4x4 is a bit more dirty than usual, use the Mega Snow Job, otherwise, use the Snow Job for this initial pre wash. Be sure to follow the instructions for each product on the back of their respective bottles.
Keep in mind that this is only a pre wash, and you will still need to move onto your normal 2/3 bucket wash after completing this step.
Safe washing
Always wash out of the sun when possible, and make sure the vehicle is cool to the touch. Usually the early morning or later afternoons are ideal.
With your buckets ready, and the Great Barrier Thingy's in them, fill both buckets 3/4 full with water. Add a capful of your favourite Bowden's Own wash into the Wash bucket (we're using Wax Wash here as it has the best anti-rust additives from all our washes and is our preferred wash for the older cars), then hit it with the pressure washer to froth the mixture up and give a nice head of suds.
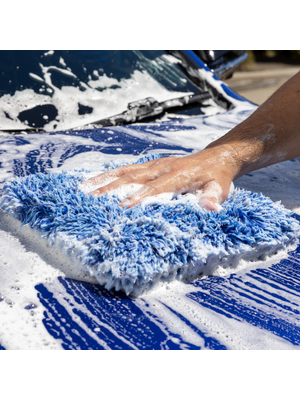
For 4x4s and other larger vehicles like Trucks, Caravans etc, we find the Wash Pillow the absolute best wash tool, as it holds a lot of suds, and with its larger surface area, it makes shorter work of larger areas.
Rinse the Wash Pillow out in the Rinse bucket water first, then dip it into the Wash water bucket to fill it with suds. Wash the car from top to bottom, rinsing your wash tool in the Rinse bucket water after each section (one section could be a panel, or half a panel depending on how dirty the car is).
TIP: When using the Shagtastic Wash Pad, Shagamittastic Wash Mitt or Wash Pillow, take care around badges and sharp corners, as the shagadelic weave can get caught if you're not careful. Just use lighter pressure around these areas. If you have roof racks, just do your best around these areas - the Shagamittastic Wash Mitt can make these areas a bit easier. Side steps can make it easier to reach the roof if you need like we've done in our video, otherwise a small safety step or step ladder might be helpful for you to reach the roof. Our Foursome brushes can be very handy for getting into these areas around badges, emblems etc.
After the whole car has been washed, use a gentle stream of water to rinse the entire car with the hose, to help remove the larger water beads and droplets.
Once you're done, empty the buckets and give them a good rinse out. You don't want to be storing any wash water for use later!
Drying
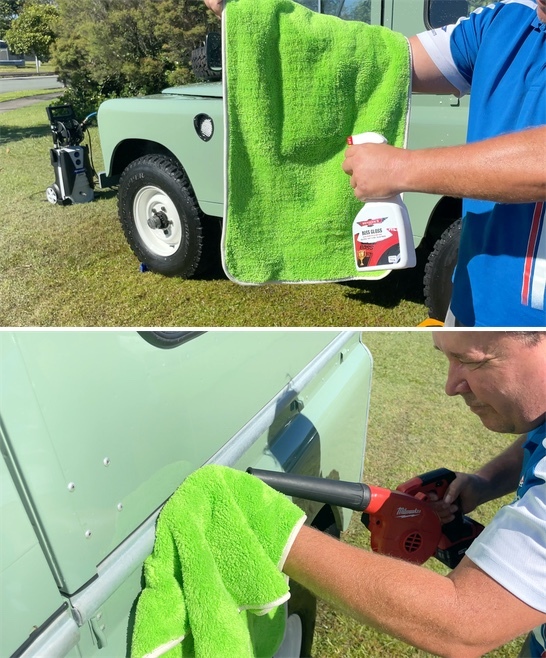
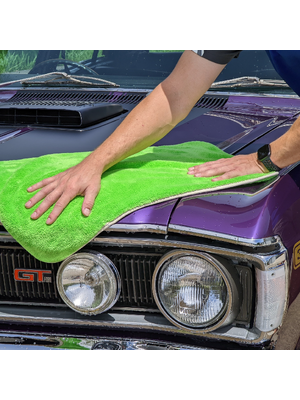
We have 2 primary ways of drying; Boss Gloss with the Twisted Pro Sucker or The Big Green Sucker and the perfectionists way of drying with After Glow with the Big Softie cloths.
Twisted Pro Sucker and The Big Green Sucker + Boss Gloss:
Get the Twisted Pro Sucker or The Big Green Sucker and drape it over your arm with the bulk of the towel hanging down. Spray 4-6 sprays of Boss Gloss straight into the towel. Flip the towel over and spray another 4-6 sprays on the other side. Now dry the vehicle like you normally would, starting with the glass, then working top to bottom.
The Twisted Pro Sucker and The Big Green Sucker can do multiple vehicles, one after the other, so they hold a lot of water!
After Glow:
The way you use this one is to get two of our Big Softie cloths. Using clean, fresh water, completely drench one cloth, then wring it out till it's just damp. Fold the damp cloth into quarters, with the low pile side facing out, then spray 3-4 sprays of After Glow into the cloth. Work on one panel at a time, work in side to side motions; up and down/left to right. Leave the product to flash off for around 1 minute, then buff off any remaining residue with your second Big Softie cloth, again folded into quarters with the low pile side facing out. Continue this technique for the entire vehicle.
After Glow is great to finish with if you're after something to put on your 4x4 that won't attract as much dust. After Glow's formula is anti-static, so it will help lessen the amount of dust on the surface - great if you're doing some off roading!
Protect the paint with Bead Machine
After you've washed and dried the car, now is the perfect time to add some epic protection to your paint to help make the car easier to wash the next time you get back from some bush bashing.
Bead Machine is our most protective sealant, but if you prefer the super slick feeling of Fully Slick, it's also suitable to use at this stage.
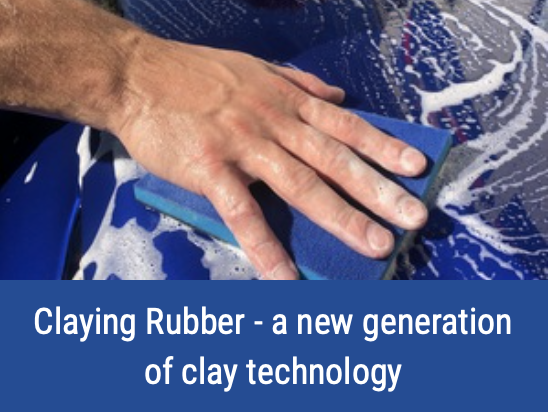
Keep in mind that if your paint feels rough or is badly embedded with iron, it's a good idea to use Three Way + Claying Rubber prior to applying either Bead Machine or Fully Slick, as these sealants will work better when applied to smooth and decontaminated paint. See our detailed guide on those products here:
Bead Machine application:
Work on small sections at a time, in the shade on surfaces that are cool to the touch. Break the car up into small sections (1/4 of a bonnet for example). Grab 2 fresh, dry and clean Big Softie cloths folded to the low pile side. One of these cloths will be your application cloth, and the other will be your cloth for buffing off residue.
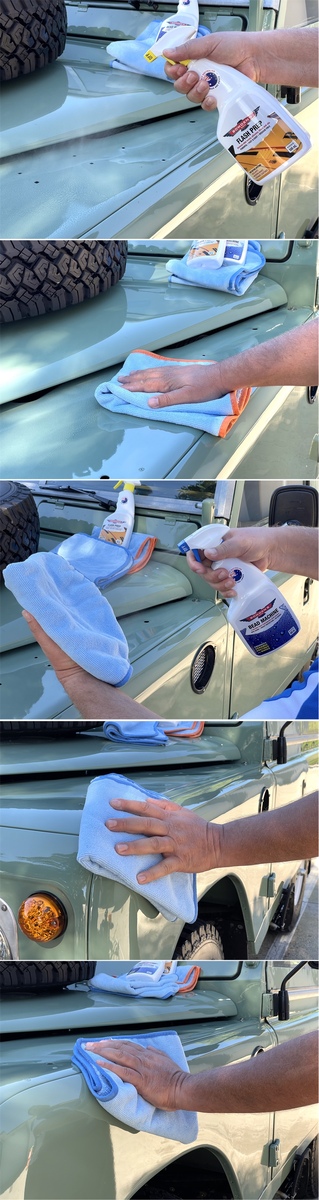
Use the Flash Prep first to prepare the surface for Bead Machine. Fold a Big Softie cloth into quarters, with the low pile side facing out. Working on small sections at a time (half a bonnet for example), spray Flash Prep directly onto the surface, then immediately wipe over the surface with the Big Softie cloth. Use a second Big Softie cloth to buff off any remaining residue. Continue this method around the car until it's done. Change cloths out if you notice any smearing that doesn't go away with the second cloth.
Step 1 -
Shake the bottle well and mist 4-6 sprays into the low-pile side of a folded, clean & dry Big Softie microfibre cloth. Wipe the product evenly over the surface in an overlapping up and down, then side to side motion.
Step 2 -
Immediately use the second clean and dry Big Softie cloth and buff off any residue. Fold and turn the cloth often for a nice, even finish.
Step 3 -
Mist 1-2 more sprays only into the application Big Softie cloth for each subsequent section, and continue the above process till the whole car is completed. If you start to notice any smearing, change out your cloths for fresh ones.
Allow at least 4 hours to cure before it can get wet for best results.
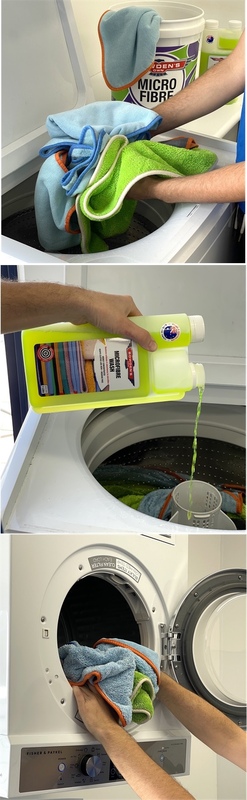
Once you've finished the whole car, put both of your cloths into a bucket like our Microfibre bucket, half filled with water and throw 10ml of Microfibre Wash in there and thrash it around to release the super hydrophobic polymer from the fibres of the cloth. Keep them wet and then put them in the machine wash together, with the other microfibre cloths you've used in the process.
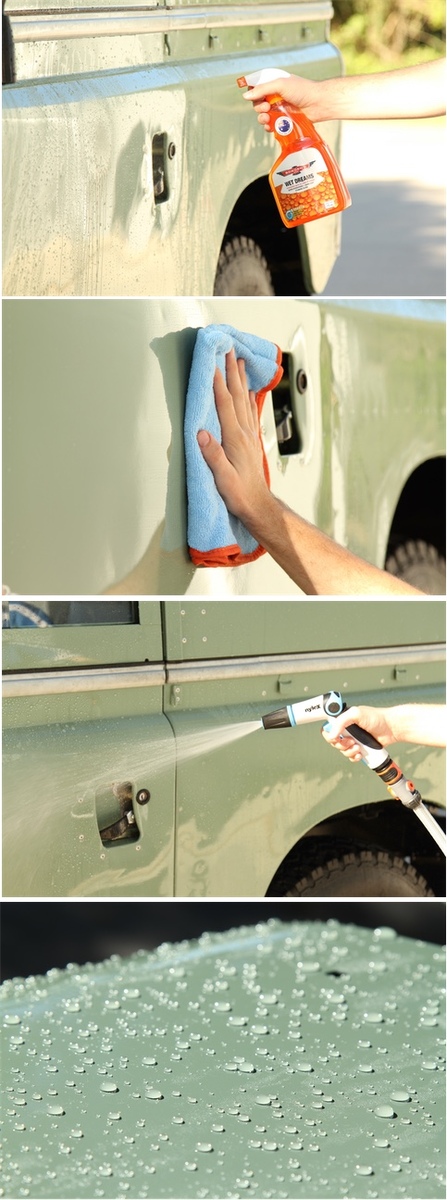
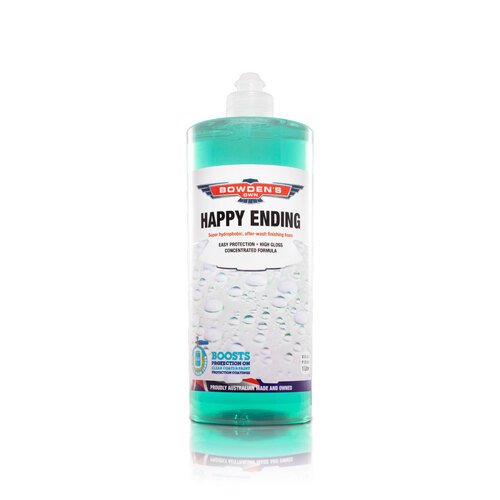
Maintenance + adding protection with Happy Ending & Wet Dreams
Either of these maintenance products should be used when the car is still wet right after washing. They both can be used on top of Bead Machine as well. Ideal for when your vehicle needs a bump in protection, shine or slickness. Be sure to follow their individual instructions on the rear of the bottles.
Happy Ending will add awesome protection and a remarkable shine to your 4x4 after washing and rinsing. It is to be used on a still wet car if you have a pressure washer, and our Wet Dreams is the product for if you don't have a pressure washer and just wish to use a hose. The biggest thing about these products is they will make it harder for the mud and grime to stick to your vehicle and also make it a lot easier to wash and dry next time around - and who doesn't like making their 4x4 to easier to wash?
Happy Ending was made to quickly give a visible boost of protection to the car at the end of the wash, as well as creating a super high gloss and slippery smooth finish. All this happens from simply spraying it on, and then pressure washing it off, to leave a super hydrophobic coating, before drying the car as you do in a normal wash.
Before we begin, there are some important things you must follow, as this product is very concentrated and cures quickly when it dries. If you're someone who dislikes following product instructions, we don't recommend this product for you. Please take note of this first important section:
DO NOT USE ON HOT/WARM PANELS, IN THE DIRECT SUN AND NEVER ALLOW TO DRY. Only use on wet panels in the cooler morning or afternoon, preferably out of strong wind. It is not suitable for fabric or vinyl convertible tops or ute tonneau covers. Nor is it ideal for poor quality, single stage, porous or oxidised paint. If your paint feels rough when washing, we suggest you quickly use our Fine Clay Bar or Claying Rubber with the car wash before use, as this product will bond better to decontaminated, good quality surfaces.
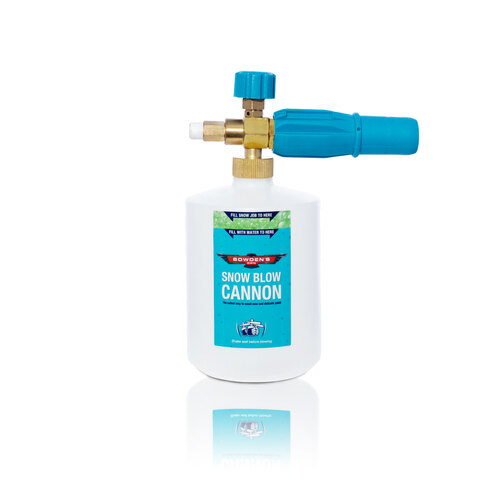
1. Mix the Happy Ending in a Snow Blow Cannon bottle (a separate Happy Ending labeled bottle is available - part code to order one from our resellers is BOHCB). It handily uses the same dilution ratio of 9:1 as the Snow Job and Mega Snow Job foams. If using the same bottle as the Snow Job or Mega Snow Job, rinse it out with water first. Then, add 900ml of fresh water, before turning the Happy Ending bottle upside down above the cannon bottles inlet and open the pop top, to ensure there is no wasted product when filling. Add 100ml of the Happy Ending using either the measuring marks on the cannon bottles label, or from watching the 100ml increments on the side of the Happy Ending bottle. You don't need to rinse out the brass cannon unit after use with our Snow Job or Mega Snow Job, as the formulas won't contaminate or affect each other in small amounts.
2. Carefully screw the Happy Ending mixture bottle to the cannon unit and attach to your pressure washer. Adjust the cannons top air knob to full clockwise (-) and adjust front nozzle to give a medium arc, a little bit wider than you would use with the snow foam.
3. Apply the light foam to the roof and then work to the bottom. It's safe for all glass, exterior plastic trims, wheels and tyres. Slowly walk around the entire car till it’s covered. Note that this product doesn’t create a thick foam. Do your best to try and avoid applying directly to the windscreen. On larger vehicles like trucks and vans, or in warmer conditions, we recommend that you do half the vehicle at a time.
4. Once finished, quickly remove the cannon from the lance and change to the lances power wash fitting. Immediately begin to THOROUGHLY pressure wash the product off, especially on the glass. Start from where you began applying using a methodical, overlapping motion from the top of the car to the bottom, doing a couple of passes over each section to activate the bead porn. The bead porn effect is activated by the friction from the strong jet of water over the surface. You'll notice it gets better over time as the product cures on the surface. Work right around the car till you're finished. If you wish for more water beading after the first application, re-apply as per above to the separate areas for complete satisfaction.
5. Now use the new found surface tension to help dry your 4x4. Do this by taking the end off your hose and flooding the panels with water, sheeting the majority of the water droplets from the now coated surface. Refer now back to the "Drying" section of this article above.
6. Quickly clean the windscreen and wipers with Naked Glass and our Inta-Mitt cloth to prevent the chance of the wipers smearing the next time you use them.
7. The protective finish and beading lasts for up to two months on a daily driven 4x4 - longer on 4x4s that are better pampered or have better paint. Note that any mud or dirt left on the car for a period of time can terminally affect any of the sealants and the protection they offer. Any left over Happy Ending foam mixture can be left in the cannon bottle and reused up to 3 months later. Store it in a cool area out of direct sunlight and use a cap or some race tape over the top to dust seal it. Note that the cannon bottle uses a unique machine thread, so no cap exists that can create a 100% perfect waterproof seal. So just be sure to store it upright.
An extra tip for before you begin packing everything away - re-attach the cannon to the pressure washer and run just water though it, to flush the Happy Ending from inside the unit. We do this to prevent blockages in the cannon or the internal aerator. This can be done by using it without the cannon mixture bottle screwed on, or by simply turning the top blue mixture knob all the way to positive, so only water goes through the unit.
On the slight chance that you get any streaking or uneven patchiness when using Happy Ending, simply wipe over the marks with the Big Green Sucker or Big Softie cloth using a bit of extra pressure on the towel to remove these "high spots". If the marks are left to dry, don't freak out as the Paint Cleanse and Restore can remove them easily. Avoid using an air blower to dry the car after using Happy Ending, as there can be some of the product lurking in the mirrors, panel gaps etc, and this can be blown over the paint and leave some marks if not careful.
See our detailed guide and video below for using Happy Ending:
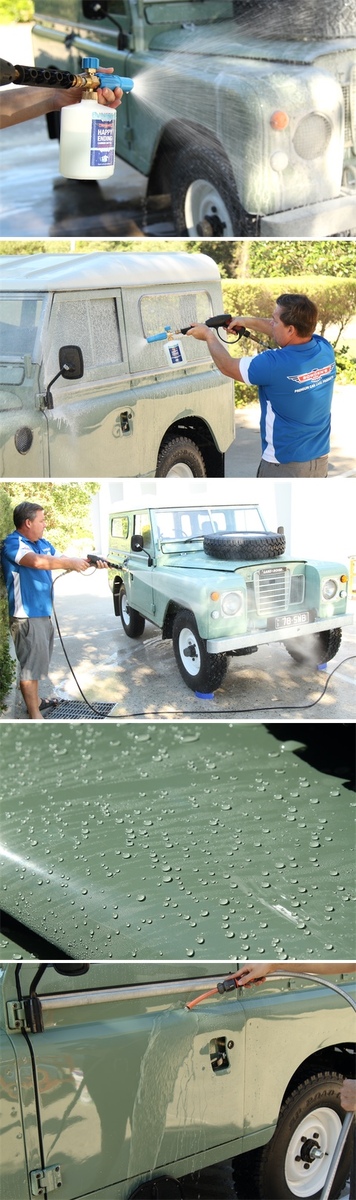
Wet Dreams
Application method 1:
This is for the first time application of the product to your 4x4, or if you don’t use a pressure washer:
1. Wet and then wring out a Big Softie microfibre cloth. Work on one wet panel area at a time, evenly mist Wet Dreams in a sweeping motion over the entire surface.
2. Gently wipe over in a back and forth methodical action to get an even coverage. (Continue to wring this cloth out between different panels/sections as well).
3. IMMEDIATELY rinse off thoroughly with a strong jet of water in a methodical side to side motion, being sure to rinse any glass and adjoining panels that might have gotten overspray on them as well.
The bead porn effect is activated by friction from the strong jet of water over the surface. You'll notice the beading will get better over the next 10 to 15 minutes as the product cures on the surface. If you wish for more water beading after the first application, re-apply to the areas that need it for complete satisfaction.
Once done, rinse out the Big Softie cloth and then put it into a bucket of clean water. Machine wash it in our Microfibre Wash with the Big Green Sucker and other cloths once you're all packed up and finished. You don't want this towel to dry with product in it, otherwise it will become super hydrophobic as well.
Application method 2:
This method is best if you're using a pressure washer and also great for touch-less use or quick top ups:
1. Work on one wet panel at a time, mist the Wet Dreams in a sweeping, even motion across the entire surface.
2. IMMEDIATELY rinse thoroughly with a pressure washer or hose, being sure to rinse any glass and adjoining panels that might have gotten overspray on them.
3. Work right around the car till you're finished. The bead porn effect is activated by the friction from the strong jet of water over the surface. You'll notice the beading will get better over the next 10 to 15 minutes as the product cures on the surface. If you wish for more water beading after the first application, re-apply to the areas that need it for complete satisfaction.
With this method you will use more product over the spray and wipe/spread method mentioned above. However, it can be handy if you're using the Happy Ending finishing foam, as this way is faster and easier to quickly boost smaller sections between its applications. Just spray it on the areas the beading is reduced and then pressure wash or hose it off.
On the slight chance that you get any streaking or uneven patchiness when using this method, simply wipe over the marks with the Big Green Sucker or Big Softie cloth using a little bit of extra pressure on the towel to remove these "high spots". If the marks are left to dry, don't freak out as the Paint Cleanse and Restore can remove them easily.
Now use the new found surface tension to help dry your 4x4. Do this by taking the end off your hose and flooding the panels with water, sheeting the majority of the water droplets from the now coated surface. Refer now back to the "Drying" section of this article above.
See our detailed guide and video below for using Wet Dreams:
Glass, tyres and drying Wheels
We like to do these last...
Interior and exterior glass can be cleaned in the same way.
Naked Glass and an Inta-Mitt in hand, follow these simple steps for the perfect finish.
Lightly mist 1-2 sprays of Naked Glass into the green side of the Inta-Mitt cloth and apply to the glass. DO NOT drench the cloth - a spray or two is always enough. Begin cleaning the glass back and forth, then up and down, ensuring good coverage. Be sure to get right into the corners of the glass and the windscreen too.
Turn the Inta-Mitt to the low drag purple side, and buff off any residue to a perfect finish. If your cloth is wet from product, or you begin to notice slight streaking, flip the Inta-Mitt inside out and add only 1 more spray. It's imperative that the cloth is dry to achieve that perfect, streak free finish. Never spray Naked Glass into the purple side of the Inta-Mitt.
We say to spray into the Inta-Mitt and apply so you don't get over spray everywhere, saving you time in cleaning up later. Only if the glass is really, really dirty is it a good idea to spray a little bit extra directly onto the glass. If you do use this method, spray on and leave it for 5-10 seconds to begin to clean deeper, then wipe off thoroughly using the technique described above.
Wheels and tyres are lucky last. Dry the tyres first with a clean and dry Dirty Deeds cloth or Twisted Little Sucker. Then, spray 6-7 sprays (you might need more or less depending on the type of tyre, how big it is etc) of Tyre Sheen into an All Sorts applicator, then wipe over the tyre, covering all the rubber surface, being sure to get it into the lettering on the tyres. If you like a shinier look on your tyres, you can apply a second layer of Tyre Sheen after the first layer has dried.
We aim for a mid sheen on the tyre, just better than a new tyre; that's the finish we get with this applicator and Tyre Sheen combination.
TIP: If you're working in the sun, you would dry your wheels earlier in the process to avoid water spots.
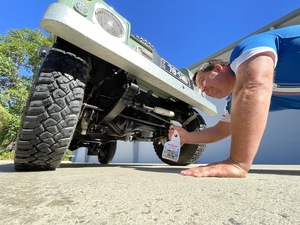
Under body protection
We are currently working on a product for 4x4's, trucks, caravans etc for the under body of the vehicle, to help prevent rust and lubricate any under mechanical parts. This is a product that contains natural lanolin. This can easily be added at the end of a full detail like this, so that you know your rig is going to be protected the next time you take it up to the beach, or go bush bashing etc.
We will have more information in the coming weeks about this product.
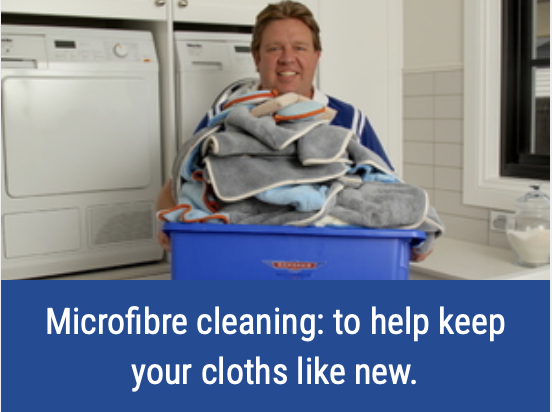
Microfibre Care
One of the most important jobs of the entire detail is making sure you clean your microfibre cloths properly. Look after your cloths, and they'll look after you for years to come.
Our Microfibre Wash was made specifically to clean waxes, polishes and cleaning products from microfibre cloths. It won't work for your clothes to remove tomato sauce stains, but it'll keep your microfibre cloths like new.
Add 20-60ml of Microfibre Wash to your machine (depending on how many cloths you're washing), and put the machine on a normal wash cycle with warm water. DO NOT ADD FABRIC SOFTENER.
Once the cloths have been washed, pop them in the dryer on the cool/warm setting for around 45 minutes, or until they come back nice and fluffy. Once the cloths are dry, pack them away in a sealable container, ready for their next use!
For a more detailed explanation of this process, please see our dedicated caring for microfibre guide below:
Any questions?
Should you have any questions about anything mentioned in this article, or have questions about other products and processes, feel free to get in touch on 1800 351 308, or shoot us an email to info@bowdensown.com.au
Mega Snow Job is now available at your local stockists.
To find your closest retailer, see our Stockists link here - https://www.bowdensown.com.au/store-finder/
Happy bush bashing!
Brett Hobbs.
Products Used
All Sorts
The All Sorts applicators are the perfect way to apply our Tyre Sheen and Sweet Rubber . They use a quality German made foam, that's rigid enough to work on anything from low profile tyres, all the way thro...s
$13.99

Wax Wash
For a beautiful, just waxed glow that time poor and lazy enthusiasts will appreciate.
$32.99
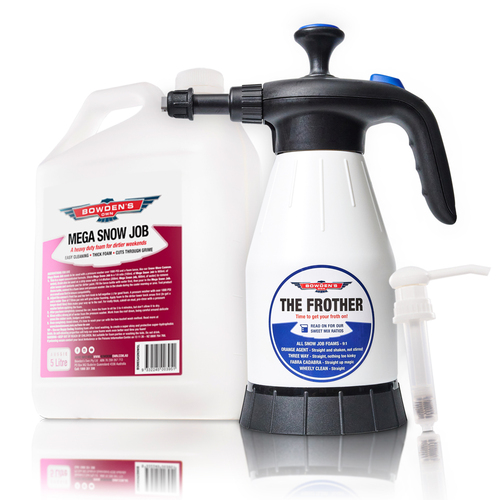
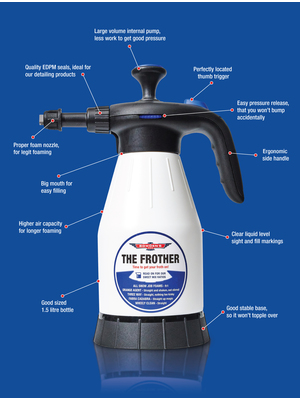
Mega Frother pack
Do you like to get your froth on and love the extra cleaning power of Mega Snow Job ? This pack is for you! With this combo of The Frother, Mega Snow Job 5L and a 5L Pumpy Pump, you can get your froth on an...s
$152.99
Mega Snow & Blow pack
A great value buy for people who want a cannon and love Mega Snow Job.
$197.99