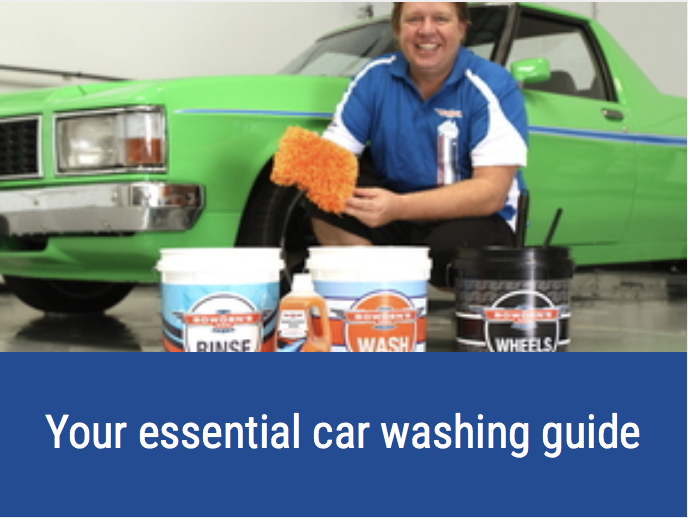
Why we started Bowden's Own - Classic Car Care
Classic cars were built different to modern cars; real metal, real chrome and quite often poorly sealed windows and electricals that let water in!
We have a long love affair with classics of all sorts, being the main reason Bowden's Own exists in the first place, as we were not contented with the type of products in the market some 20 years ago, so rather than sit back and accept it, we started making our own. We find it can be quite therapeutic to spend some time with your loved classic - something we always keep front of mind when making all of our products to help make detailing fun and importanlty increase the enjoyment of owning a classic car.
In this guide we're going to run through a system of what we see as our better products and processes that you can use to look after and pamper your classic ride.
Let's start with washing
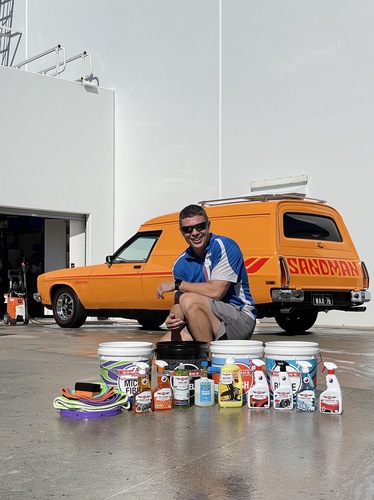
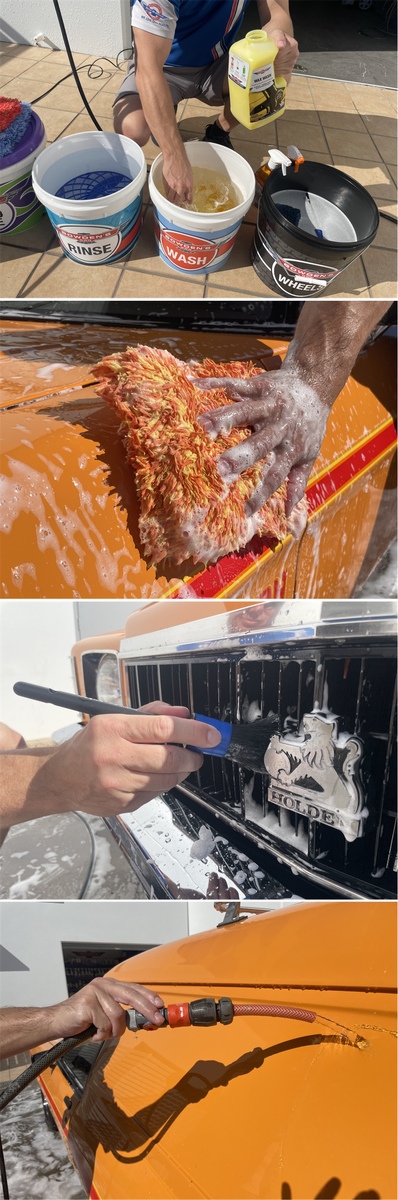
Get all of the products out that you're going to need for your wash, plus your pressure washer, and get it all set up. For our wash here, we'll need the following:
- 4 buckets - Wash, Rinse, Wheels and another one for your Microfibre.
- Hose Slides.
- Brushes (Little Chubby, Flat Head, Foursome).
- Snow Job foam + Snow Blow Cannon.
- Orange Agent/Wheely Clean.
- Wet Dreams.
- Wax Wash + Wash Pillow/Shagtastic Wash Pad.
- Boss Gloss + Big Green Sucker.
- Naked Glass + Inta-Mitt.
- Clean Detail + Dirty Deeds.
- Tyre Sheen + All Sorts applicator.
Wheel and tyre cleaning
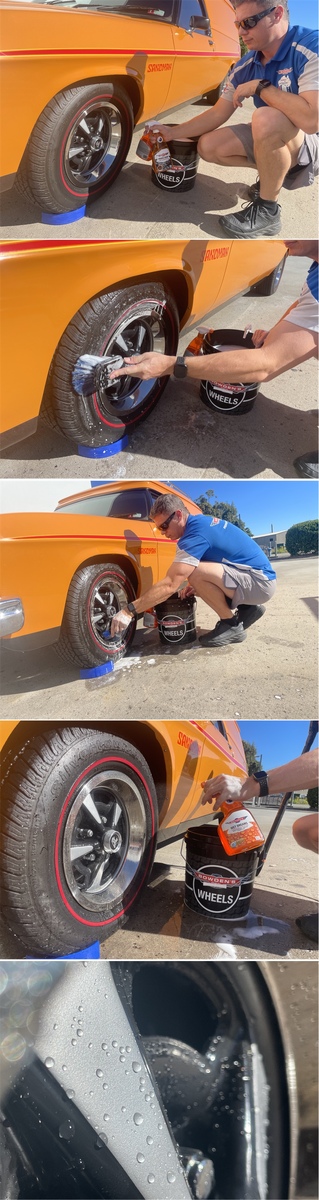
Depending on what type of wheels and brake pads you have on your classic car, you can use either the Wheely Clean if you enjoy driving (like us) a little spiritedly and make a bit of brake dust, or, as we've used here, Orange Agent if it's more just built up dirt and grime. After cleaning, we seal the wheels with Wet Dreams to add some shine and protection, and make the wheels that little bit easier to clean next time.
Half fill your Wheels bucket with water, then add a capful of Wax Wash and froth the mixture up inside the bucket with a short blast from the pressure washer. This ensures the Wax Wash is well mixed, and creates a lovely micro emulsion of suds that smells a bit like a banana milkshake!
With your Wheels bucket set up next to the wheel with your brushes handy in the bucket, spray the Orange Agent or Wheely Clean directly onto the wheel. If you'd like to clean the tyres at the same time, spray Orange Agent directly onto the rubber too. Leave it to dwell for only a short time (30 seconds or so), then start by scrubbing the tyre with the Little Chubby brush, then clean the outside face of the wheel. If you'd like to clean the inside barrel of the wheel, use the Flat Head brush and get in there right the way around the inside of the wheel barrel. Rinse the brushes out in the Wheels bucket as needed.
For the smaller or intricate areas around the wheels (wheel nuts etc), use the Nuts and Guts brush from the Foursome brush set.
Once the wheels and tyres have been cleaned, pressure wash them down thoroughly, then spray a few sprays of Wet Dreams straight onto the wheel face, then pressure wash it straight off, to add some super easy protection and a lovely shine in one step.
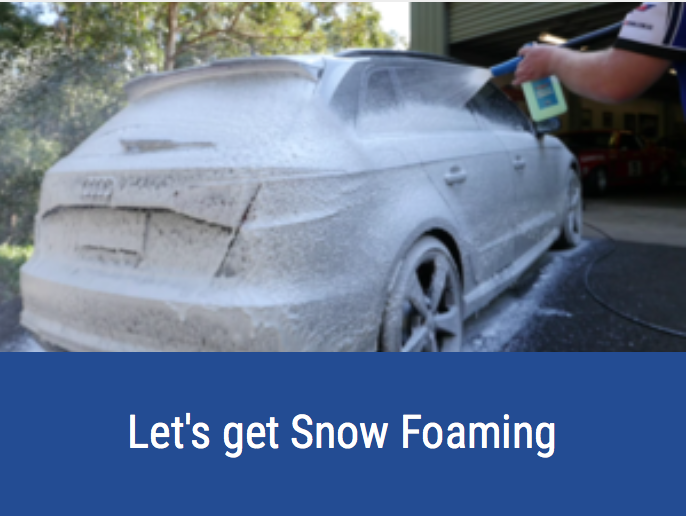
The pre wash Snow Job
We have found that snow foaming is the perfect first step to dramatically reduce swirl marks and micro scratches while washing your beloved car. It's effectively a pre-wash system that creates a thick, deep blanket of cleansing foam that gently dissolves and releases a lot of the grit and grime that has bonded to the paints' surface. After letting the foam dwell, you blow it off with a strong jet of pressurised water. With it goes the vast majority of the potentially scratching particles, grit and other contaminates.
Depending on how dirty your classic is, you'll either want to use the Snow Job pH neutral foam, or the Mega Snow Job with its subtly stronger alkaline foam. If you're just doing a maintenance wash on a car that's reasonably clean and you don't want to affect any protection that's already on there, use the Snow Job. If it's quite dirty, or muddy, or you just want a deeper clean, then use the Mega Snow Job, but be aware it will affect/remove any previously applied carnauba waxes from the car, while the Snow Job will not.
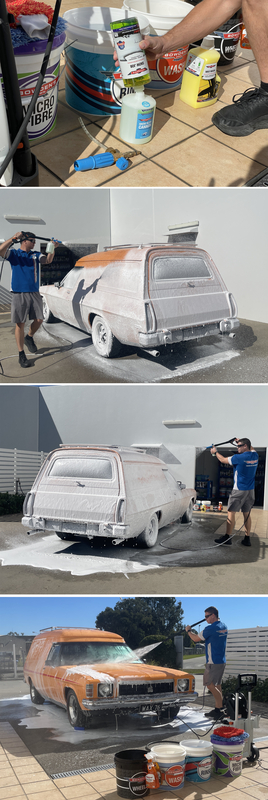
Our Sandman here is pretty clean and only needs a maintenance wash to remove the layer of light dust and sea-spray from a weekend of cruising the Sunshine Coasts roads, so we will use Snow Job foam.
Fill your Snow Blow Cannon bottle with 900ml of water, then add 100ml of Snow Job. Attach the cannon head and screw it on until it fits snug, but don't over-tighten it. Gently turn the bottle and cannon upside down a couple times to mix the solution inside the bottle.
Starting at the back of the car (where it's usually the dirtiest), begin foaming, moving then to the side of the car, and from the bottom to the top until the whole car is covered in a lovely, thick foam - by using this technique you will use a lot less product. Leave the foam to dwell for a few minutes, but don't let it dry, then begin pressure washing the car off, starting from the roof this time, and working your way down in an overlapping motion, leaving the rear of the car till last so that it gets the longest dwell time to break down the dirt and grime.
Classic cars and pressure washers: You need to be a little more careful with classic cars when using a pressure washer. Most domestic electric machines are fine, but don't go using any petrol professional machines as the chance of damage due to their higher pressure is there. With our years of using many different machines, we feel you will want between an electric machine that is between 1800 PSI, to a max of 2200 PSI.
Things to take note of when removing the snow foam are any rubber seals, as they aren't all exactly water tight. Be sure to keep the pressure washer a good 50cm to 1m distance away from these seals so you don't damage them or spray water inside the cabin, boot or other areas you don't want pressurised water to go. Likewise, be careful around all the lights for the same reason, as water can get past the seals and affect how they work, even more so if they are the old Lucas (Prince of darkness) electrics! Also keep that same 50cm+ distance from all grill emblems, trims, stripes and stickers, badges and any older, delicate paint as well.
For a more detailed break down of all things snow foam related, see our excellent guide here:
The hand wash
After snow foaming, check to see if you need to move onto a 2 bucket hand wash. At the lower sills of the front or rear wheel, run your finger along the paint - if there's dirt there, then it's time to give it a hand wash.
Get your Wash and Rinse buckets ready and 3/4 fill them with clean water. Add 50ml, or 1 capful of Wax Wash to your Wash bucket, then once again, froth it up with the pressure washer to get a small head of suds, and enjoy the banana milkshake smell.
We recommend Wax Wash for older vehicles because it has the best anti rust additives of all our washes. This makes it the most suitable for older metal to help prevent rusting from water sitting in areas you can't see. Wax Wash also contains ingredients that are good for exterior plastics and rubbers.
Grab your choice of washing implement (we're using the Shagtastic Wash Pad here, and the Shagamittastic Wash Mitt for the lower sections of doors and the front grille area), dunk it into the Rinse bucket and squeeze it out to ensure there's no dirt or grime in it, then go into your Wash bucket and gently squeeze it to load it up with wash suds.
Starting at the top of the car, wash in straight lines, flipping the wash tool as needed, going back to the Rinse bucket after each small section to rinse any dirt from the wash tool, then go back into your clean Wash water and do the next section until the whole car is done. Do the lower sections of the doors last, and any other sections that are quite dirty.
If you want to clean in and around badges, emblems etc, do so now after the car has been washed. Using a Foursome brush, dip it into some of the wash suds (use some Orange Agent if you wish, or if you require stronger cleaning), and gently work the area you wish to clean with the brush, then rinse the area thoroughly to remove all of the product and wash suds.
If you're washing in the sun, we'd recommend to wash small sections of the car at a time (1 door, for example), then rinse that panel off before moving onto the next panel, so that the Wax Wash doesn't dry on the paint. Once you've washed the whole car, take the end off the hose, or use a small attachment like we have here to flood the water off the panels, making it easier and quicker to dry the car.
Once you're done, empty the buckets and give them a good rinse out. You don't want to be storing any wash water for use later!
To see a detailed explanation on this safe wash method, see our guide here:
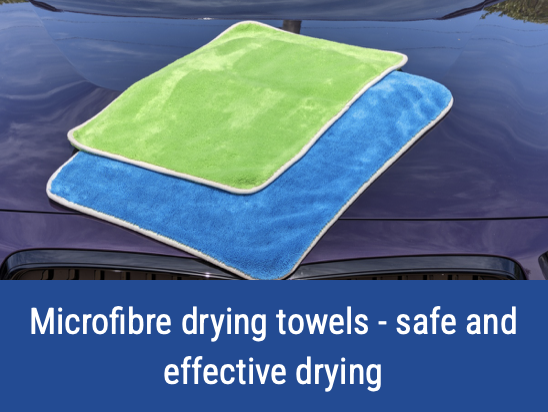
Safe drying
If you have any roof racks/roof rails or other intricate bits around your classic car, it's a good idea to use a small hand held blower with a non scratch rubber tip on it to blow all the water out of the nooks and crannies around the car.
You might need to do this again after you've dried the car, but it's always best to start with that to remove the bulk of that hiding water. Once you've finished with the blower, it's time to dry the paint with either the Twisted Pro Sucker or The Big Green Sucker and Boss Gloss. The Boss Gloss acts as a drying aid by adding lubrication to the cloth, helping the cloth suck water off the surface more efficiently, leaving a perfect finish and also leaving a really nice shine on the paint. The Boss Gloss won't clog up in the fibres of the cloth like other sealants and detailing sprays can, so it's the only one from our range that we recommend to use with the Twisted Pro Sucker or The Big Green Sucker.
Drape the Twisted Pro Sucker or The Big Green Sucker over your out stretched arm and spray 4-6 sprays of Boss Gloss into each side of the cloth, then starting at the top of the car and working your way down, begin drying the car. You'll find both cloths will dry the whole car without the need to wring the cloths out. Once you've dried the whole car, pop the cloth into the Microfibre bucket, ready to take to the washing machine after you've finished detailing, to wash with our Microfibre Wash, to keep it performing like new.
After drying the paint, you can then dry the door jambs, wheels and tyres. Grab a Twisted Little Sucker or Dirty Deeds cloth, spray a few sprays of Boss Gloss into the cloth and dry the door jambs and wheels safely.
It's a good idea to take the car for a quick drive around the block to get any hidden water out of nooks and crannies, to help prevent rust forming. This is particularly important to do if the car is going into a shed to be stored for a long period of time. We personally like to put the cars away dirty after a weekend drive and give them a wash before we go for the next drive, so they'll get a good chance to dry out on the run.
Once again, throw your dirty cloth in the Microfibre bucket, ready to wash.

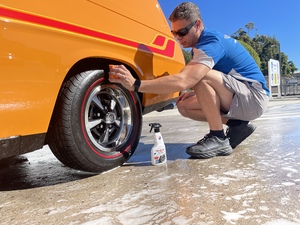
Dressing the tyres
Now it's time to get the tyres looking nice. Nothing too shiny or over the top, just a lovely mid sheen like our Tyre Sheen gives.
The All Sorts applicator is great for applying our Tyre Sheen. With the tyres now dry and preferably out of direct sun, spray a few sprays of Tyre Sheen straight into the All Sorts applicator, then apply to the rubber and wipe it over the tyre face until a nice and uniform finish is achieved. For a shinier finish, you can apply a second coat of Tyre Sheen after allowing the first coat a few minutes to bond.
No need to wash the All Sorts applicator out, simply store it in a plastic bag of some sort until the next time you wish to use it.
Glass cleaning
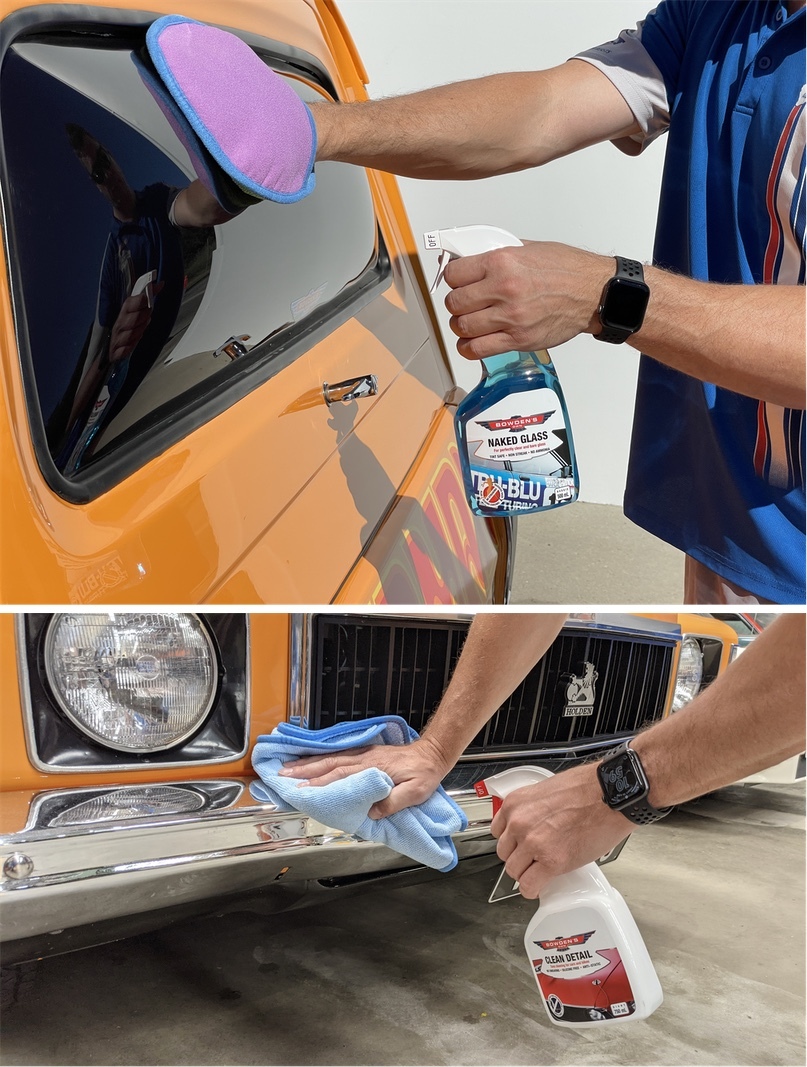
For the best glass cleaning experience, we recommend to use our Naked Glass and our specialised glass cleaning cloth; the Inta-Mitt.
Spray 1-2 sprays only of Naked Glass into the green side of the Inta-Mitt (if it's cold, use less, and if it's warmer, you may need to use a little more Naked Glass). Gently wipe up and down, then back and forth over the glass until you see any marks in the glass disappear and the Naked Glass start to flash off. Turn the Inta-Mitt to the purple side and gently buff over the entire glass surface to remove any remaining product and to remove any haze from the glass.
If the glass is very dirty, or you have stubborn marks on there, you can spray the Naked Glass directly onto the glass, leave it for 10-15 seconds before using the Inta-Mitt in the same way as described above.
For a more in-depth look at glass cleaning and the Inta-Mitt, see our article below:

Chrome, alloy and stainless trims
One of the best things about classic cars is the use of chrome, alloy and various stainless steel trims all over them - something you don't see too much in many modern cars anymore. We have a good purpose specific grouping of gear to care for these areas depending on their condition.
Chrome
This mirror reflective hard metal plating is beautiful to look at, but it needs the right products to look after it properly. If the chrome is in good condition it can be as simple as just wiping it over with our Naked Glass or Clean Detail sprays and a Big Softie cloth, then seal it with any of our carnauba waxes or Fully Slick.
If it's looking a little dull or has any light pitting on it, you can use the fine grade Shiny Stuff metal polishing paste on it. Being a fine grade abrasive, you don't have to worry about it damaging or leaving polishing scratches in the finish. This is important to know as they are impossible to remove if an aggressive metal polish was ever used.
To use it's pretty simple - rub on a small 10 cent piece sized dollop into a Dirty Deeds low pile microfibre cloth and then gently buff it into a section of the chrome surface. It doesn't take much time for it to work its magic - 10 to 20 seconds is the most it should ever need. Then buff off with a seperate, clean Dirty Deeds cloth to reveal a stunning shine.
Alloy and Stainless
These are softer, porous metals, and being so they tend to oxidise and lose their shine a bit more than chrome ever will. But, due to this they can respond very well to polishing and even be brought back from a pretty bad state with a little bit of work.
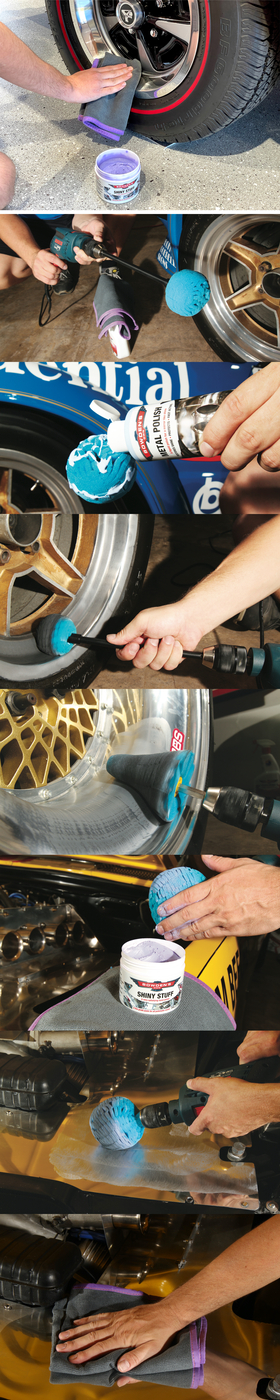
If they are in pretty good condition, with slight dulling, you can use our Shiny Stuff fine grade paste by hand, exactly as we would on the chrome, like we do on the Sandman's stainless trim rings here. As Shiny Stuff leaves a nice seal to the metal surface, it will help keep the shine for longer after its use.
If they are a little worse off, or you have larger areas (like alloy wheels) to do, you can use the Shiny Stuff or our medium grade liquid Metal Polish with our Quick Cone foam or our large or small foam Blue Balls in an electric drill to do the hard work for you. These foam tools are made from a high quality German foam, that we chose as they polish better and last longer than other foam tools we had used in the past for this sort of job.
The Quick Cone is ideal for nearly all outer wheels (especially with a deeper dish) and wide, flatter surfaces. The larger 100mm wide Big Daddy Blue Ball is ideal for larger curved and rounded areas & checker plate, while the 70mm wide Mini Me Blue Ball is for intricate and tricky areas you find all over classic cars - even inner wheels if your spokes are wide enough to allow it in. The Mini Me also comes with a plastic coated extension rod that will prevent it ever damaging spokes when working in those areas, as well as giving you a nice place to hold when you're using it.
To use, lightly coat the cone or balls foam surface that will come into contact with the metal surface. Then, slowly work over the areas on the slowest speed of the drill so not to splatter the polish everywhere. Then, run the drill at 1200 rpm (slow to medium speed) and apply medium pressure and slowly work back and forth over the area for up to a minute. You will notice black residue coming off as you work it, which is normal as it's polishing off the oxidation that hides the shine on the metal surface. Be very cautious around any rough edges and protruding parts to not catch and tear off the foam tabs on these tools.
Turn the machine off before removing from the surface, then get a clean Dirty Deeds microfibre cloth and wipe away the black residue while it's still fresh and wet. Once you are happy with the shine, continue to the next section, or repeat the process once more with the same technique. If you notice any micro-scoring marks on softer metals (even with Shiny Stuff), slow the drill speed down and work it in for just half the amount of time.
If you have any intricate parts that gets polish residue on them, you can come back after and spray some Clean Detail into those areas and agititate it away with a small round detailing brush, then wipe away with a clean Dirty Deeds cloth. If you have used the liquid Metal Polish, a mighty fine party trick is how its residue washes away with just water, something we like when it's been used on intricate wheels, as it all comes off after a good clean with the wheel brushes before washing the car, like we mention in the wheel cleaning section above - all very nice and easy.
After you are all done, hand wash the cones or balls in the sink with warm water and pouring 30ml of our Microfibre Wash into the foam, before gently massaging it through the foam by hand. If you have used the Metal Polish liquid, try washing it this same way with just warm water (serious, it's a thing with this formula making it wash off super easy from your hands). After this, rinse under the tap with fresh water and then squeeze the water out and leave to air dry. Wash the Dirty Deeds microfibre cloths separate to other cloths in the machine.
Both of our metal polishes will seal the metal surface, to keep the shine there a lot longer. Like all car care, regular maintenance is the key to keeping them looking great and easy to clean. So, every 4 to 6 months, or when you feel they need a spruce up, just give the polishable metals a gentle wipe over with the Shiny Stuff polish by hand to quickly bring back a lovely shine and keep the surface nicely sealed.
Engine bay detailing
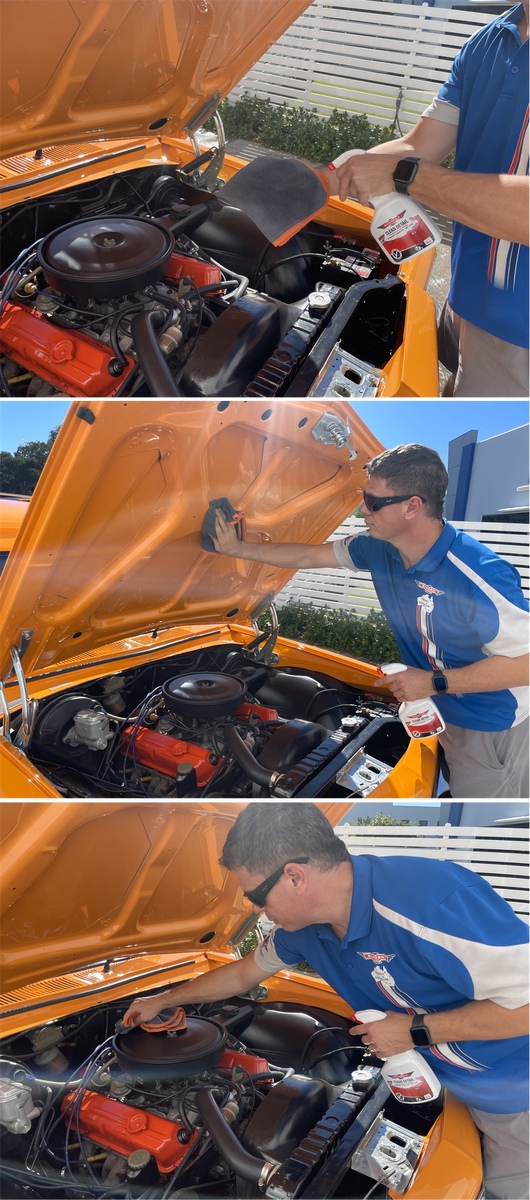
It's always a good idea to quickly give the engine bay a wipe down to remove any water that's managed to get itself under there, and it's a good chance to clean up any areas before they become an issue!
A really quick and easy way to do this, is with our Clean Detail spray. Clean Detail is great for fast and effective cleaning wihout the need for water. Use it on any painted areas, like under the bonnet, firewall, or any non shiny surfaces like the orginal satin black inside the engine bay of our Sandman here.
Spray 6-8 sprays of Clean Detail into a clean and folded Dirty Deeds cloth, then gently wipe over any dirt, light grease or grime, flipping the cloth and adding more Clean Detail as needed. No need to use any water to clean up after this, as long as the cloth you are using is clean it will flash off to leave a perfect, clean finish.
For dirtier engine bays
If your engine has not seen much love and has a heavier build up of grime, then we need to wash with water. You would do this job first, before you wash the car. Unlike modern cars, the engine bay electricals are not well sealed so you cannot simply get the pressure washer and snow foam away. Cover the distributer and alternator with plastic bags, as well as other electricals you cannot keep the water away from. Also cover the air cleaner and air intakes.
Get the hose and rinse down the first section you wish to clean, then spray it with the Orange Agent all purpose cleaner and agitiate all over the area with the suitable brush from our foursome set of round detialing brushes. The Pouncer brush for the more intricate areas and larger Big Boy Brett for the larger open areas. Then, rinse the area down with the hose, making sure the Orange Agent never dries, especially on rubber hoses - where the technique is to spray on, quickly agitiate and then rinse off right after, one hose at a time.
Once all done, get a small air blower and use it with a few dry microfibre cloths (again we use the Dirty Deeds cloths) to wipe down and remove the water, especially if it's sitting in engine crevices like around the manifold.
Once you've done all of this, it's time to prepare the paint for some protection. There are a few steps here for the best possible finish, so if you need to decontaminate and protect the paint, the next steps are for you.
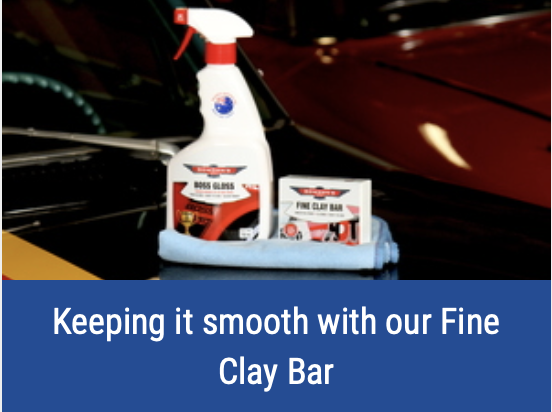
Paint preparation - Clay Bar
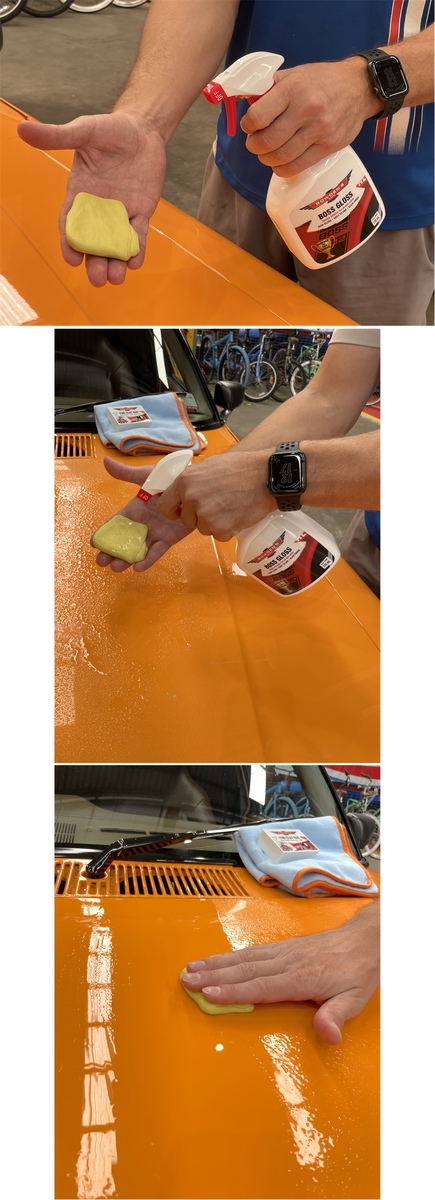
If your paint ever feels slightly rough and not perfectly smooth, it could most likely do with a clay. For this job, you preferably want the car inside, out of sunlight and in an area that's reasonably dust free - in a garage would be perfect. You could have used our Claying Rubber no problems at the end of the wash stages, as it likes to be used with any of our car washes at a double solution. However, for the Sandman we're going to use the Fine Clay Bar with the Boss Gloss as we find it better to use indoors in a garage situation and it's an enjoyable way to start the process with such a nice car.
First thing to do is remove the Fine Clay Bar from its packaging and knead it into a nice, flat piece. Spray a generous amount of Boss Gloss onto a section of the car (a section for us here is 1/4 of the bonnet, so break the bonnet up into 4 parts and do one part at a time). Then also spray a couple sprays of Boss Gloss directly into the Fine Clay Bar to ensure there will be no dry spots when you put the clay onto the paint.
Applying little to no pressure (let the clay do the work), gently work the clay back and forth, then up and down over the lubricated area. You should be able to feel and hear the clay working if there's contamination on the paint, and as you glide over it, it will start to become smoother. After doing a small section, knead the clay so that the side you were just using doesn't touch the paint again, then use some more Boss Gloss for lubrication and continue. Periodically wipe the Boss Gloss up after doing a section, with a clean and dry Big Softie cloth.
Continue around the entire car using this method, wiping the Boss Gloss off as you go. Take your time and be patient and methodical. See the link below for a fully detailed article on how to use our Fine Clay Bar:

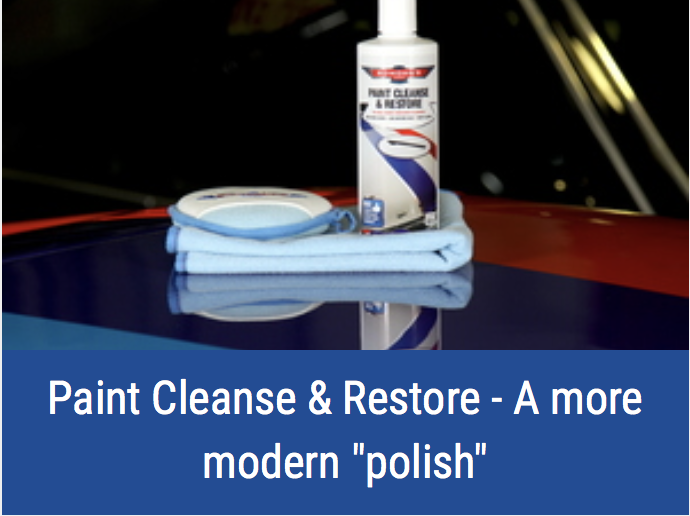
Paint Cleanse & Restore
 With the clay bar done now, the next thing you want to do is to deep clean the pores of the paint to prepare the surface for the Beaut Beads wax. Paint Cleanse & Restore gets deep into the undulations of the paint and cleans deep embedded dirt, leaving a perfectly clean finish, ready for waxes and sealants.
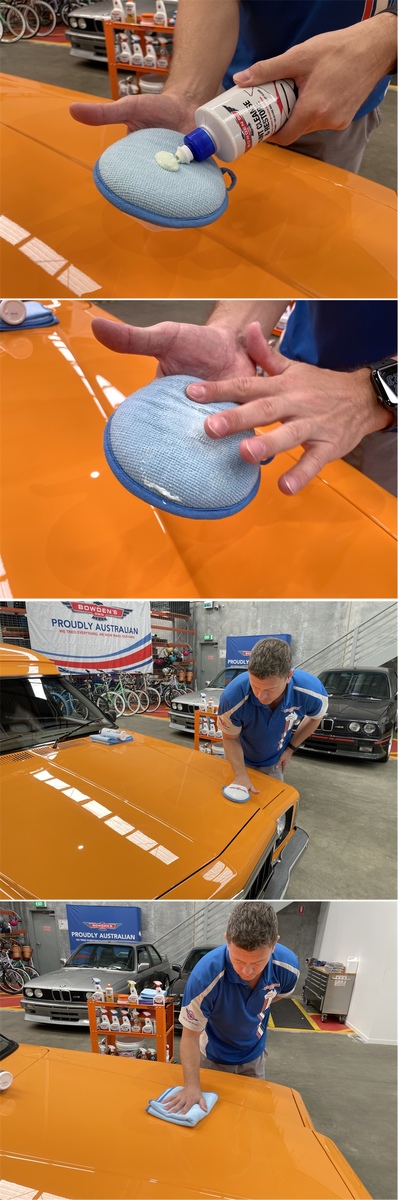
Grab the Paint Cleanse & Restore and a Circle Work applicator pad. Shake the bottle well and add a 50c sized dollop of the Paint Cleanse & Restore to the centre of the pad, and wipe it in to the surface of the pad with your finger, to ensure there are no dry spots for starting the process.
Working on smaller sections at a time (similar to the clay bar - break the bonnet up into 4 parts, for example). Using some gentle pressure, work the product into the paint with the pad in an up and down motion, then side to side over the same section, to ensure you don't miss any bits. You'll notice the Paint Cleanse & Restore will begin to go opaque, before going clear after a short work time. Once it's gone clear, it's done all the cleaning it's going to do, so it's time to wipe off.
Using a clean, dry and folded Big Softie cloth (folded to the low pile side), gently buff off the remaining Paint Cleanse & Restore residue, flipping the cloth to a fresh side as needed.
For the next section, and subsequent sections, only add a small amount more of the Paint Cleanse & Restore as needed (usually a smaller 5c or 10c sized dollop will be needed for each new section).
If you have any problems removing the Paint Cleanse & Restore with the cloth after application, spray 1-2 sprays of Boss Gloss straight onto the part that is difficult to remove, then buff off immediately with a Big Softie cloth and this will assist in removing any residue that is difficult.
Click the link below for a fully detailed guide on Paint Cleanse & Restore, including a helpful how-to video:
Carnauba Waxes, perfect for classic cars with all paint types
After you have finished the paint cleansing, we have three different types of carnauba waxes to finish it off with, as in our opinion, and what we have seen and tested, waxes still give the most stunning glow and shine of any car care product. They work on all paint types, from orginal single stage paints, to modern resprayed clear coats. Which wax type you choose to use is all dependant on your own personal preference.
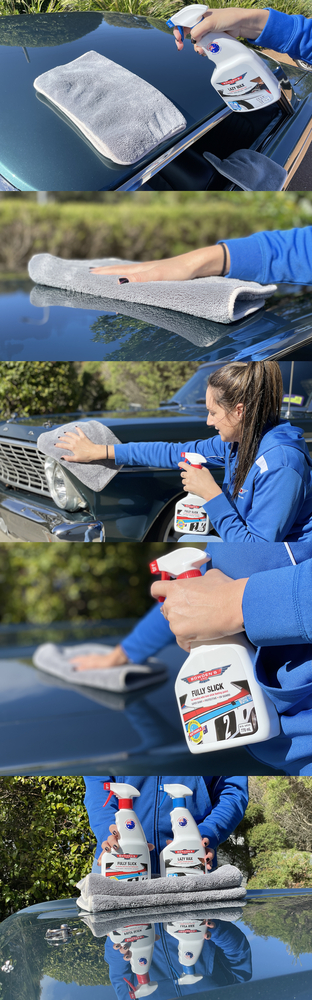
The first is the very easiest to use - the Lazy Wax spray - its name gives away how easy it is! This carnauba spray wax gives a beautiful shine, especially on metallic and darker coloured cars. Use it by spraying 8 to 10 times over one side of a folded plush Drop Bear cloth, then apply back and forth evenly over a smaller section, like 1/2 a bonnet, one door etc. Then, buff off right after applying with a 2nd clean and dry Drop Bear cloth, for a lovely smooth and shiny finish. Top up the same wet side of the Drop Bear with two more sprays of Lazy Wax and move onto the next section, continuing the same application and buff off process till the vehicle is done.
We also have the Carnauba Body Wax liquid cream, which has the same protection and shine as the Lazy Wax does, but is a little more work to use, but we have it there if you like to use a liquid wax. Use it with a microfibre applicator pad, spreading it right around the pad so there are no dry spots. Now apply to a smaller section of the vehicle, like 1/2 a bonnet or a door etc. Then, buff it off with the low pile side of a Big Softie cloth right after application. Add another small dollop of the wax to the applicator when it feels like it is starting to dry out. Do the whole car this way till completed.
On either of these waxes above you can add more protection by sealing them 3 to 4 hours later with our Fully Slick water based synthetic spray sealant. We found that by adding a layer of this over the waxes above made them last up to double the time on the car (waxes are more organic in their nature, so they break down a bit faster than synthetics), plus it leaves the slickest feeling finish of anything in our range, which is something that many car fanatics just love. Use it the exact same way you do the Lazy Wax with the two Drop Bear cloths above.
Beaut Beads paste wax
The above carnauba waxes are great, very cost effective products and will appease most classic car enthusiasts, but if you want to take it to the next level, with the best level of depth and shine from our entire range, as well as great super hydrophobic protection, we have our high end carnauba paste wax - Beaut Beads.
This is something our chemist formulated over 11 months with 57 different versions of much trial and error. This process was done to create a modern take on a classic favourite, that eliminated the numerous issues we had with other high end paste waxes in the past (hard to apply, even harder to remove, not that protective and continual re-hazing or ghosting in our humid Australian conditions). Also to show fellow car fanatics that carnauba waxes are far from a dead medium in car care. This one is a labourous handcrafted blend, with a lot of fairly exotic wanky ingredients, making it purely for the hardcore fanatical car lovers or traditionalists who love the "romance" of using a qualty paste wax - basically, for people just like us. You can read our full story of making this wax here.
Due to the different set of ingredients used to make this paste wax, you use it a little bit different to our other two waxes as we will run through below.
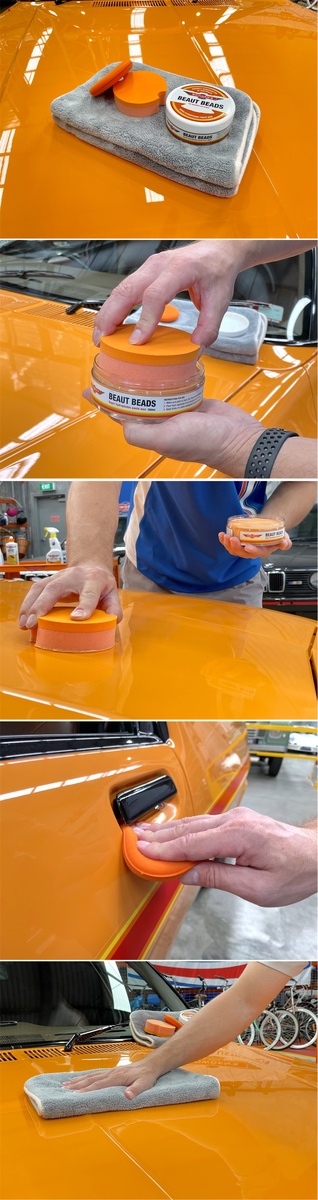
Applying the paste wax
With the car now totally clean and free from contamination and oils, it's time to seal the paint.
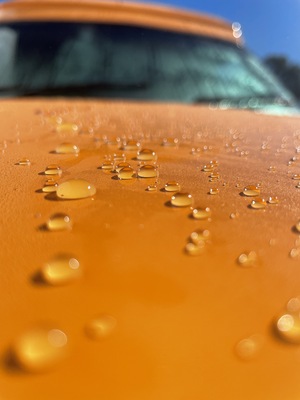
Beaut Beads is a high end paste wax that is super easy to apply and remove, creates a fantastic glow and if you missed it above, gives remarkable depth and shine to your paint, as well as excellent water beading and self cleaning properties.
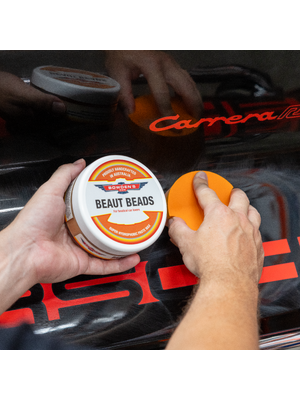
Grab your Beaut Beads jar and 2 applicators. Place the larger applicator into the jar with the soft foam side facing down (this will be your application side). Gently twist the applicator side to side a few times, to get some wax on the applicator. Start on the bonnet if it's preferred (we did here on the Sandman), then use the applicator in an up and down direction in a small section, then go over the same section in a side to side motion (the opposite way) to ensure complete coverage of the area with the wax. When you apply the Beaut Beads paste wax, less is often times more - the thinner and more evenly you can apply the product, the better the result you will get, and your overall experience will be a lot nicer (having said that, even if you pile it on thick, this wax is still an absolute dream to remove).
For any more intricate areas like around door handles, wing mirrors, grills, badges etc, there is a smaller foam applicator in the Beaut Beads box that is perfect for these areas.
Avoid getting Beaut Beads on any exterior plastics, as it can leave white marks. If you notice this, use the Flash Prep and a cloth straight away to remove it. If you miss any bits and need to clean it up later, use our Orange Agent all purpose cleaner and a brush like our Plush Brush, then use some Vinyl Revival to help protect the plastics if they're in good condition, or use our Mr Black trim restorer if they're faded and need some more attention.
Go around and apply Beaut Beads to the entire car, then leave it on the car to cure and bond for 20 minutes. After this cure time, gently buff off the remaining residue with a Drop Bear cloth, flipping and turning the cloth often as you go. If you notice the cloth start to fill up with wax, switch to a fresh cloth. We found that the Drop Bear was the nicest cloth from our range to use for the final removal of the Beaut Beads paste wax - it's a 960 GSM, super plush cloth, perfect for this job.
Leave the wax now to cure and harden for at least 4 to 5 hours before getting it wet or applying any other products over the wax. Ideally it should cure and harden for 12 hours (overnight) at least before washing the car again.
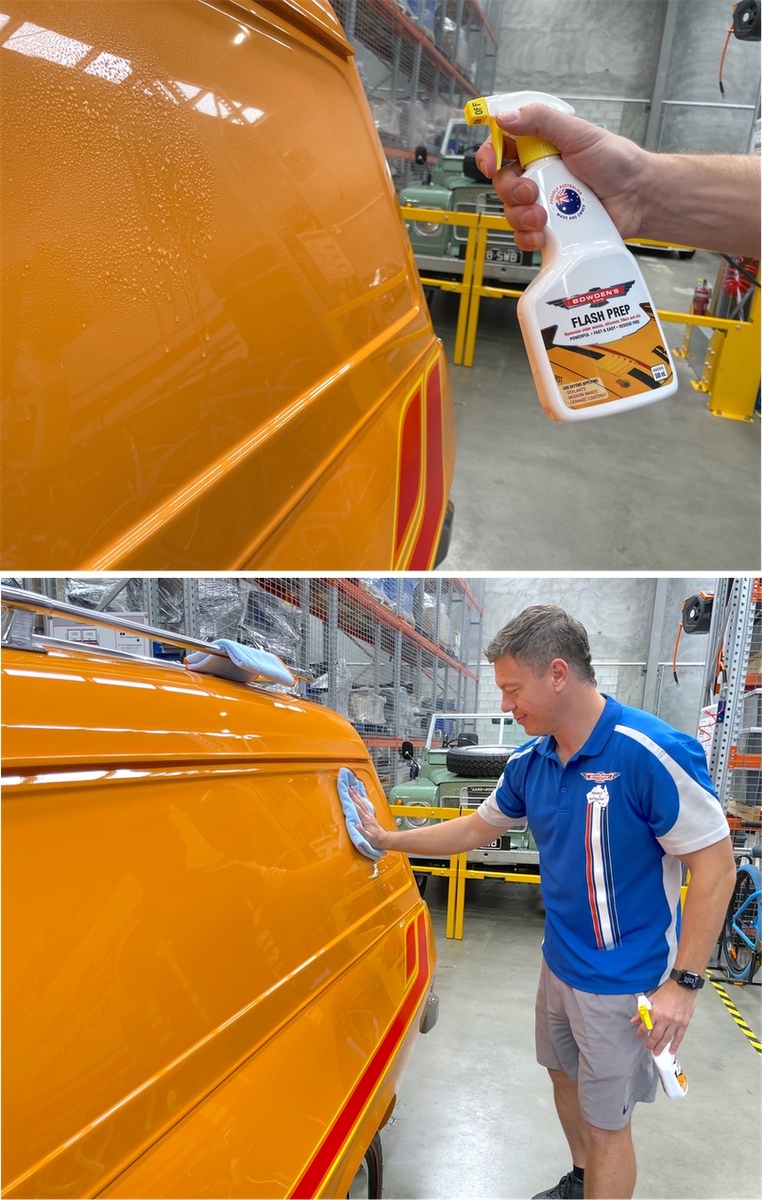
Before applying Beaut Beads - Flash Prep
The Paint Cleanse & Restore is excellent for getting rid of deep embedded dirt in the paint and due to the way it works with its cleaning oils, it does leave some oil residue on the surface that will need to be removed for the paint to be perfectly clean and bare, ready for the final wax or sealants you're going to use. If the paint is completely clean and bare, free from dirt, grime, contamination and oils, the wax and sealants will work a lot better, and last longer.
Flash Prep is our preparation spray that removes polishing oils, light dirt and grime and flashes off for an extremely nice and clean surface. This surface is perfect and critical for applying Beaut Beads, (as well as our Bead Machine spray selant or even a professional ceramic coating). It is not however needed for our Lazy Wax, Carnauba Body Wax or Fully Slick.
Section at a time (1/4 of a bonnet or so, the same as before), spray Flash Prep liberally, directly onto the surface, then immediately wipe it into the surface with a folded Big Softie cloth, folded to the low pile side. Once it's been wiped in adequately to remove remaining oil residue, use a separate dry and clean Big Softie cloth to remove any remaining trailing residue. Flash Prep will flash off to leave a beautiful finish, and is a very easy and forgiving product to use. Continue around the entire car using this method, but spray less product onto the paint as you go around the car, to avoid saturating your lead application cloth. Change to a fresh secondary cloth if needed.
What next? Further protection and maintenance
The Beaut Beads wax and our Bead Machine spray sealant share some similar super hydrophobic chemistry, and so we find they will bond and work together very nicely. Once the wax has cured, you can add a layer of Bead Machine spray sealant over the top to help further protect the wax and improve its already great longevity, if you wish. But for many classics, this might be a bit of an overkill unless you are going for a long interstate road trip. You can also use Bead Machine as a spray detailer on the Beaut Beads too if you wish, for super quick top ups of shine before a car show or the like.
If your classic is one that doesn't get driven a lot, you would use Beaut Beads on the paint once or twice a year, the night before a car show or when you notice the water beading start to diminish. Remember to still use the Flash Prep first and then apply the wax.
With the Beaut Beads wax on the paint, the long term maintenance will become easy, only needing a few steps to keep it looking great:
- Snow foam (Snow Job or Yellow Snow are pH neutral and suitable - Mega Snow can affect/remove the wax on the paint).
- 3 bucket wash with your favourite wash (Wax Wash is recommended for older metal cars). NOTE: Wax Wash can temporarily mask the hydrophobic nature of waxes and sealants as it's a hydrophilic formula (think opposite of beading). Once the wax in the Wax Wash has dried and cured on the surface, the super hydrophobic nature of Beaut Beads will return.
- Dry with The Big Green Sucker and Boss Gloss, or with our dedicated drying aid; After Glow. After Glow will not affect the super hydrophobic nature of the paste wax, or any other sealants.
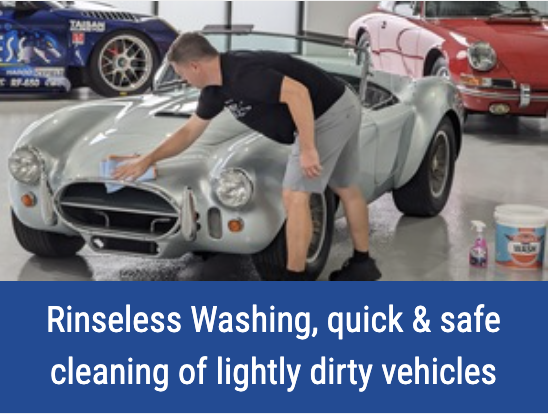
Washing without a hose - rinseless washing
Perfect for those classics that you don't like to get wet for fear of rust forming in places you can't see, or you just prefer to not wash it, our solution for rinseless washing is here; Dry Spell. Rinseless washing is ideal in many different circumstances, like for apartment dwellers who don’t have access to a hose or wash bay, people in water restricted areas, classic car owners, or simply for a mid-week, or pre car show maintenance clean to quickly bring back the shine to your garaged friend. We find it takes us a quarter of the time with this system over traditional washing with a hose.
Begin by adding 8 litres of water into a 15 litre bucket, or the top of the Bowden’s Own logo on our buckets. Pour in 40mL of Dry Spell, quickly agitate, then drown 6-8 Plushcious cloths in the solution. The number of cloths you’ll need is dictated by the size of what you’re cleaning. For the pre-spray bottle or our Frother pump sprayer, mix up a stronger solution with good quality water at a ratio of 40 to one.
Pre spray the panels one at a time and allow the Dry Spell pre mix to penetrate for 2 minutes. Grab a cloth from the dry spell bucket, wring it out till it's damp, and fold it into quarters. Clean the sprayed section by dragging the cloth in one direction, rolling up the front edge of the cloth as you go. Flip or fold the cloth to a clean side for the next area. Use a new cloth after using all 8 sides, and store the used cloth in a separate bucket.
Dry the cleaned panel immediately using either The Big Green Sucker with Boss Gloss or our personal favourite; After Glow, for a perfect, anti-static finish. Both products add to the slick and shiny finish created by Dry Spell.
For even more info on Dry Spell, including what it is, and how to use it, see our detailed guide here:
Finishing up + any questions?
Once you've completed the job, be sure to throw all of your microfibre cloths into the washing machine with some of our Microfibre Wash, to help loosen and remove the wax and other detailing chemicals from the microfibre. Any Circle Work applicators that were used for the Paint Cleanse & Restore will need to be pre soaked/washed with some warm water and a tiny amount of Microfibre Wash, to help loosen the product out of the microfibre pad. See our detailed microfibre care guide here for more information:
All of the products used in this article can be purchased from your local Bowden's Own retailer - autObarn, Supercheap Auto, Repco and many others. To find your closest retailer, click the link here - Find your closest stockist.
If you have any more questions about any of the products used in this guide, or any other products in our product range, give us a call on 1800 351 308, or send an email - info@bowdensown.com.au
Happy detailing,
Brett Hobbs.

Products Used
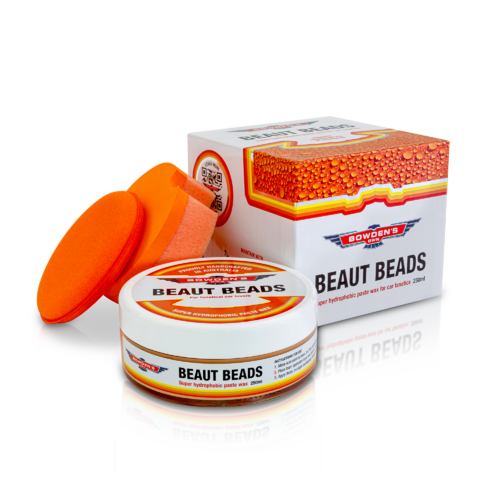
Beaut Beads Paste Wax
Hand-crafted, super wanky and hydrophobic carnauba paste wax, for the more devout car fanatics.
$129.99