Cleaning and caring for your Caravan
The off-road caravan market has never been as popular, allowing us to get out and enjoy the beautiful stretches of wilderness that our great land has to offer.
Of course, once you get home from your great lap, you're left with a very dirty van. Fortunately, our range of car care works just as well on caravans as it does on cars, giving you a fun and easy way to clean it up ready for your next adventure.
This article will run you through our system for cleaning a caravan. For more in-depth articles on the topics we touch on, you can find our full list of guides here - https://www.bowdensown.com.au/guides/exterior-care
Gear you will need
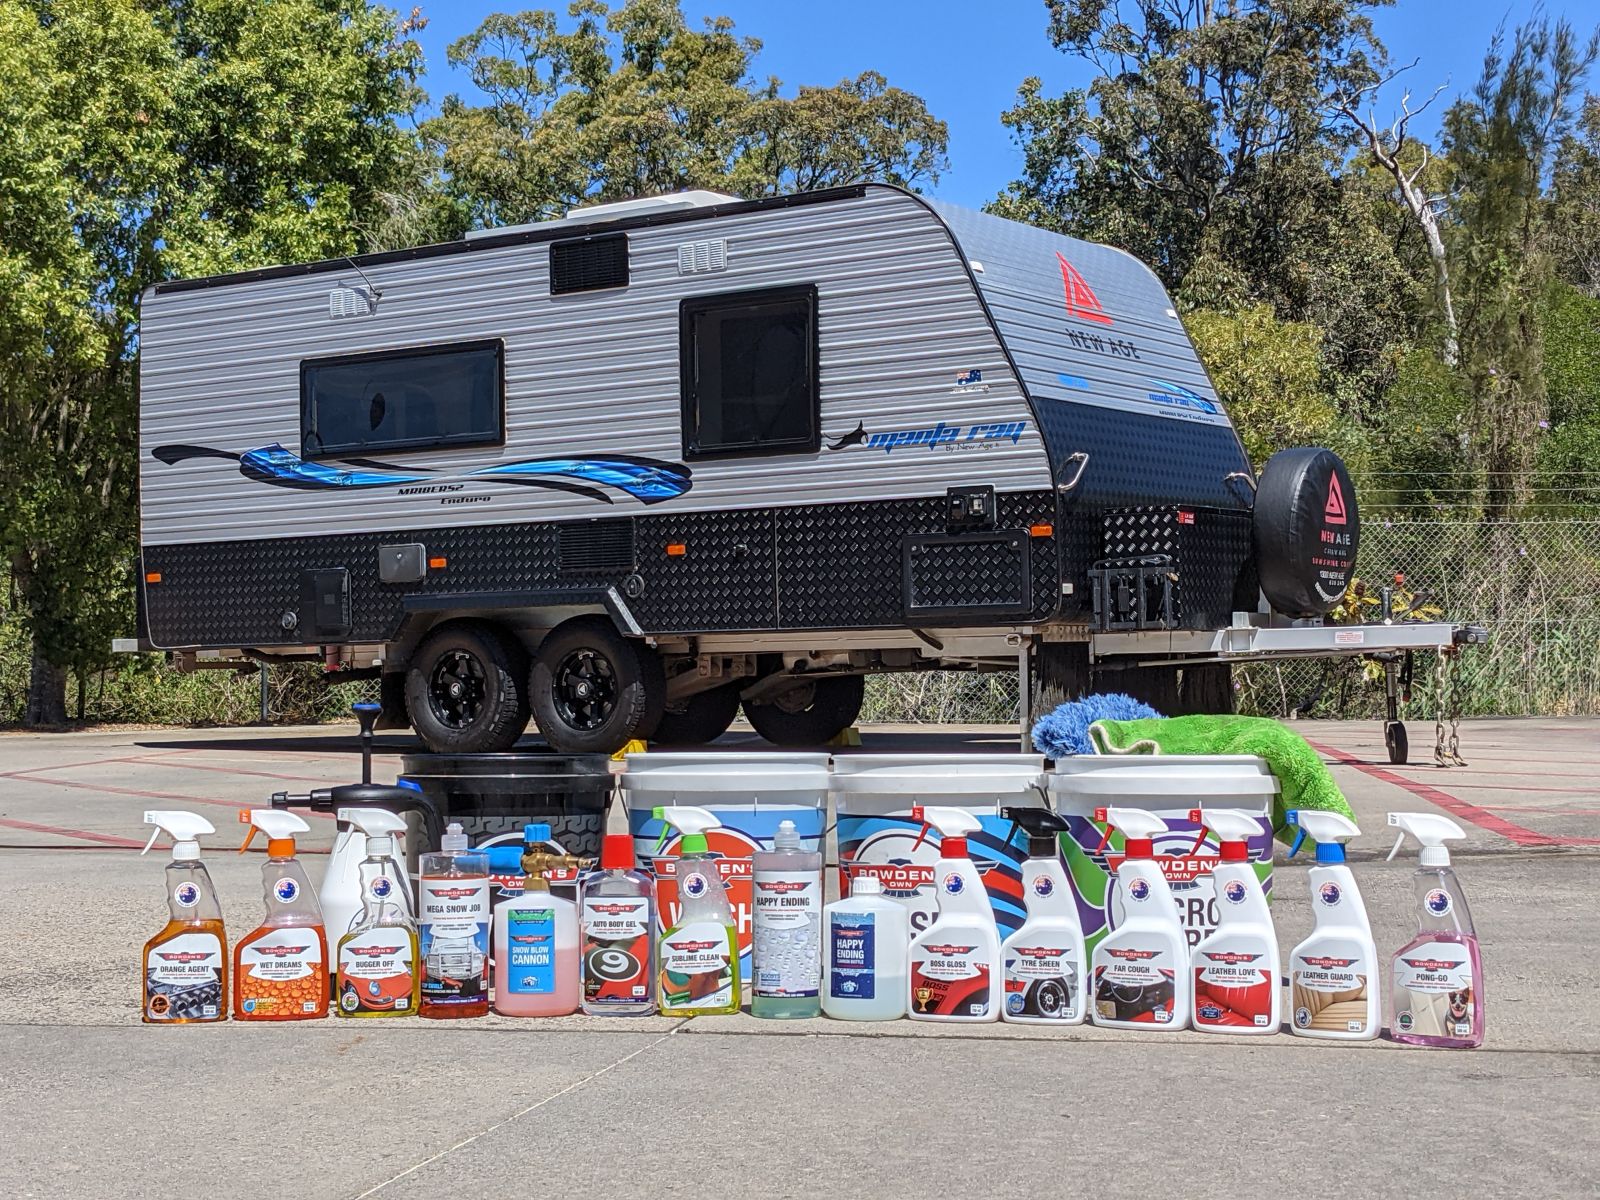
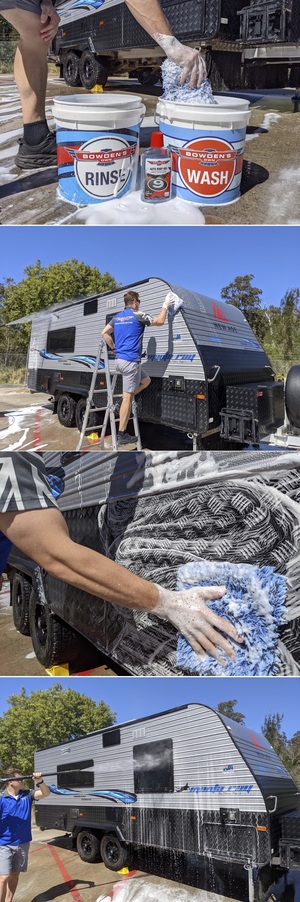
- 3 Buckets - Wash, Rinse, Wheels + Great Barrier Thingy x 2.
- Little Chubby, Big Boy Brett and the Big Black One brushes.
- Orange Agent / Wheely Clean.
- Wet Dreams.
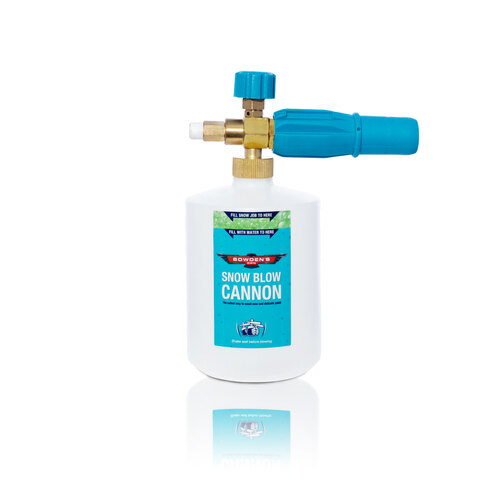
- Snow Job / Mega Snow Job + Snow Blow Cannon.
- Auto Body Gel.
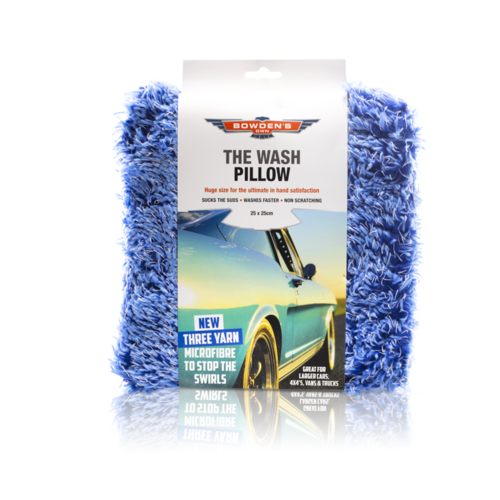
- The Wash Pillow, Shagtastic Wash Pad or Shagamittastic Wash Mitt.
- Bugger Off + Debugger Cloth.
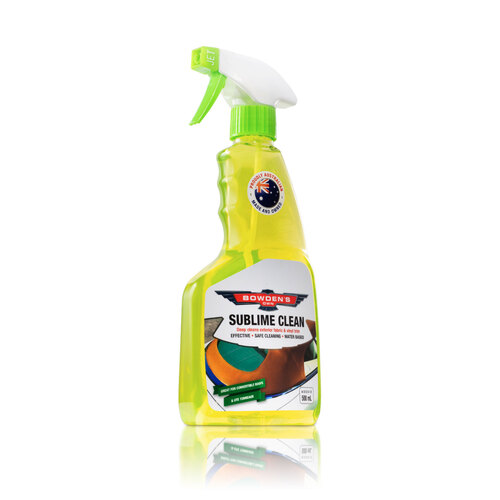
- Sublime Clean.
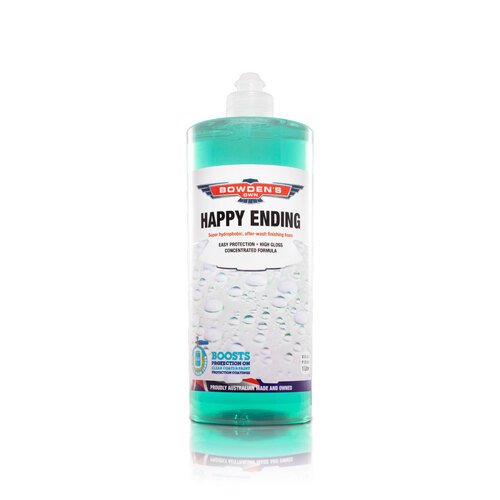
- Happy Ending + Happy Ending Cannon Bottle.
- Big Green Sucker + Boss Gloss.
- Tyre Sheen + All Sorts applicator.
- Big Softie cloths.
- Dirty Deeds cloths.
- Far Cough, Leather Love and Leather Guard, Pong-Go.
- Microfibre Wash.
Safety first
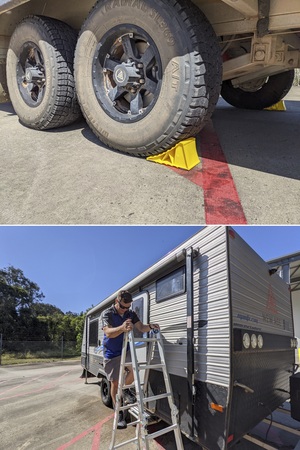
As with everything you do, safety is critical. Make sure you are working on a level, clear ground, and you have a second person nearby to help with ladders and spotting. Also, make sure any electrical cables are kept well away from water, and that you have switched off what you can on the inside of the van.
Make sure to apply the handbrake and chock the wheels to prevent the caravan from rolling away, then put down any stabilizer legs the van is equipped with to keep it stable and level.
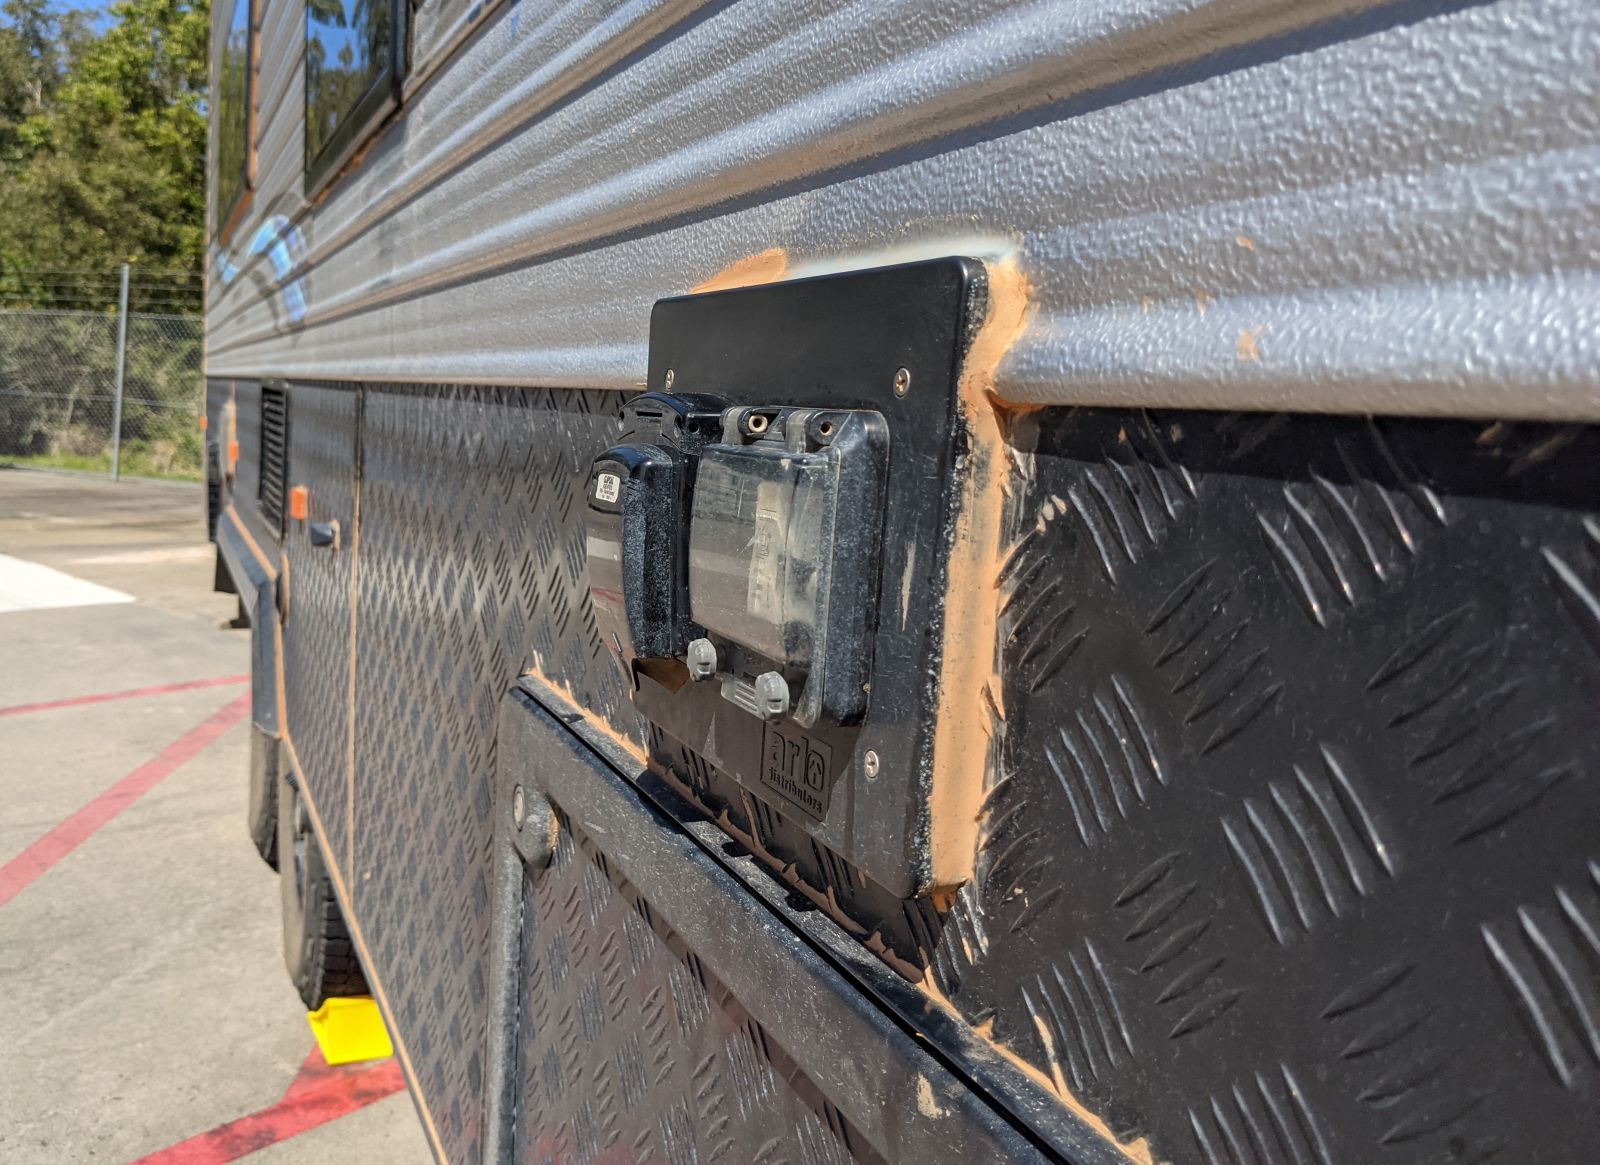
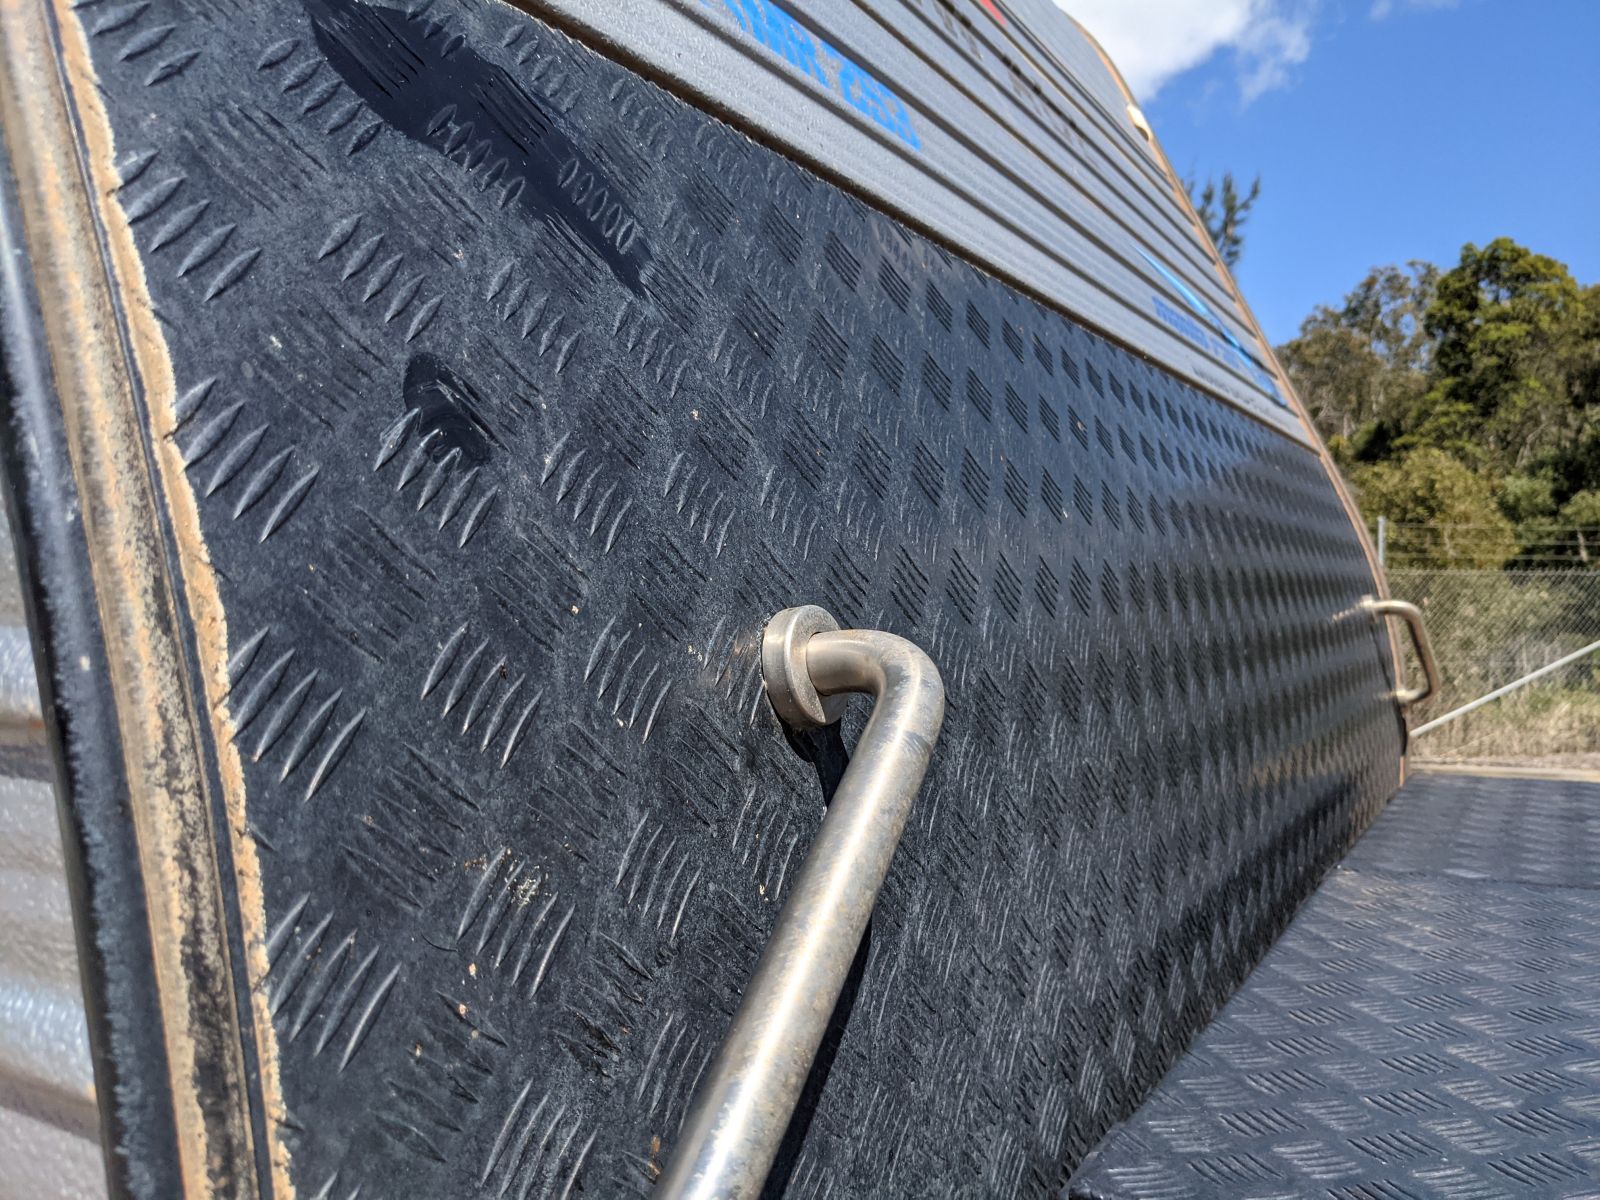
You'll find a multitude of different surfaces on modern caravans; fibreglass, perspex, powder coat, aluminium, steel, vinyl, rubber & plastic just to name a few! The poorly sealed fibreglass of 20 years ago had a tendency to yellow with the use of older car care products - fortunately, our range is totally safe to use inside and outside of your van. Powdercoated materials are always ones to be cautious when cleaning, as they are usually porous which could cause staining if you allow anything to dry on them. Most caravans would have checker plate lining on the lower edges which are usually powdercoated.
We like to use a pressure washer for our detailing as it's much more effective and faster, but be conscious of keeping the gun well away from any vents or electrical components, and don't get too close to any silicone seams or edging to avoid damage. NEVER spray water directly into any of the vents, these often lead directly inside cupboards or behind fridges.
Wheels and undercarriage
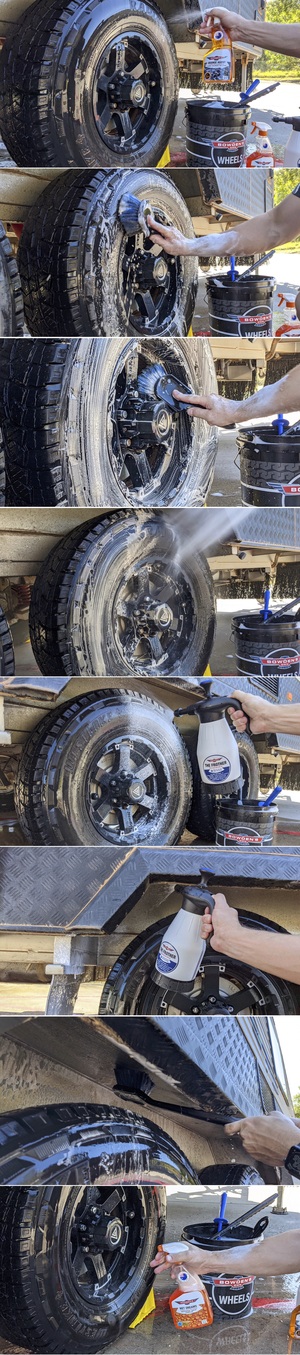
We like to start with the wheels as you don't have to worry about water drying anywhere else on the van. You may need a different combination of brushes depending on what type of wheels you have on the van. We have used a Little Chubby for the wheels here as the 5cm deep synthetic feathered bristles are very effective at removing dirt without inflicting scratches on the wheels.
The Big Boy Brett brush is handy for any of the more intricate areas - it comes as part of our Foursome brush set which all have soft boars hair bristles for their longevity and gentle cleaning ability.
The Big Black One comes into its own with its solid 20 inch handle able to reach just about anywhere dirt might be dwelling, using the same synthetic bristles of the Little Chubby.
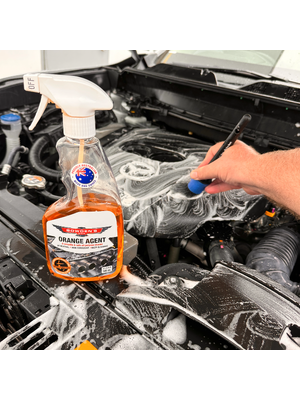
We are using Orange Agent for cleaning as there is very little brake dust on these wheels - it's fantastic for the general grime that you'd gather on an extended off-road trip.
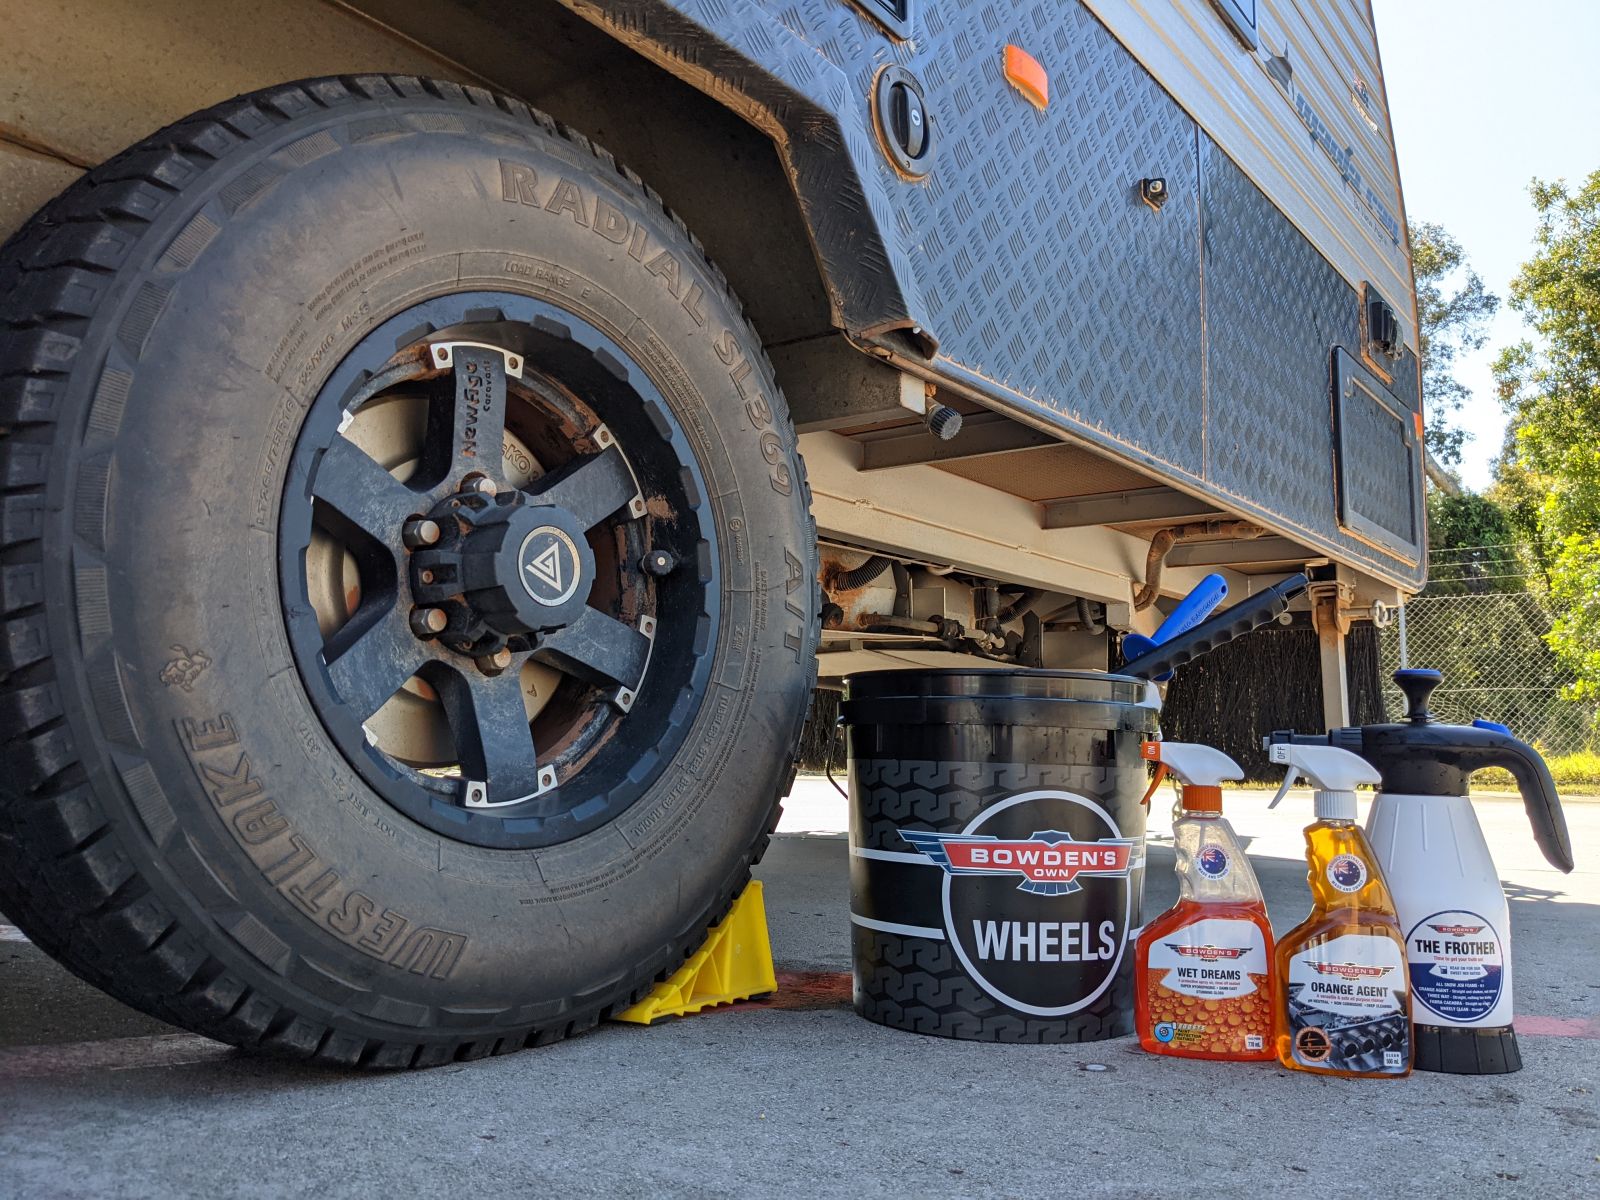
Get your Wheels bucket and add approximately 8-10L of water. If you want, you can also add a Great Barrier Thingy to your Wheels bucket for that extra element of protection, particularly if you have delicate finish wheels. Add a capful of your favourite Bowden's Own car wash, and get the Orange Agent and brushes ready.
First, wet the tyre, then spray Orange Agent directly onto the wheel and tyre, then give them a scrub with the chosen combination of brushes. We like to start with the Little Chubby brush. When you're finished, pressure wash or rinse it off thoroughly. Repeat this process if necessary.
You can also use The Frother with Orange Agent, poured straight into the canister to the 1L mark.
Follow this same process for under the undercarriage - spray Orange Agent up under there to help break down the dirt and assist with cleaning. If you think it needs it, use either the Big Black One or Little Chubby brushes, and give it all a good scrub. Once done, rinse thoroughly and repeat the process if needed.
After this is done, apply Wet Dreams to the wheels to add some protection, helping them resist dirt and making them easier to clean next time around. Simply spray evenly onto a wet wheel in a sweeping motion, then immediately rinse off to reveal the super hydrophobic water behaviour.
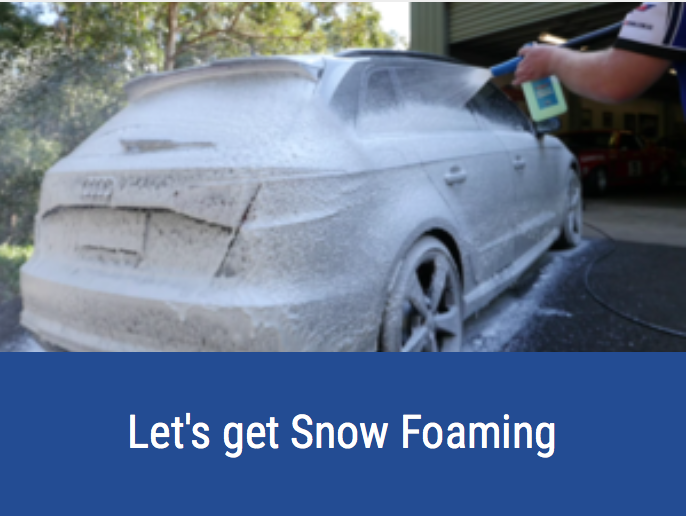
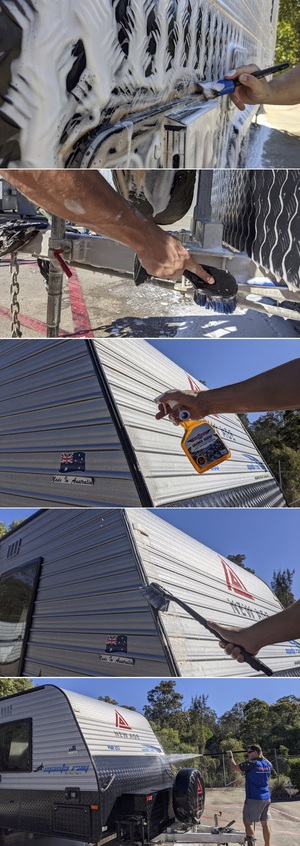
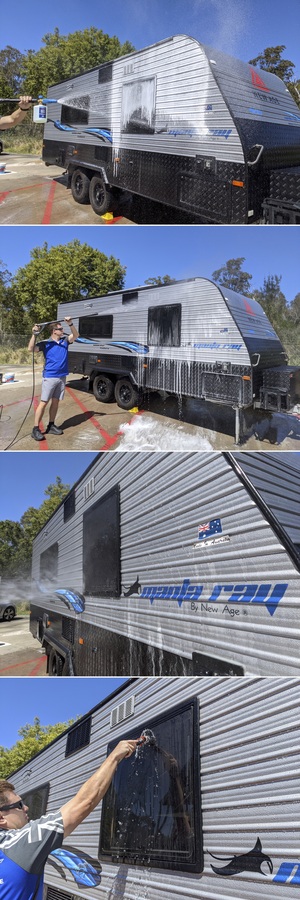
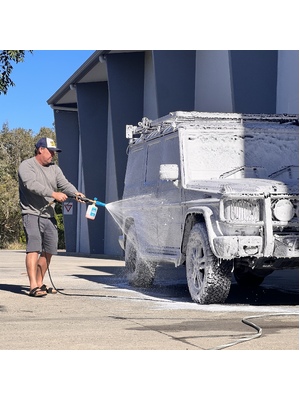
Snow foaming
Moving onto our snow foam pre-wash, which removes the bulk of the dirt from the van before moving onto your hand wash. This dramatically cuts down the risk of inflicting scratches or swirls into the paintwork, and it's also bloody fun.
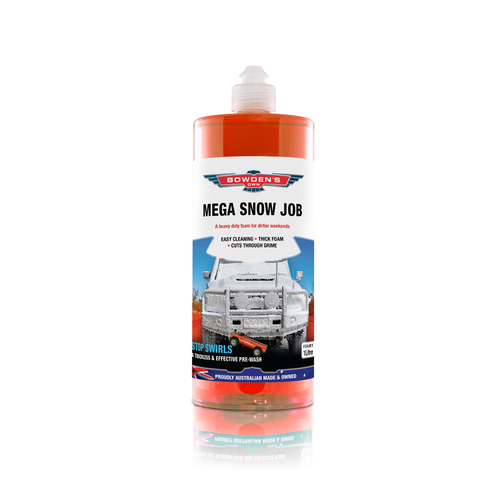
For this van, we chose to use Mega Snow Job as it has just come back from a trip through the outback and was covered in red dust and mud. For regular day to day cleaning, Snow Job is pH neutral and has more than enough cleaning power.
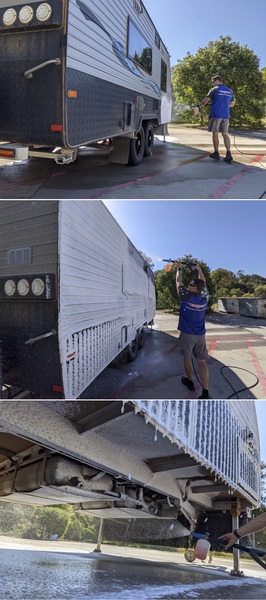
Start by filling your Snow Blow Cannon bottle with 900mL of water, and add 100mL of your chosen snow foam. Give it a good shake, adjust the cannon fan and adjustment knob to suit, and begin foaming one side of the caravan at a time. Start at the bottom, and use sweeping overlapping passes to methodically cover the van with foam. Do not spray foam (or water) directly into any vents, grilles, or openings to avoid causing damage.
Mega Snow Job is also excellent for breaking down salt, so we like to use it for grime cleaning the underside of the caravan as well.
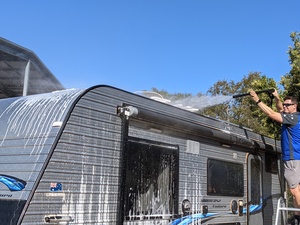
For the roof, you may need to stand on a ladder to reach. The fan adjustment on the cannon can be changed to help reach further than it normally would using a narrower fan, so keep that in mind when you are foaming the roof.
TIP: If you don't have frontal stabilizer legs, lower the jockey wheel so that the roof is tipped at an angle, which helps the water flow off properly when rinsing.
For a detailed how-to guide on using the Snow Blow Cannon and Snow Job, see the guide below -
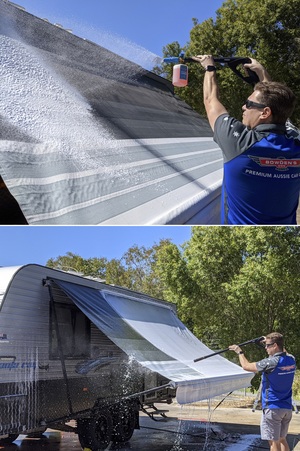
Silicone and rubber seals
A lot of vans have silicone bonded windows, hatches, vents and outlets, and anyone who has done remote travel can attest to how much dirt, dust, and grime ends up stuck on these surfaces and how difficult it can be to remove!
While the snow foam is still sitting on the surface, grab your choice of detailing brush (we have gone for the Little Chubby and Big Boy Brett here) and gently scrub around the silicone to loosen the dirt. The Big Black One can be handy for reaching up to the higher sections of the van without grabbing the ladder. You can also scrub around the tow bar and other intricate areas where dirt tends to build up. Make sure to rinse out your brushes when they get dirty in your Wheels bucket, or with the hose.
Don't let the foam dry! Thoroughly rinse down the van, again being careful not to spray water directly into any vents, and then move onto the next section of the van. Breaking this up into sections avoids the dirt drying back onto the paint.
If you require a bit more cleaning power to clean the grime out, you can use either Orange Agent or Sublime Clean sprayed into the bristles of your chosen brush, then given a thorough scrub and immediate rinse down. Never spray Orange Agent directly onto any surface that is hot or in direct sunlight, wet the area down first, and spray it into your brush to avoid it drying too quickly and leaving residue.
Canvas
Your canvas wheel covers or stone guards can be cleaned up nicely with Sublime Clean and a scrub with a soft detailing brush like our Plush Brush. Pre-rinse the area first, then liberally spray Sublime Clean and begin scrubbing with your brush, working in a north-south, east-west motion to better remove the dirt. As the product foams up, it will lift the ingrained dirt out of the pores of the surface.
After a few passes in each direction, it's important to rinse it all off while still wet. Thoroughly rinse the area down with your hose or pressure washer, and repeat the clean if necessary.
Hand washing
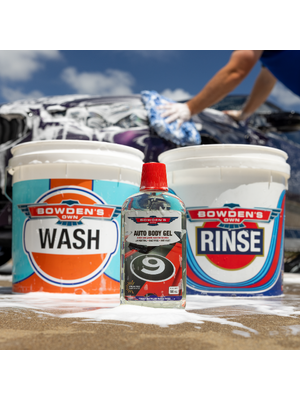
Grab your Wash and Rinse buckets and fill them with around 9L of water each, and drop your Great Barrier Thingys in the bottom.
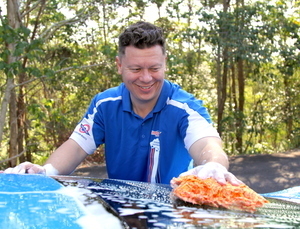
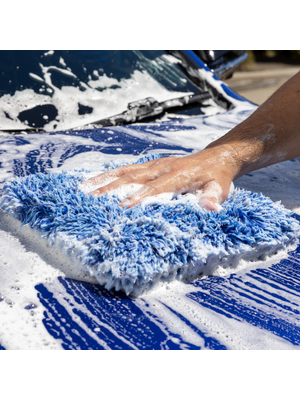
We are using our Auto Body Gel and Wash Pillow for this job as we prefer these for larger jobs.
All three of our washes are safe for use on caravans, but we like to use Auto Body Gel as it's a lot more forgiving if it dries or you are working in direct sunlight, and the Wash Pillow is our favourite when washing larger surface areas like a caravan - it holds a mammoth amount of suds and speeds up the washing process thanks to its massive size.
Now add the correct dosage of shampoo as on the product label, which is just one capful for all of our washes. You add to the bucket when the water level is ¾ full, so you won't get a huge head of suds and very little water! Your aim is to get a nice layer of suds, about 10cm worth, so they sit just above the rim of your bucket. Be sure to rinse the washes cap clean in the wash water as well, so you can be sure to get the full dose. Agitate the wash solution with your pressure washer to create a nice head of suds, like a well-poured beer.
Set up your ladder in the section you are going to start on, you will want to try and do the upper sections first, leaving the lower dirtier sections till last. You may need to move your ladder several times for this.
Give your Wash Pillow a thorough rinse out in the rinse water bucket first to dislodge any dust or dirt that may have settled on it, and then dip it into your Wash bucket and give it a good squeeze to soak up a heap of suds.
Begin washing in straight overlapping motions starting at the top and working down, flipping the wash tool after each area (how often to flip depends on how dirty the van is, more often if it's dirtier). Once both sides have been used, take it back to your Rinse bucket and give it a good thrashing to dislodge any of the collected dirt, before dipping back into your Wash bucket and continuing until the van is done. Be careful around any sharp edges, seams, badges, bolts or screws, or any protruding objects that could catch the microfibre and potentially damage it.
Thoroughly rinse the van down with the open end of the hose, to flood the panels which makes the water sheet off in one big clump and leaves very little water left behind for you to dry. If you are using Happy Ending in the next step, you can rinse with the pressure washer.
Once you're done, empty the buckets and give them a good rinse out. You don't want to be storing any wash water for use later!
Roof
It can be quite difficult to hand wash the roof of the van, depending on what model you have. The one we are washing here has a lot of intricate areas, solar panels, vents, and air conditioning units that prevent any kind of effective hand washing (even with an extendable wash tool pole).
Fortunately, the roof here was not too dirty so we could get away with a Snow Job and rinse down.
Some car wash facilities will have a dedicated wash bay with a gantry that you can walk on and safely access most of the roof.
We do not recommend climbing on the roof of your van, some vans are not able to support the weight, and even if it can, the risk of slipping on the wet and soapy surface is too great to be worth the risk.
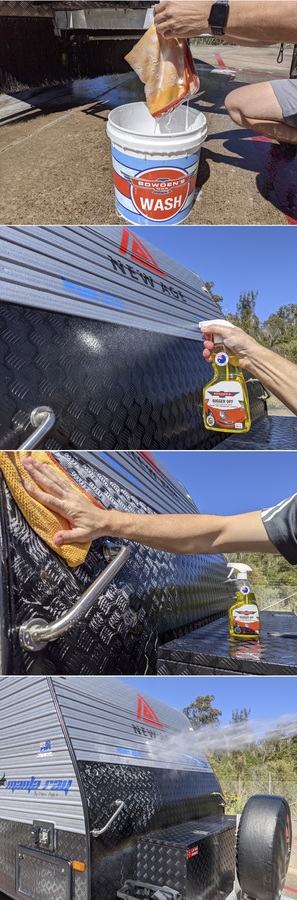
Bugs
If the front of the van has a splattering of bugs, now is the time to deal with it. Grab your Bugger Off and Debugger cloth (dipped in your Wash Bucket), wet the area and then liberally spray half of the front of the van and allow it to dwell for no longer than a minute. The Bugger Off contains powerful cleaners that break down the enzymes which make bugs so difficult to remove. Don't let it dry, slowly and gently in one direction wipe over the section, flipping and turning to a fresh side of the cloth often. Repeat as necessary until all the bugs are gone. Thoroughly rinse down the area afterwards.
If you have any staining from the bugs etching into the paint, Paint Cleanse & Restore might help if the damage isn't too severe. Please note, Paint Cleanse & Restore is not suitable for matte or satin finishes.
Awnings
Mega Snow Job is a very effective cleaner that is safe for use on awnings - able to remove a fair amount of dirt with no scrubbing required. Apply the snow as you would to the rest of the van, allow it to dwell for 2-3 minutes before pressure washing off thoroughly. Any ingrained dirt or mould can be scrubbed with a Little Chubby brush while the Mega Snow Job is dwelling, or afterwards with Sublime Clean. The Big Black One is handy for reaching up to the higher sections of the awning as well.
Adding protection
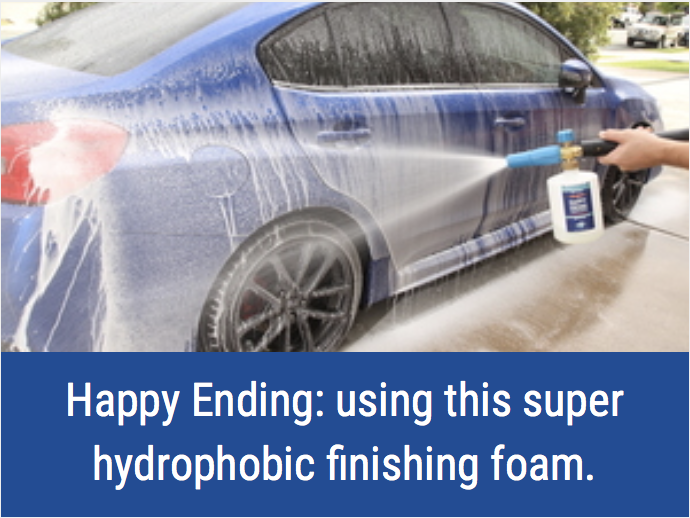
Now that the van is clean, it's time to add some protection. In the past, this would involve grabbing out your chosen wax, buffing it on and then buffing it off in small sections at a time which just isn't any fun on something as large as a caravan! We spent a few years developing what we would call the biggest cheat in car care - Happy Ending. It's a super hydrophobic finishing foam that is applied with the Snow Blow Cannon to a clean, wet surface, then immediately rinsed off with the pressure washer. Happy Ending adds super hydrophobic properties to the paint, while also making it super slick and shiny, which helps keep it cleaner for longer, and makes the next time you wash an absolute breeze as the dirt comes off so easily.
Please Note: DO NOT USE ON HOT/WARM PANELS, IN THE DIRECT SUN AND NEVER ALLOW TO DRY.
It's best used in the shade on cool panels, for a caravan you may need to break each side of the van into two sections to prevent the product from drying.
Mix 900mL of water with 100mL of Happy Ending in your Happy Ending Cannon Bottle, and attach to your Snow Blow Cannon. Starting from the back, evenly apply a thin layer of Happy Ending over your chosen section, using a wide fan setting on the cannon.
IMMEDIATELY switch to your pressure washer lance and thoroughly rinse off the entire section starting from the top and working your way down. Continue around the van until it's complete, working in smaller sections.
You may need to apply two coats of Happy Ending to really see the super hydrophobic water behaviour, thanks to the larger particle size of modern gel coat.
On the slight chance that you get any streaking or uneven patchiness when using Happy Ending, simply wipe over the marks with The Big Green Sucker or Big Softie cloth using a bit of extra pressure on the towel to remove these "high spots". If the marks are left to dry, don't freak out, as the Paint Cleanse and Restore can remove them easily.
See our full Happy Ending guide here, IT'S CRITICAL TO FOLLOW THE DIRECTIONS FOR HAPPY ENDING.
Happy Ending is the quick and easy way for lazy people like us, but for those who want a spend a bit more time and see a better result, Bead Machine is our most protective and durable sealant which is applied to a dry surface with two cloths. This takes a bit more time, but once it's done you can easily maintain it with Happy Ending when necessary as a quick top up of protection.
After rinsing off the Happy Ending, thoroughly rinse the van down with the open end of the hose, to flood the panels which will now be very hydrophobic leaving very little water behind, which means less drying time for you!
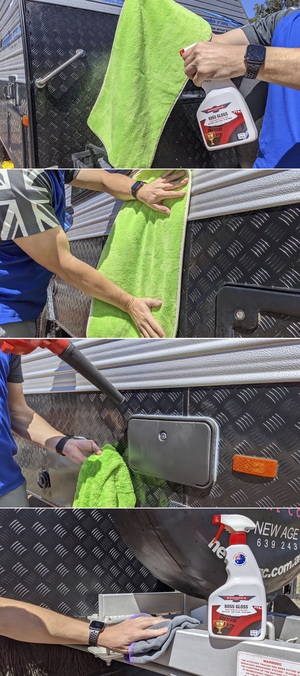
Drying
For such a large area, we like to use the Twisted Pro Sucker or The Big Green Sucker drying towel and our Boss Gloss with it. Boss Gloss functions as a drying aid in the Twisted Pro Sucker or The Big Green Sucker, helping it absorb water more readily (slightly damp microfibre absorbs water much faster than dry), it also lubricates the towel to help minimise any errant dirt or dust from scratching the paint. For larger vans, you may need two Big Green Suckers to completely dry it all in one go.
Get the Twisted Pro Sucker or The Big Green Sucker and drape it over your arm with the bulk of the towel hanging down. Spray 4-6 sprays of Boss Gloss straight into the towel. Flip the towel over and spray another 4-6 sprays on the other side. Now dry the larger panels of the van as best you can, starting with any windows first to minimise water spotting issues. You'll want to focus on the sections that are in the sun, leaving the ones in the shade till last.
Once most of the flat surfaces are done, grab an electric blower like our 18V Milwaukee here, and holding the cloth nearby, blow out every single crevice, window channel, hatch seal, and any other intricate areas where water likes to hide. This helps eliminate any run marks from appearing after you've finished drying. Make your way around the van until you're happy the bulk of the water is gone.
Give the tow bar a quick blow down as well, then wipe dry with a folded Dirty Deeds cloth or Twisted Little Sucker sprayed with Boss Gloss, you don't want any leftover dirt from these lower areas getting into your Twisted Pro Sucker or Big Green Sucker and causing scratches!
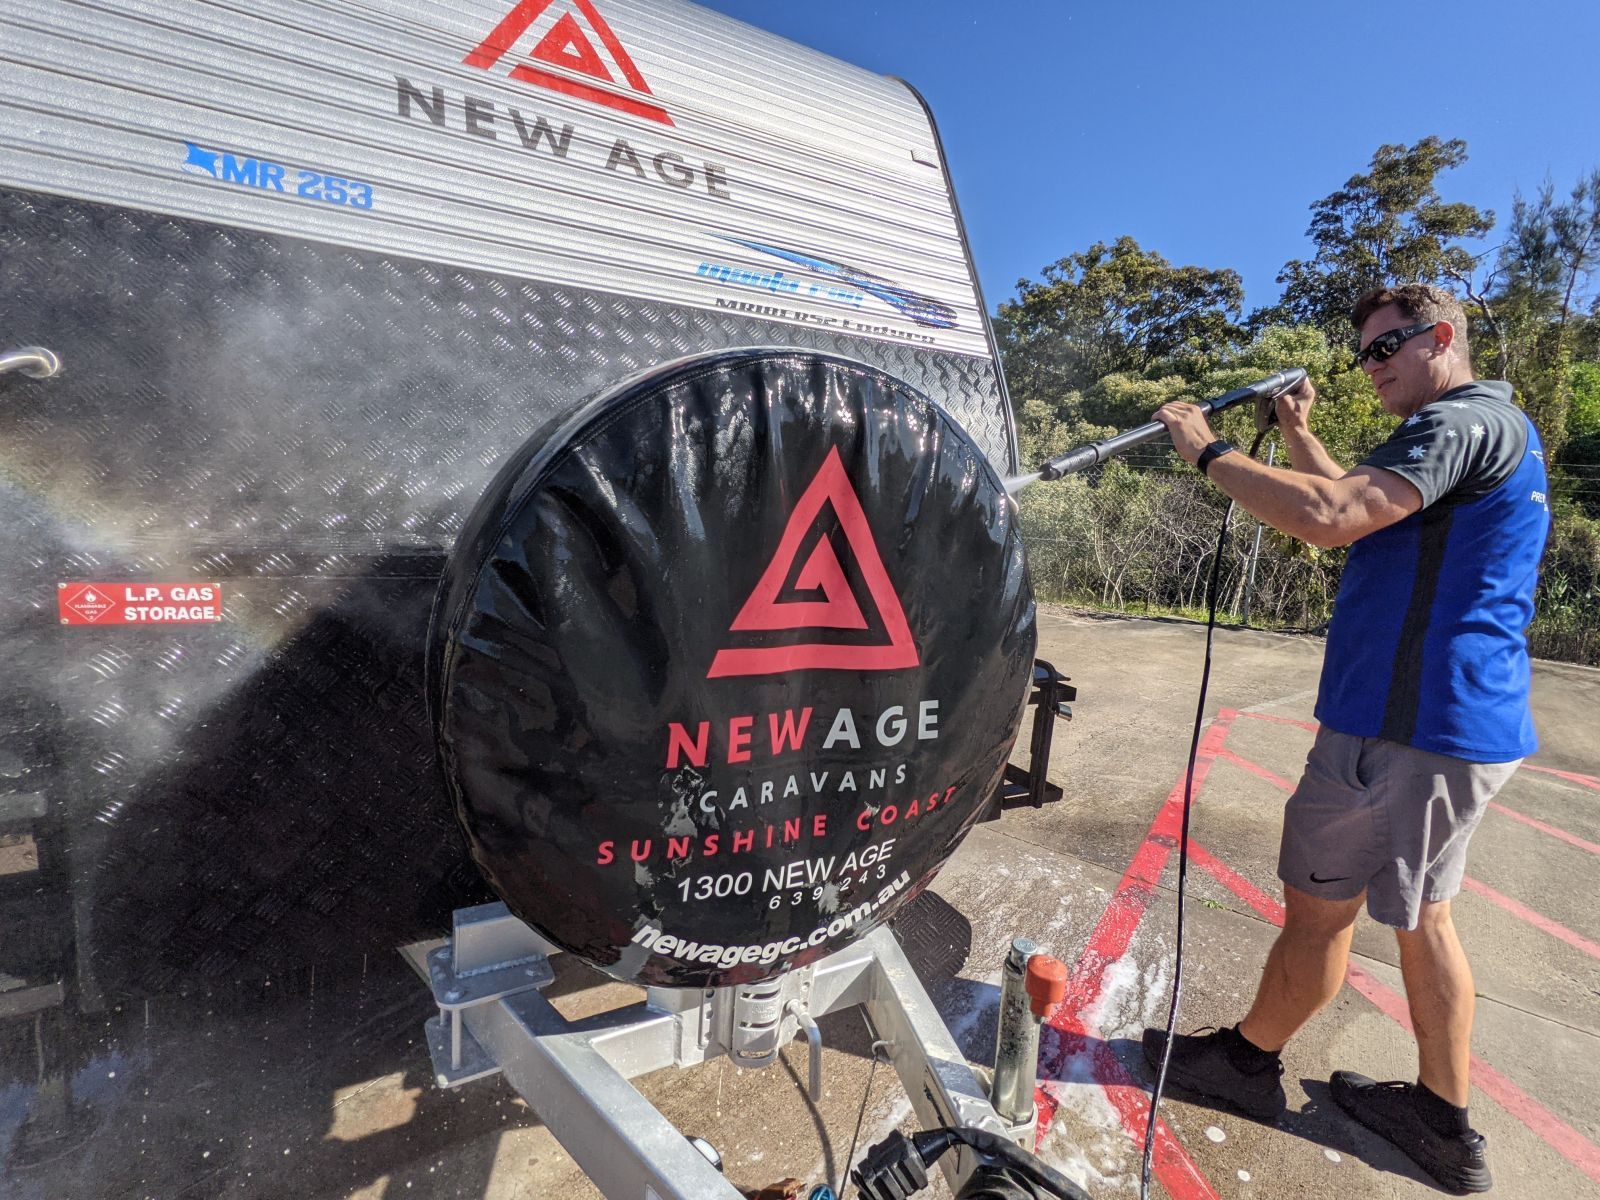
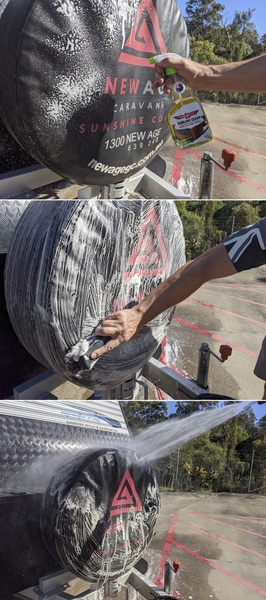
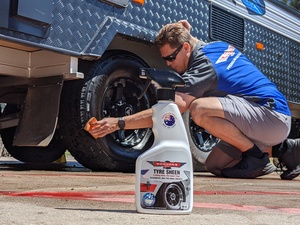
Tyres
Wheels and tyres are lucky last. Dry the tyres first with a clean and dry Dirty Deeds cloth. Then, spray 6-7 sprays (you might need more or less depending on the type of tyre, how big it is etc) of Tyre Sheen into an All Sorts applicator, then wipe over the tyre, covering all the rubber surface, being sure to get it into the lettering on the tyres. If you like a shinier look on your tyres, you can apply a second layer of Tyre Sheen after the first layer has dried.
We aim for a mid sheen on the tyre, just better than a new tyre; that's the finish we get with this applicator and Tyre Sheen combination.
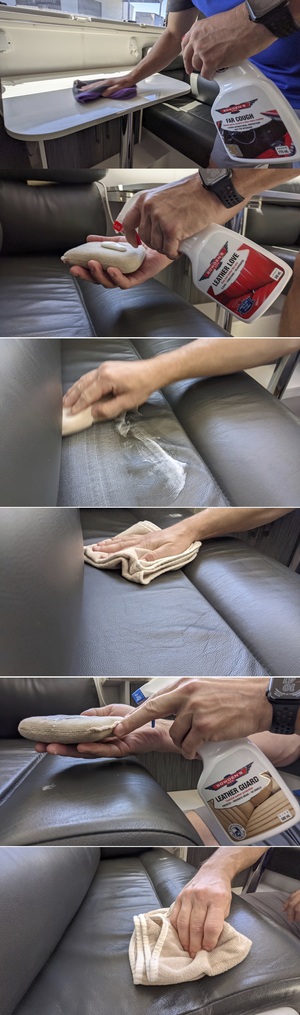
Interior
We've found that our range of interior products are actually a lot safer and more effective than your usual household chemicals, especially on surfaces like Leather which are very similar to what you'd find in a modern car.
Leather - Leather Love for cleaning and conditioning, and then Leather Guard for the stain and abrasion resistance, critical in such a high wear area such as a seat or armrest.
Glass/Windows - Any glass surfaces, mirrors, stove covers, etc can be cleaned with Naked Glass and a Big Softie cloth. Make sure when wiping down perspex windows that you are very gentle, as these can scratch very easily with too much pressure.
General-purpose cleaning - Far Cough is our interior anti-bacterial spray, which can be used safely to wipe down all interior surfaces of the van, including countertops, handles, tables, light switches, cupboards, etc.
Dirtier areas - Any of the more dirty areas like the floor, dust seals, rubber mats, etc can be cleaned with Orange Agent which is a safe pH-neutral all-purpose cleaner.
Fabric - To spot clean seats, curtains, headboards, and other fabric surfaces, Fabra Cadabra is an effective and colour-safe option for quickly and easily removing stains or spills. Fabratection can be applied to protect these fabrics and help them resist staining and water.
Check out our in-depth guides on using these products below.

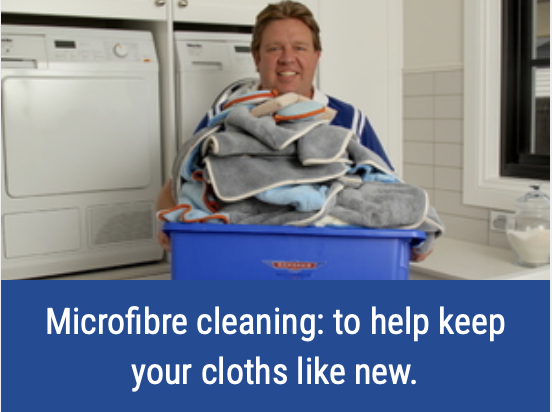
Microfibre cleaning
Once you have finished, make sure you clean your microfibre cloths properly. Look after your cloths, and they'll look after you for years to come.
Our Microfibre Wash was made specifically to clean waxes, polishes and cleaning products from microfibre cloths. It won't work for your clothes to remove tomato sauce stains, but it'll keep your microfibre cloths like new.
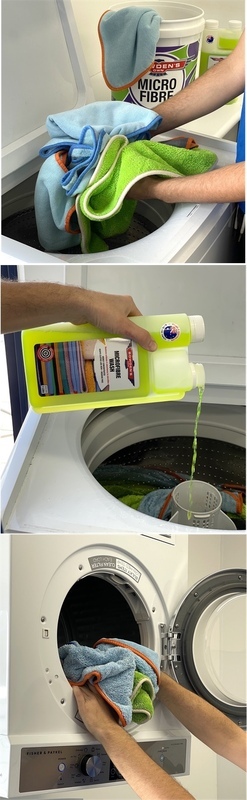
Add 20-60mL of Microfibre Wash to your machine (depending on how many cloths you're washing), and put the machine on a normal wash cycle with warm water. DO NOT ADD FABRIC SOFTENER.
Once the cloths have been washed, pop them in the dryer on the cool/warm setting for around 45 minutes, or until they come back nice and fluffy. Once the cloths are dry, pack them away in a sealable container, ready for their next use!
For a more detailed explanation of this process, please see our dedicated caring for microfibre guide below:
Any questions?
You should now have a sparkly clean and protected caravan, ready for your next trip up to dingo piss creek.
Should you have any questions about anything mentioned in this article, or have questions about other products and processes, feel free to get in touch on 1800 351 308, or shoot us an email to info@bowdensown.com.au.
Brett Hobbs.
Products Used
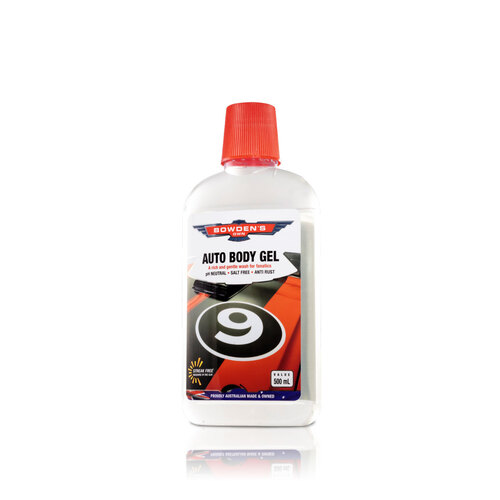
Auto Body Gel
The original salt-free wash, for a rich and gentle clean, even in the direct hot sun!
$19.99

FAVE

Orange Agent
Super versatile citrus pH neutral cleaner, to remove silicones, oils and heavy grime from most surfaces.
$17.99

Sublime Clean
Deep cleans exterior fabrics and vinyl, as well as removing silicones from plastics.
$24.99