Using your Brand Spanking New Kit
Congratulations!
Congratulations on your purchase! You now have everything you need to safely wash and protect your brand new 4 wheeled friend. Read on for our best tips and tricks on using everything in this kit.
Wheels
We always like to start with the wheels. They're generally the dirtiest part of the car, so get these done first!
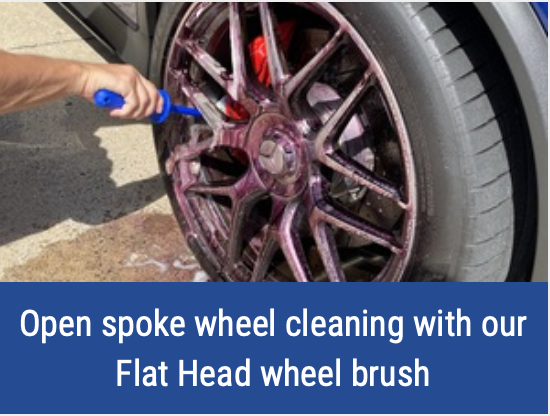
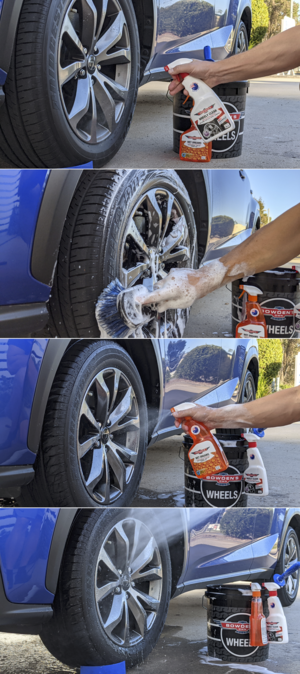
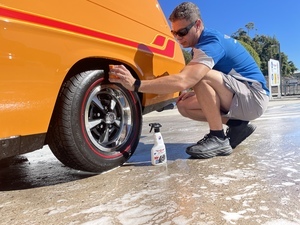
Half fill your Wheels bucket with water, then add one capful of Nanolicious Wash and agitate with the pressure washer wand or jet spray from the hose. Spray Wheely Clean evenly over the wheel surface (one wheel at a time), in a sweeping motion and allow it to dwell for 30 seconds to 1 minute until you see the purple reaction. If the purple reaction begins to go yellow, you've waited too long and the product will no longer be as effective on brake dust. For more stubborn dirt and grime build-up, scrub the wheel face with a suitable wheel brush like our Little Chubby or Nuts and Guts dipped in the Wheels bucket. To get into the wheel barrels, we have our Flat Head brush, which is perfect for this job and for getting in behind tight calipers.
Once the wheel is cleaned to your satisfaction, rinse it off thoroughly with either your pressure washer, or the jet spray on the hose nozzle. To add some super hydrophobic protection to the wheels, to make them easier to clean next time and so the brake dust finds it harder to stick to the wheels, spray Wet Dreams evenly over the still wet wheel surface, then immediately rinse off thoroughly to add a protective layer. Continue around the car until all four wheels are completed, doing one wheel at a time.
For a more indepth dive into wheel cleaning, we have a super detailed guide here:
Washing
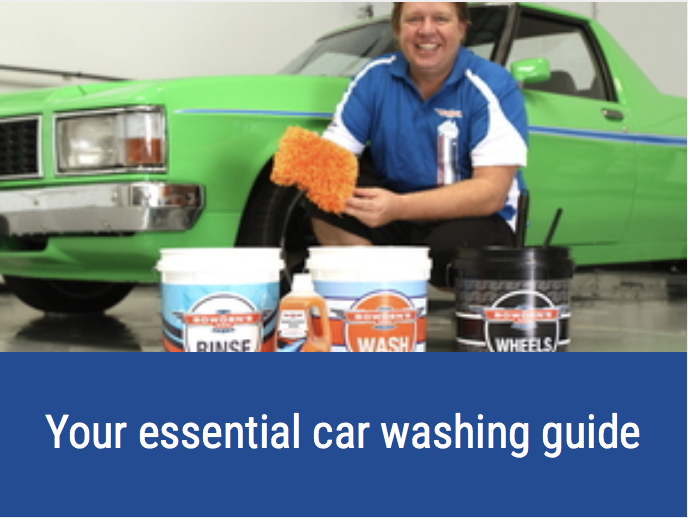
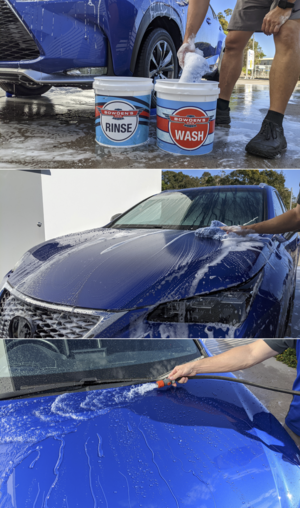
Get your Wash and Rinse buckets ready and 3/4 fill them with clean water. Add 1 capful of Nanolicious Wash to your Wash bucket, then froth it up with the pressure washer to get a good head of suds. Thoroughly rinse out your Shagtastic Wash Pad in the Rinse bucket, then dip it into the Wash bucket and let it absorb a large amount of suds.
Starting at the top of the car, wash in straight lines, flipping the wash tool as needed, going back to the Rinse bucket after each small section to rinse any dirt from the wash tool. Then go back into your clean Wash water and do the next section until the whole car is done. Do the lower sections of the doors last, and any other sections that are quite dirty.
If you're washing in the sun, we'd recommend washing small sections of the car at a time (1 door for example), then rinse that panel off before moving onto the next panel, so that the Nanolicious Wash doesn't dry on the paint. Once you've washed the whole car, take the end off the hose to flood the water off the panels, making it easier and quicker to dry the car.
Once you're done, empty the buckets and give them a good rinse out. You don't want to be storing any wash water for use later!
To see a detailed explanation on this safe wash method, see our guide here:
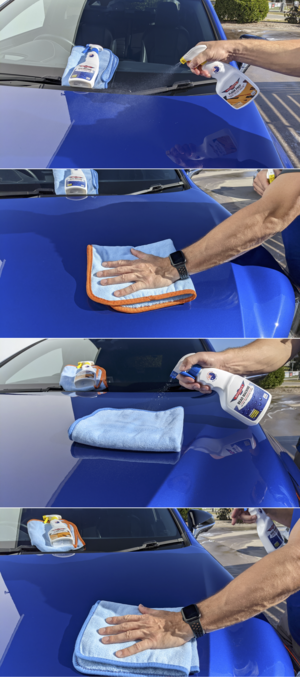
Drying
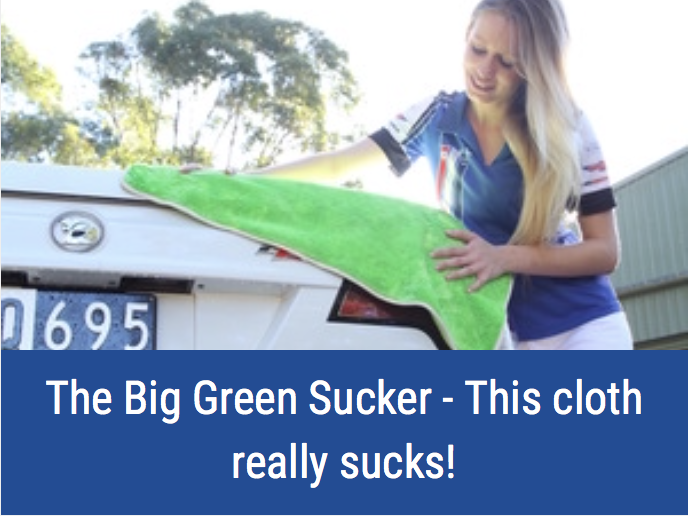
Drape The Big Green Sucker over your out stretched arm and spray 6-8 sprays of Boss Gloss into each side of the cloth, then starting at the top of the car and working your way down, begin drying the car. You'll find The Big Green Sucker will dry the whole car without the need to wring the cloth out.
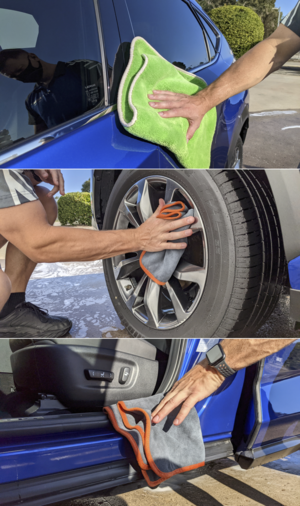
After drying the paint, you can then dry the door jambs, wheels and tyres. Grab a Dirty Deeds cloth folded into quarters, and spray a few sprays of Boss Gloss into one side of the cloth, leaving the other side to dry the tyres with. Dry the door jambs and the wheels with the side of the Dirty Deeds with the Boss Gloss on it, then flip the cloth over and dry the tyres last with the side that has no Boss Gloss on it.
See our full drying guide below:
Place your used cloths into the Microfibre bucket ready to be washed.
Tyre Sheen
Now it's time to get the tyres looking nice. Nothing too shiny or over the top, just a lovely mid sheen like our Tyre Sheen gives.
The All Sorts applicator is great for applying our Tyre Sheen. With the tyres now dry and preferably out of direct sun, spray a few sprays of Tyre Sheen straight into the All Sorts applicator, then apply to the rubber and wipe it over the tyre face until a nice and uniform finish is achieved. For a shinier finish, you can apply a second coat of Tyre Sheen after allowing the first coat a few minutes to bond.
No need to wash the All Sorts applicator out, simply store it in a plastic bag of some sort until the next time you wish to use it.
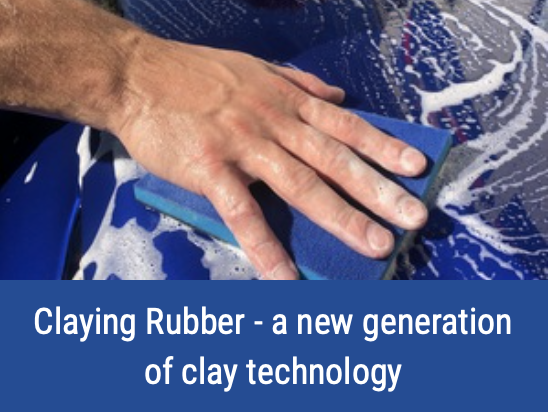
Decontamination
For the most effective decontamination, we've found using Three Way as the lubrication for our Claying Rubber is the best option. This is a very specialised rubber compound that we’ve found to be super fine and won’t ever micro scratch or marr even the softest paints.
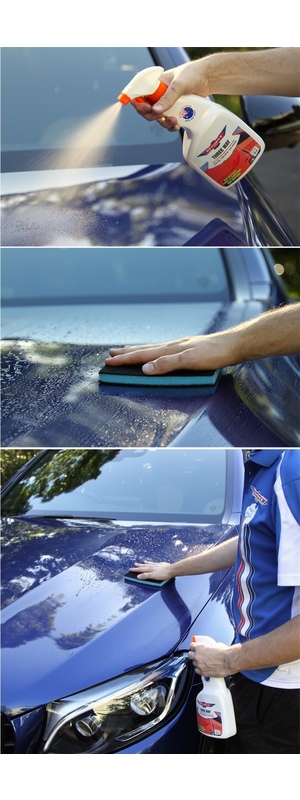
Begin by spraying one section of the car at a time (like the roof) and allow the Three Way to begin breaking down any iron embedded in the paint. If you get no reaction, you can still use Three Way as a lubricant for the Claying Rubber, or use a double cap solution of your chosen wash instead. Nanolicious Wash is our most lubricating wash, and therefore is the most suitable for this task.
After a minute or so, spray a few extra sprays of Three Way into your Claying Rubber and with zero pressure, gently work the pad over the panel in north-south, east-west motions, rinsing out the pad in a bucket of fresh water regularly. Rinse the section thoroughly you've just completed with water and continue until the car is done.
Once you have finished, tip about 100mL of Orange Agent into your Wash bucket with a cap full of your preferred wash and half fill with water. Re-wash the car to remove any residue from Three Way, rinse and dry.
Our full Three Way and Claying Rubber guide can be found here:
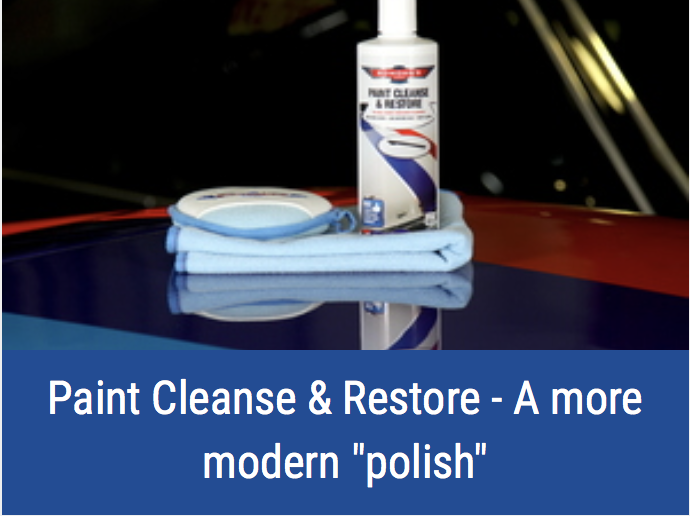
Paint Cleanse & Restore
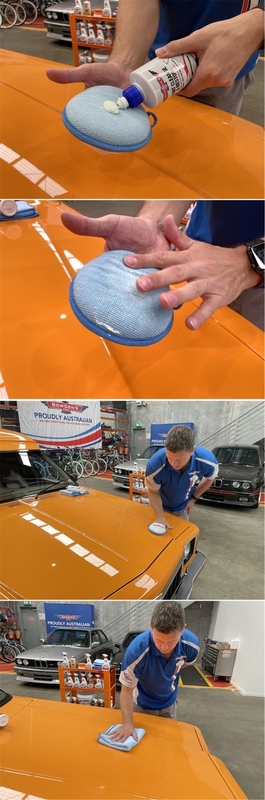
Once the car is washed and dried, it’s ready for deep cleaning and cleansing, to get deep into the pores of the paint and ensure it's as clean as possible before we move onto our final step sealant protection. We do that with our Paint Cleanse & Restore. Make sure the paint is cool to touch, dry and in the shade. Place a 50c sized dollop of Paint Cleanse & Restore onto the Circle Work pad, then rub it into the surface till there are no more dry spots in the pad. Do a section of the car at a time (maybe 1/4 of the bonnet). Work the product in an up and down, then side to side motion till it begins to go opaque. Once this occurs, buff off the remaining residue with a Big Softie cloth.
For the next section, only apply a small amount of the Paint Cleanse & Restore to the Circle Work pad (around a 5c sized piece), and continue around the car using this method.
If you find the product is difficult to remove, or becomes a bit sticky, simply add a couple sprays of Boss Gloss to your Big Softie cloth prior to removal to help remove these bits.
Read our in-depth guide on Paint Cleanse & Restore here:
Place your used cloths and applicators into the Microfibre bucket ready to be washed.
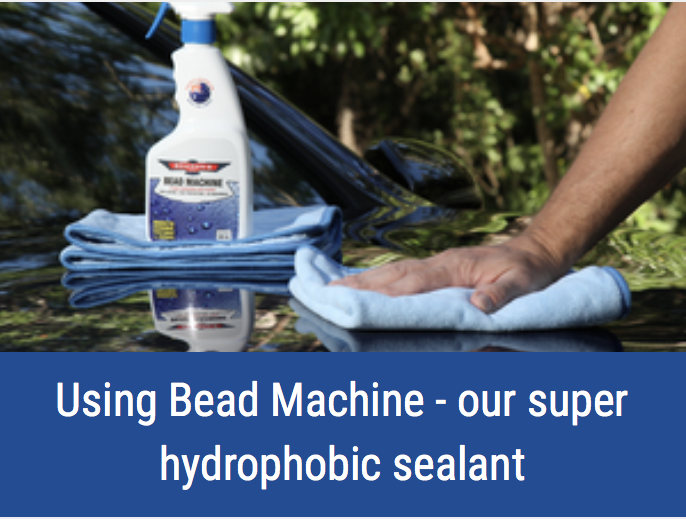
Bead Machine
Bead Machine is a super hydrophobic paint sealant. It's applied after your car has been washed and dried, and works best on modern paint that's in good condition.
First, prep the surface using our Flash Prep spray to remove any silicones, oils, or residues that could prevent it from bonding properly.
Working on one section at a time, spray Flash Prep liberally, directly onto the surface, then immediately wipe it into the surface with a folded Big Softie cloth. Once it's been wiped in enough to remove remaining oil residue, use a separate dry and clean Big Softie cloth to remove any remaining trailing residue.
For Bead Machine, spray 4-6 sprays into the low pile side of a folded Big Softie cloth and apply in a north-south, east-west motion on one section of the car (e.g. a quarter of a bonnet, one guard), then immediately buff off with a second dry Big Softie. Add two more sprays to the wet side of your first cloth for the next section, and continue around the car till done.
If you get any streaking, or find Bead Machine difficult to remove, use a slightly damp microfibre cloth to even out those high spots. This will not affect the protection Bead Machine provides to the paint.
See our full Bead Machine guide here for all the tips and tricks:
Place your used cloths into the Microfibre bucket ready to be washed.
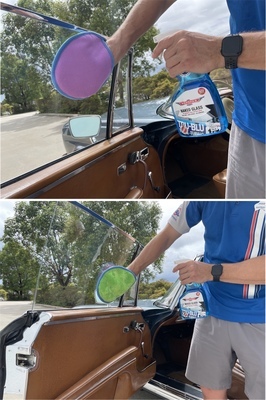
Glass Cleaning
For the best glass cleaning experience, we recommend using our Naked Glass and our specialised glass cleaning cloth; the Inta-Mitt.
Apply 1-2 sprays only of Naked Glass into the green side of the Inta-Mitt (if it's cold, use less, and if it's warmer, you may need to use a little more Naked Glass). Gently wipe up and down, then back and forth over the glass until you see any marks in the glass disappear and the Naked Glass start to flash off. Turn the Inta-Mitt to the purple side and gently buff over the entire glass surface to remove any remaining product and to remove any haze from the glass.
If the glass is very dirty, or you have stubborn marks on there, you can spray the Naked Glass directly onto the glass, leave it for 10-15 seconds before using the Inta-Mitt in the same way as described above.
For a more in-depth look at glass cleaning and the Inta-Mitt, see our article below:

Place your used cloths into the Microfibre bucket ready to be washed.
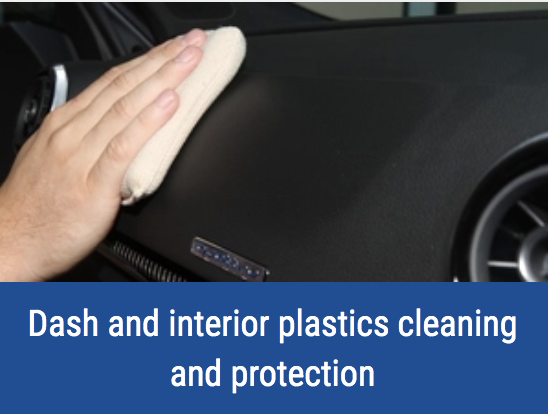
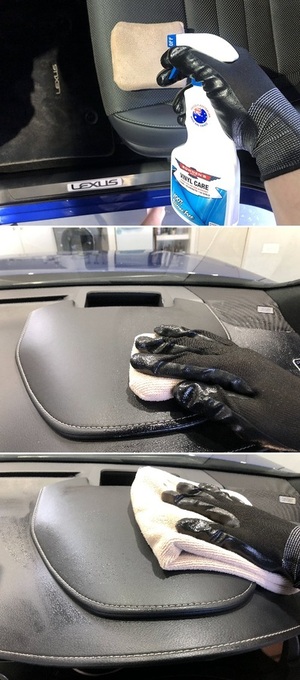
Interior Plastics
If your plastics are quite dirty, in need of a deep clean, or you've used silicone based products on them previously, you will need to do a deep clean with our Orange Agent all purpose cleaner first. Spray a few sprays of the Orange Agent into a Square Bear applicator or similar, then gently wipe over the plastics you want to clean. While the product is still wet (DON'T LET IT DRY), wipe it off with a Plush Daddy cloth or similar, so that all the dirt and grime you've just released from the surface, is drawn into the cloth and doesn't dry back on the surface.
If your plastics are in good condition, aren't too dirty, and you haven't used silicone based products on them in the past, simply grab the Vinyl Care and mist about 4 sprays into a fresh and clean Square Bear applicator. Using an applicator ensures good coverage, as well as for making a lot less work wiping away over-spray if you spray it directly onto the surface.
When applying product to the dash with the applicator, work in small sections at a time. Move across the surface in a gentle circular motion, as this gives you the best and most effective clean of the dash, especially if it has a textured or undulating surface. You want to ensure the product gets into all these areas for the best protection and finish.
Grab your Plush Daddy cloth and fold it into quarters with the low pile side facing out, and gently wipe off the Vinyl Care while it's still wet, for an even finish.
Check out our full guide for Vinyl Care below:
Place your used cloths into the Microfibre bucket ready to be washed.
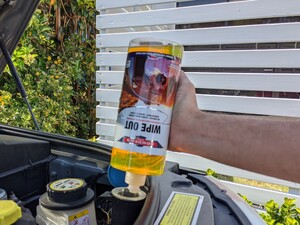
Windscreen Wash
Wipe Out is an effective and safe to use windscreen wash additive concentrate. After a heap of testing, we found a 20:1 ratio to be ideal for daily use. This means the 1 litre bottle makes up to 23 litres, giving great value. We have also added a measuring ruler on the side of the label, (that our label crew needed to apply in just the right spot) to help get the right dilution ratio. If you're going on a road trip, a stronger 5:1 mixture is better at dealing with the Aussie kamikaze summer bugs.
When adding to your windscreen washer reservoir, first find out what capacity it has either from the factory manual or online. Pump out the reservoir, and then add another litre of water to rinse clean the reservoir and washer lines. Add half the amount of water, followed by the amount of Wipe Out you need, then fill it up with water so it mixes in well. Another easy option (if you cannot find what size your reservoir holds) is to mix it in a seperate jug or bottle. If you're really fastidious, we suggest you use a demineralised water over tap water, to minimise the chance of potentially hard water leaving marks when it evaporates.
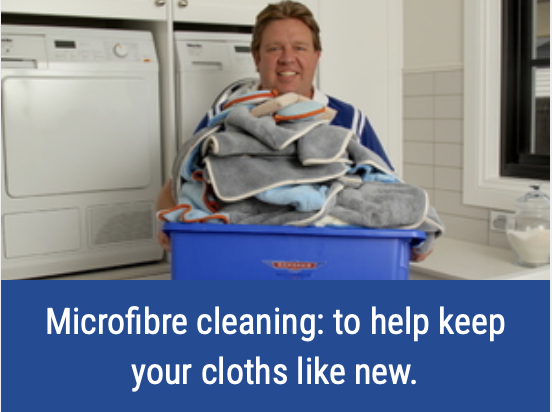
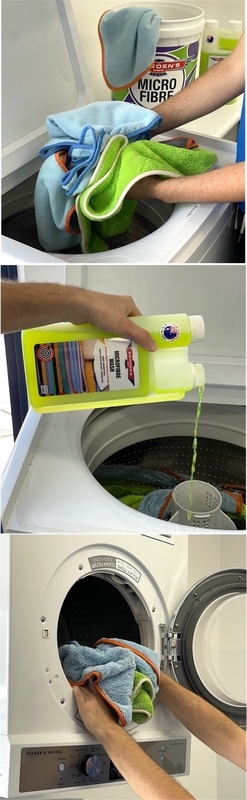
Microfibre Cleaning
Probably the most important and overlooked part of detailing is keeping your cloths and applicators clean. We made our own microfibre wash to break down detailing chemicals from the fibres of the microfibre and allow the fibres to rinse free, meaning your cloths will continue to work like new for years to come. For any heavier stained cloths or applicators, put a few mL of the Microfibre Wash directly onto the cloth or pad and massage it around with your fingers to help release the product, then give it a good rinse under some warm water before putting it into the wash. You can also put approximately 10-20mL of Microfibre Wash into a bucket with some warm water and let the applicators and cloths soak in there for 30 minutes prior to putting them through the wash.
Put all your cloths and pre soaked dirtier applicators into the washing machine on a normal cycle, on the warm water setting. Put 20mL of Microfibre Wash in the machine (DO NOT USE FABRIC SOFTENERS) and away you go. Once they’re washed, tumble dry the cloths on the cool setting and then store them in an air tight container if possible, ready for their next use.
For a more detailed explanation of this process, please see our dedicated caring for microfibre guide below:
Any questions?
This gives you a good overview of the products in your new kit, and a step by step guide on how to use them and in what order to use them in.
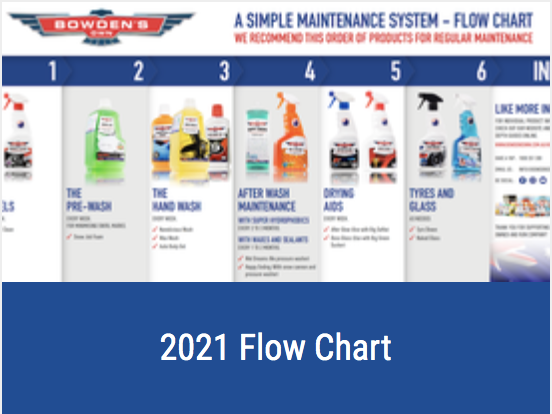
If you require some more information, we have a detailed Flow Chart that you may also find helpful here -
If you have any questions, please email us info@bowdensown.com.au or call our office on 1800 351 308.
Happy detailing!
Brett Hobbs
Products Used
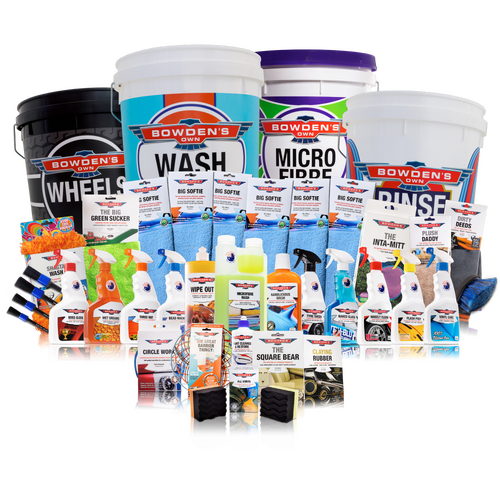
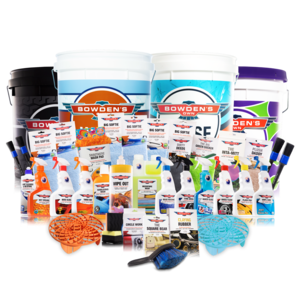
Brand Spanking New Kit
The kit specially designed for looking after the new addition to your family.
$679.99