Motorbike Detailing
We have a lot of fans out there who love detailing their Motorbikes with our great range of detailing products. When detailing a Motorbike, we stick to the same fundamental principles as when detailing a car with reference to our safe wash system, only we tweak a few things and add some steps for removing grease from specific areas on the bike, and we take special care and pay attention to any external air filters and other sensitive componentry.
Inspection
The first step is always to inspect the bike.
- What type of bike is it?
- What materials are used on the bike?
- Are there any unpainted plastics?
- Are there matte surfaces?
- Is there an exposed air filter?
- Do other components need to be covered prior to starting detailing?
All of these questions and more, need to be asked before you start the job. Give the bike a good look over and get familiar with the different parts of it - each bike is different, so get to know yours well.
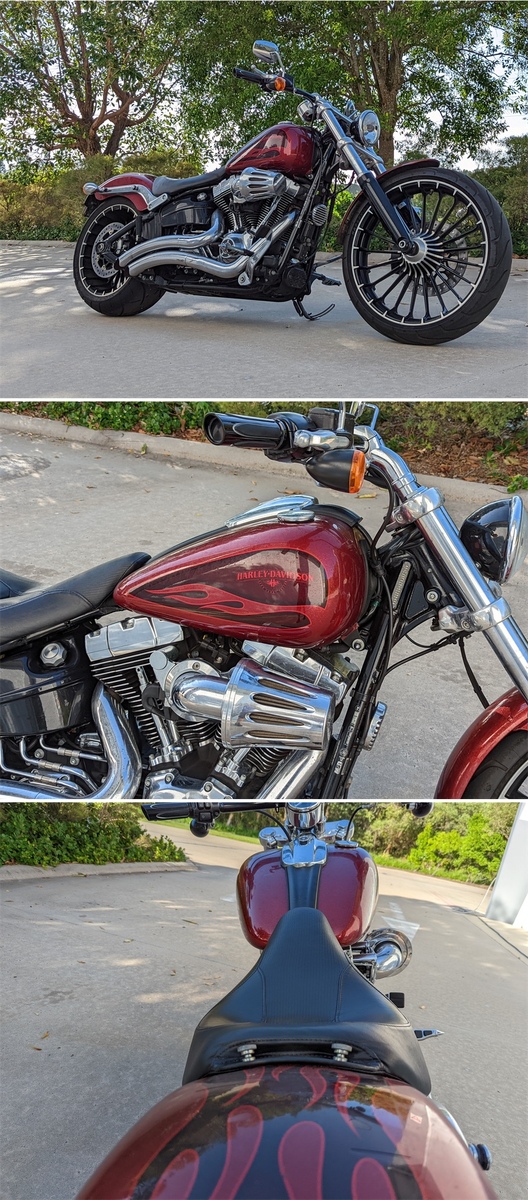
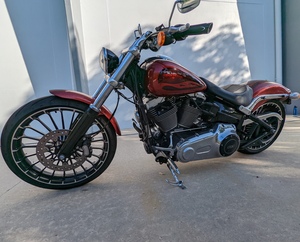
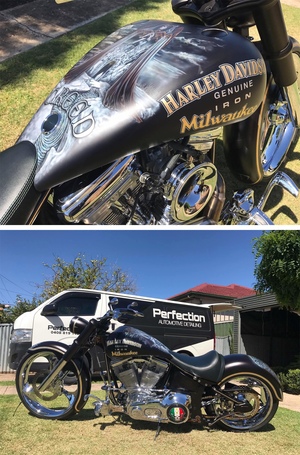
This particular bike we're doing here is a 2017 Harley Davidson. It has an exposed air filter. It has no unpainted plastics and a couple of matte surfaces. It does have a vinyl seat, which we will cover later in this article. This bike also has a lot of chrome that has pitted and has formed rust spots over time. We will address this later in the article also.
Preparation
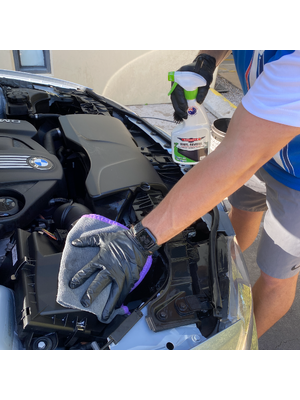
After you’ve looked over the bike thoroughly, it’s time to take some precautions and do some preparation. At this stage, you can start by removing the seat if you wish. Cover any electrical components with plastic wrap or a plastic bag of sorts so that water can’t get in there. Cover any exposed air filters with a plastic bag (which is what we did with this bike - taped a plastic bag around the air filter and wrapped it up well, so water couldn't get in there), and any other electrical components around the bike that look like they should be covered - cover them with plastic wrap or similar. With the exposed electrical componentry and the exposed air filter covered, it’s time to get the bike up on stands or on a lift - we do this for safety so the bike doesn’t fall over during any of the following steps. Our bike was well planted on its stand, so we left it as is.
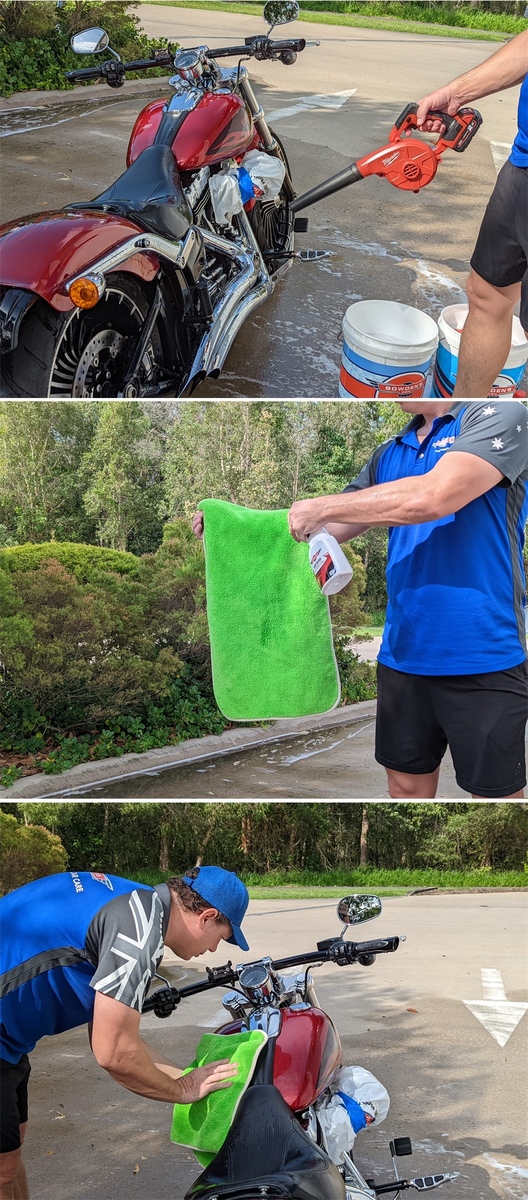
Degrease, Wheels and Snow Job
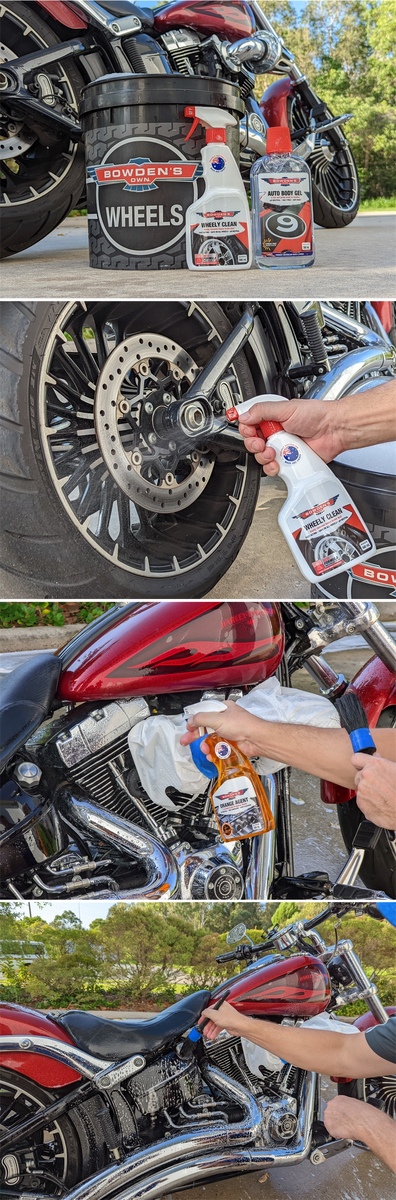
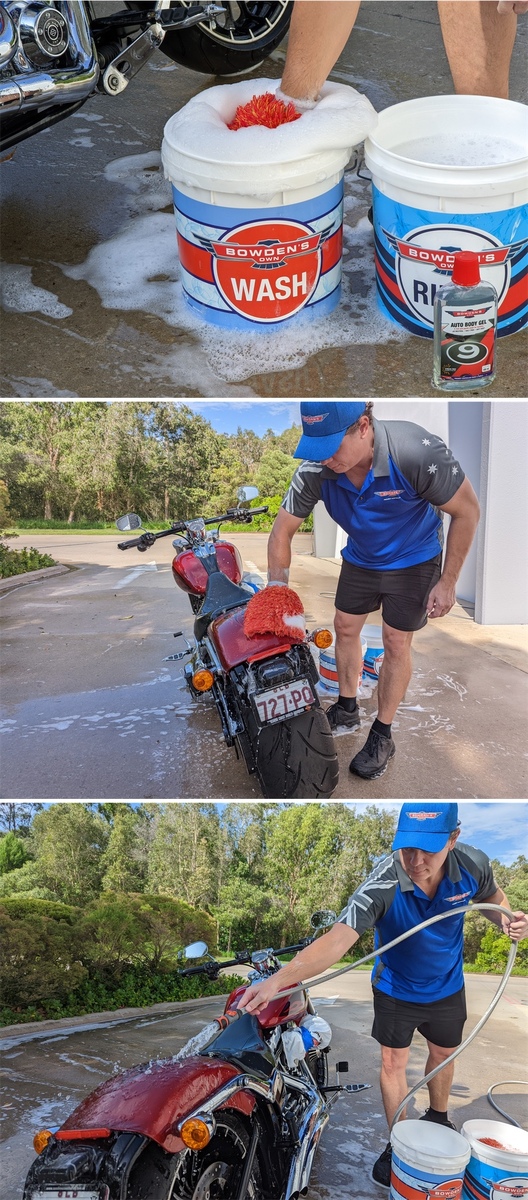
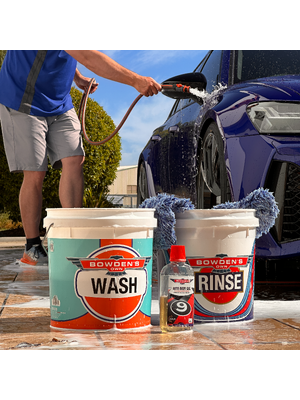
Have your Wheels bucket setup and ready to go, with a capful of your favourite car wash in there (we're using Auto Body Gel here), and an assortment of brushes you'll need for cleaning the wheels - the Nuts & Guts brush is handy for this.
This is where we differ off from normal car detailing processes slightly. Treat high grime/grease areas first with Orange Agent and agitate with a brush like our Nuts and Guts brush. We do this to help loosen all the really caked on grime around the chain, sprocket and guard, and any other areas that are prone to heavy dirt and grime - work quickly; DO NOT LET IT DRY.
Now, just like the process when detailing a car, we want to do the wheels first, and we do this with Wheely Clean. Spray Wheely Clean onto one wheel at a time, and gently agitate with the Nuts & Guts brush. Once you're satisfied, rinse the wheel thoroughly before moving onto the next wheel and using the same process.
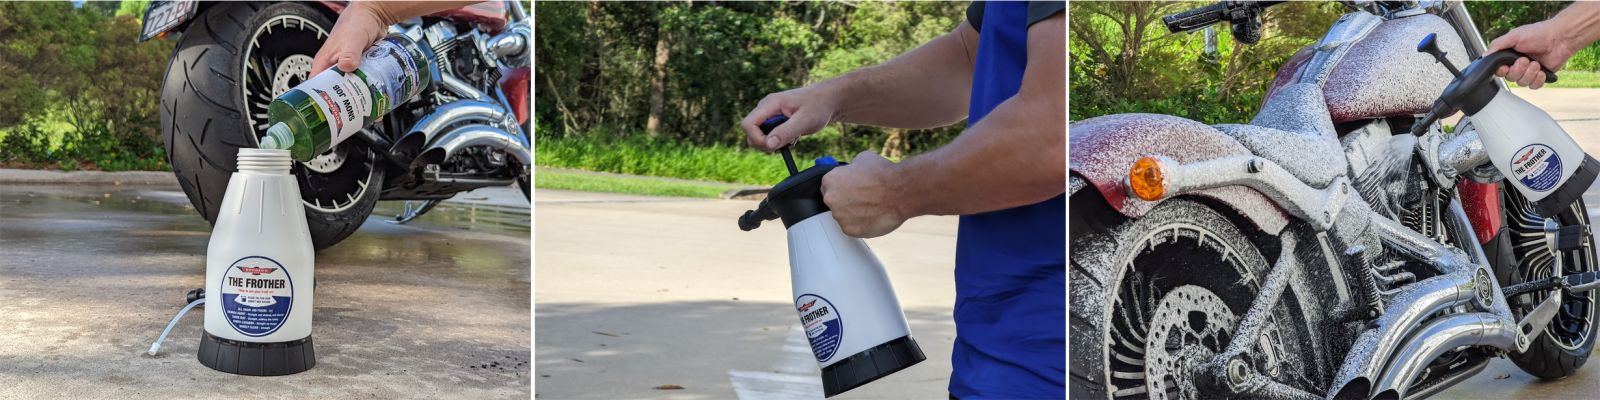
Once the wheels are done, you can move onto giving the bike a snow foam. You can use any of our snow foams here - if the bike is extra dirty, it can be helpful to use the Mega Snow Job. We're using Snow Job here because it's pH neutral and our bike wasn't overly dirty. Using The Frother for a job like this makes things a lot easier - mix up the Snow Job in The Frother at a 1:9 ratio, pump it up, then foam the entire bike (you may need to pump The Frother a couple times). Leave the foam to dwell for a couple minutes to break down the heavier dirt and grime, then hose or pressure wash it all off, starting at the top and working your way down.
Washing
Now that the bulk of the dirt of grime has been broken down and pressure rinsed off, it’s time to wash the bike.
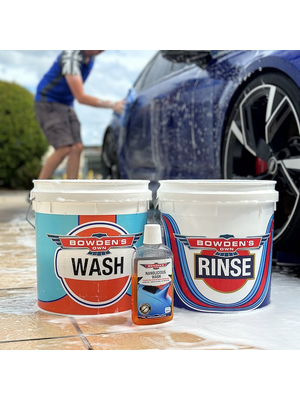
You can use any of our lubricating washes; Nanolicious Wash, Wax Wash or Auto Body Gel - all are pH neutral and very gentle with good gloss enhancing properties. NOTE - if you have a matte finish bike, use the Auto Body Gel.
For this bike, we've chosen Auto Body Gel because it's safe to use in direct sunlight, it's lubricating, and there were a few matte surfaces we needed to consider, plus, we just love it. Wax Wash is also excellent for its anti rust properties - really cool for bikes with lots of exposed metal.
Choice of washing tool is up to you as they're all suitable, though for this article we used The Shagamittastic Wash Mitt as it's the easiest to mould into all the intricate areas of the bike. Shagtastic Wash Pad would be another really good choice for this bike and holds more suds, but for ease of use and getting into all the nooks and crannies on this particular bike, we felt the mitt was more suitable. Using the 2 bucket wash method, and with a good bucket of suds beside you, start at the top of the bike and work your way to the bottom. Be sure to rinse out your wash tool in your Rinse bucket when it becomes dirty, to avoid contaminating your wash suds.
Rinse the entire bike down again in preparation for the clay bar. Be sure to get suds out of all those hard to reach places.
Once you're done, empty the buckets and give them a good rinse out. You don't want to be storing any wash water for use later!
Drying
For drying, it's good practice to begin by blowing all of the standing water out with a small blower of some sort. We're using a battery powered Milwaukee one here, which is great because it has a rubber tip that won't mark anything if you accidentally hit something with it. There are lots of different sort of these on the market, and honestly, any of them will do the job.
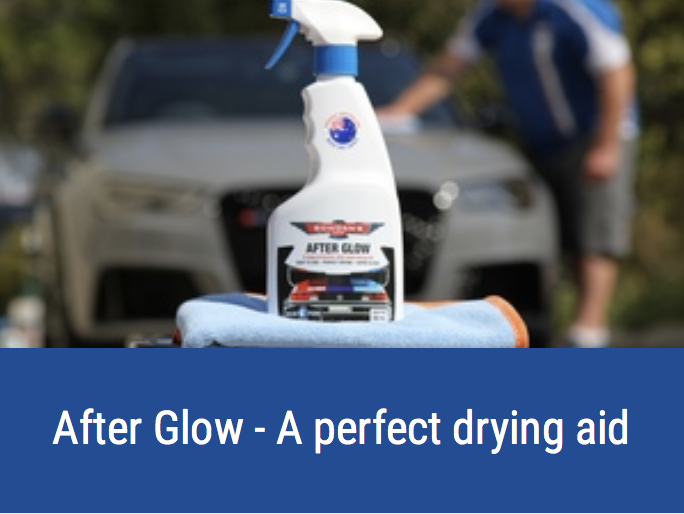
After all of the standing water has been blown out, there are 2 methods for drying: Twisted Pro Sucker/The Big Green Sucker + Boss Gloss, or After Glow + 2 Big Softie cloths. We're using The Big Green Sucker with Boss Gloss here, so spray 6-8 sprays of Boss Gloss into each side of the cloth, then dry the bike, starting at the top and working your way down. Don't be afraid to use your blower to help get any bits out that you may have missed.
Another great option for drying bikes is our Twisted Little Suckers + Boss Gloss. These smaller cloths enable you to get into all the small crevices where the other cloths can't get to easily.
After Glow is for the fanatical among us. It will leave a perfect finish, and add some protection, as well as leaving an anti static finish, which is great to help reduce dust and dirt sticking to the bike.
To read more about After Glow, including a detailed how-to video, see our guide here:
Clay Bar
There are a few ways to clay a vehicle these days. We have a Fine Clay Bar, which can be used with car wash suds or the Boss Gloss detailing spray. We also have the Claying Rubber, which can be used with both of the aforementioned methods, or it can also be used with Three Way, our iron reactive clay lubricant. We don't recommend to use Three Way with the Fine Clay Bar, as the degreasers used can affect the clay - only use Three Way with the Claying Rubber.
If your wash suds bucket is still clean, add another capful of wash solution to it, then hit it with the hose or pressure washer again to get an extremely sudsy mixture going. If the wash water is dirty, pour it out and start fresh with a double dose (2 cap fulls) of wash mix, then froth the mixture up nicely. Use this suds mixture as the lubricant for your clay medium.
We've used the Fine Clay Bar with Boss Gloss here because it's just a bit easier to get in and around the different areas of the tank and other sections, plus we had a good indoor area to work in.
Knead the Fine Clay Bar into a small, flat piece, then spray some Boss Gloss liberally onto the sections of paint you want to clay, then also spray some Boss Gloss onto the clay bar. Begin gently rubbing back and forth, then up and down. You will feel and hear the contamination if it's present on the surface, as it will be rough. Gently rub the clay over the surface until it becomes smooth. Don't apply any pressure to the clay - they work better with light pressure. Knead the clay as needed, and lubricate each subsequent section of paint with plenty of Boss Gloss.
Once the section you're working on becomes smooth, wipe excess Boss Gloss off with a Big Softie cloth and move onto the next section.
Iron decontamination + Claying Rubber
Another good step here is to do an iron decontamination with the Claying Rubber. We do this with our Three Way spray, which acts as a lubricant for the Claying Rubber to perform a complete iron and physical decontamination of the paint. See the link below for a full break down on this process:

Cleansing - Preparing for wax
The purpose of this step is to deep clean the paint and increase the shine, so that it looks its absolute best before putting any protective products on there.
Place a 50c sized dollop of Paint Cleanse & Restore onto a Circle Work pad and work the product in with your fingers so there are no dry spots on the pad.
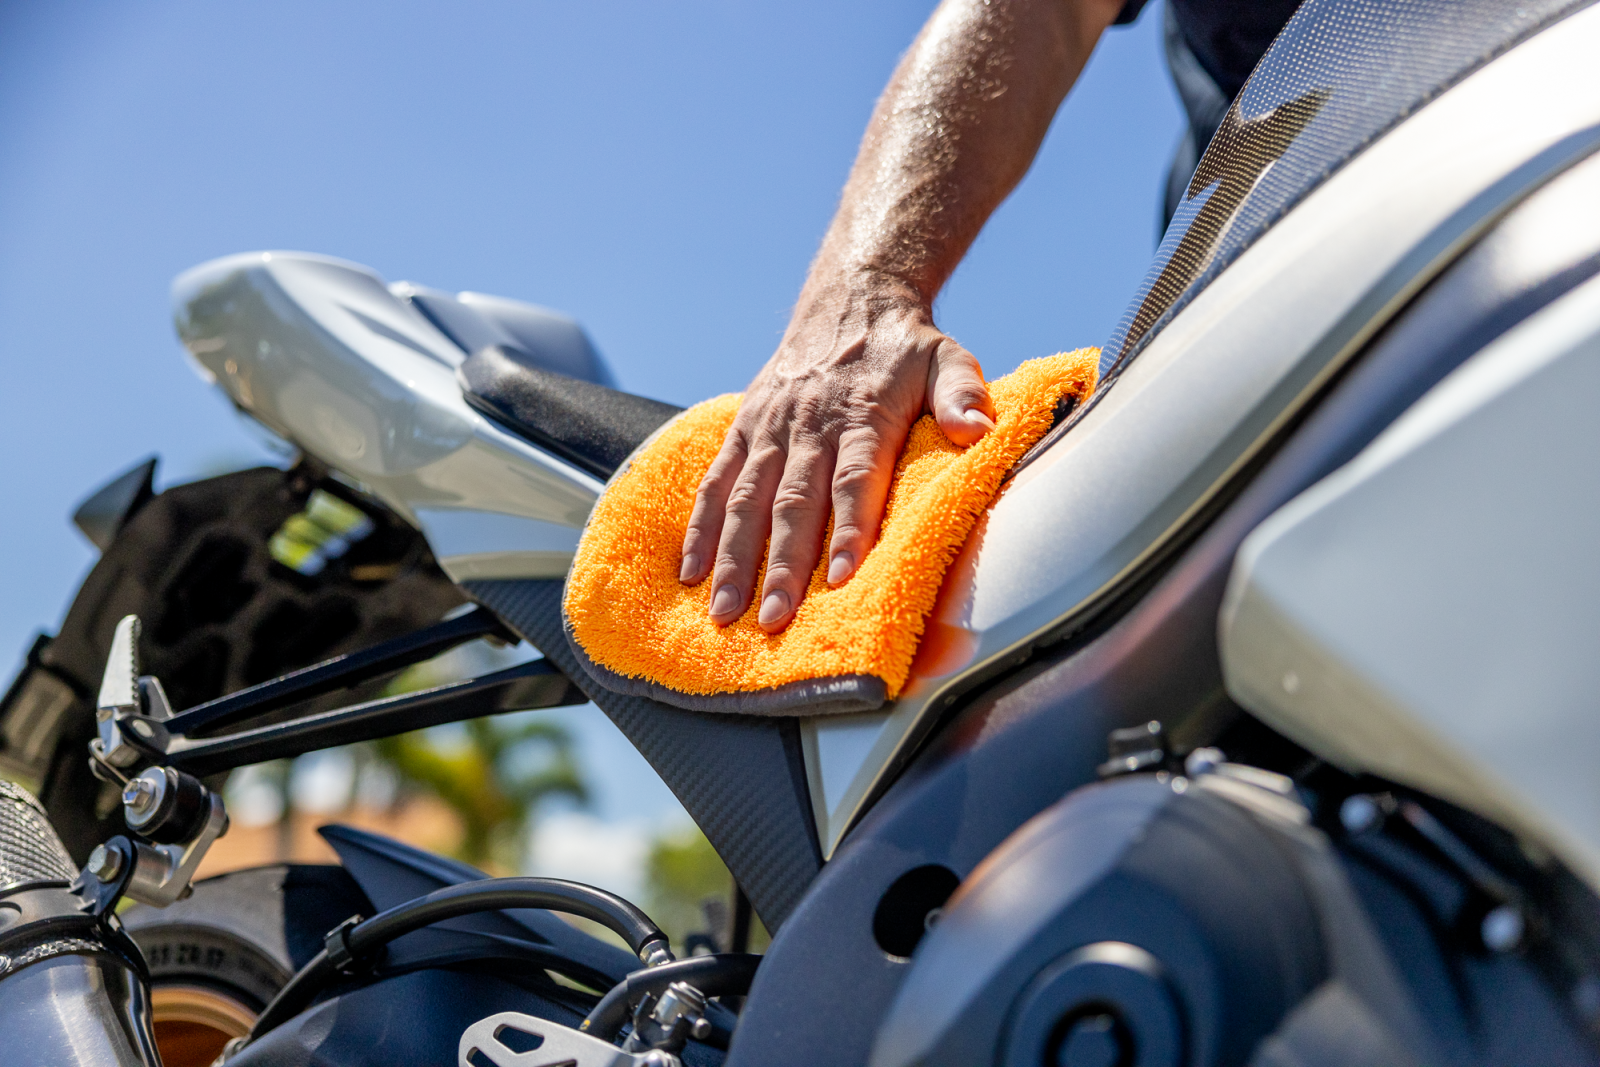
Using back and forth, then side to side motions, gently work the product into the painted areas until the product starts to go clear. Once this occurs, gently buff off the remaining residue with a clean and folded Big Softie cloth on the low pile side. Flip the cloth to the high pile side and give it one last buff.
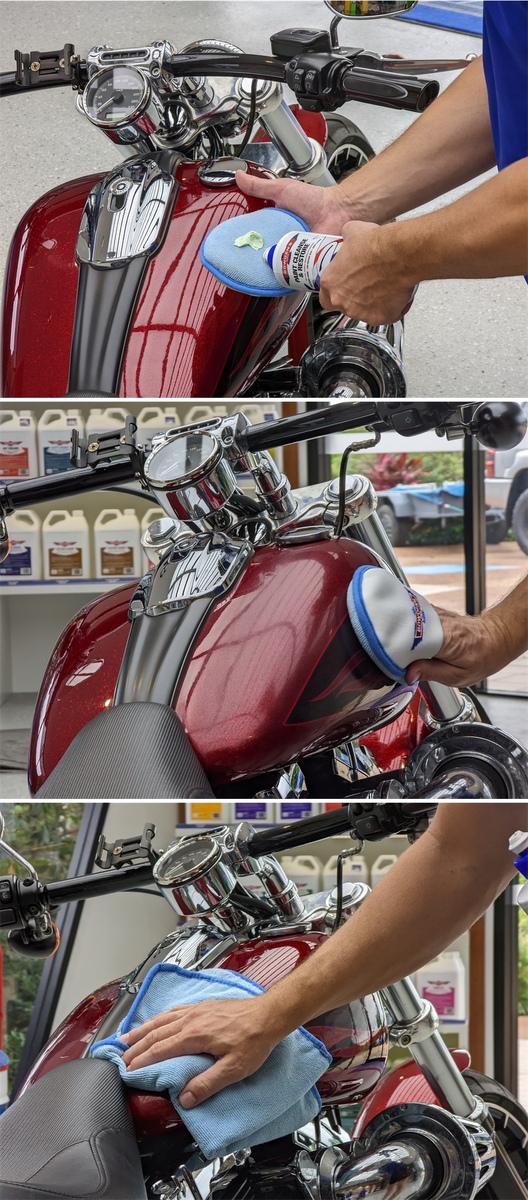
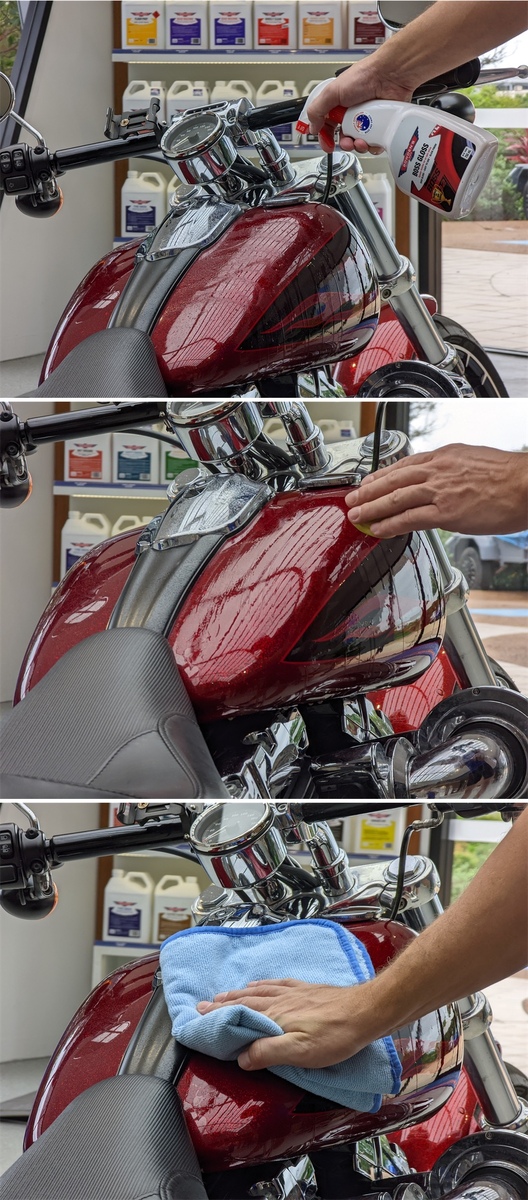
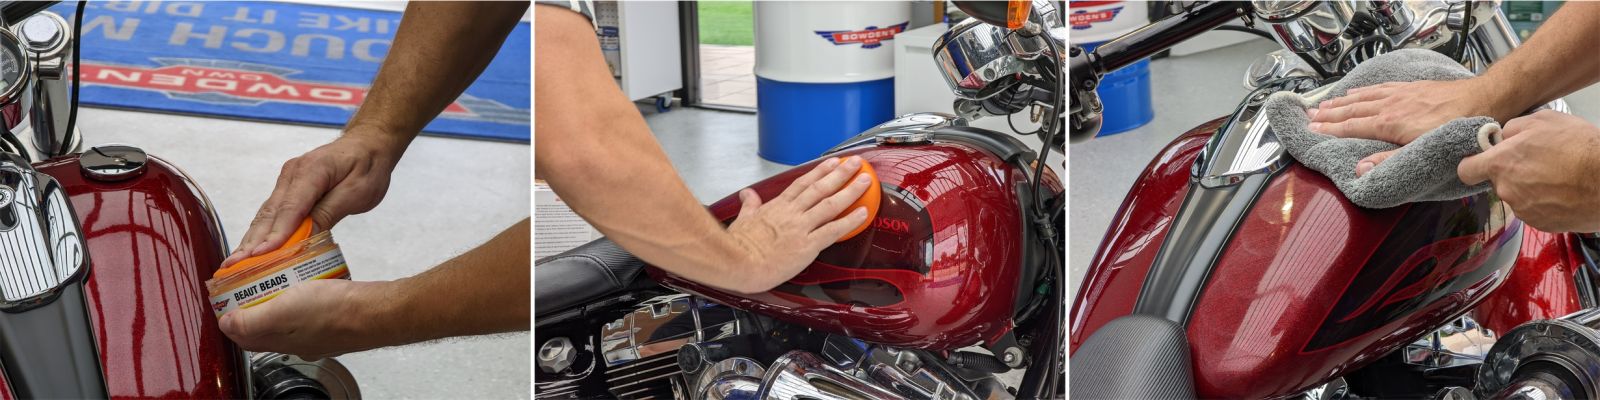
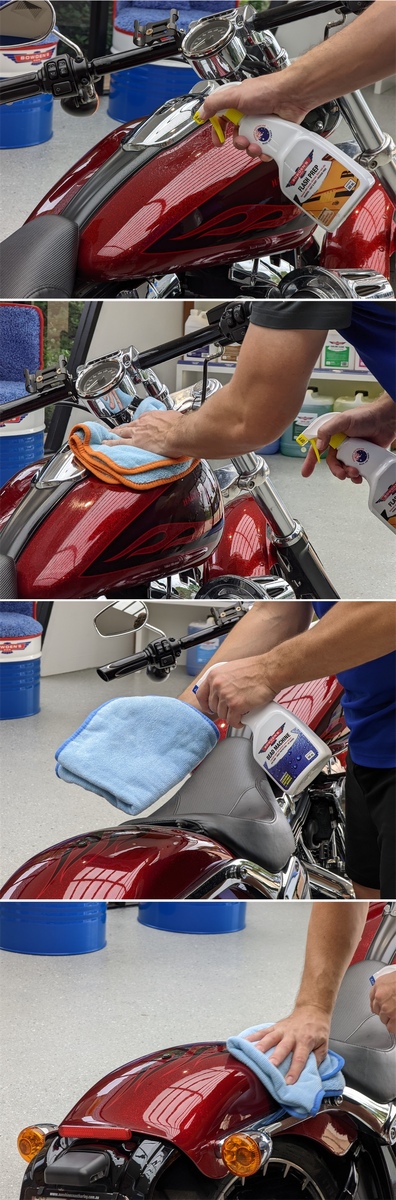
Preparation spray + Protection
After using the Paint Cleanse & Restore, we need to use a panel prep spray to remove the cleaning oils, so that our protection product that we apply will bond better and last longer. We do this with Flash Prep. Flash Prep is a very easy to use and pleasant smelling panel wipe product that will remove polishing oils, silicones, old waxes etc and prepare the paint for our sealant here, which will be Beaut Beads, topped with Bead Machine. The reason we're using this combination, is because it's our most protective wax and sealant combination and it will last the longest on the paint and provide the best protection. Any of our other products would also be suitable to use - Wet Dreams and Happy Ending are our other super hydrophobic products in our line up, and will offer the best protection outside of Beaut Beads and Bead Machine. Lazy Wax, Carnauba Body Wax and Fully Slick are all suitable too, if you prefer using these products instead.
Spray a few sprays of Flash Prep directly onto the paint, then gently wipe it in, side to side, then use a separate cloth to wipe over and remove any remaining residue.
Now it's time to apply Beaut Beads. Put the smaller foam applicator into the jar and get a small amount of the wax onto the applicator. Begin applying a thin layer to the paint, taking note to avoid getting the wax on any plastics or highly porous material. If you do get any wax on these types of material, a quick clean with some Orange Agent will remove any residue. Once all the areas are covered in wax that you want to cover, allow the wax 20-30 mins to bond to the surface, before removing it with a Drop Bear cloth. We found the Drop Bear is by far the nicest cloth to use for this job as it's super plush and thick.
After all of the wax has been wiped off, you need to let it cure for at least 4 hours before applying anything over the top. If you're unsure, you can even leave it until the next time you wash the bike (1-2 weeks), to ensure the wax is totally cured.
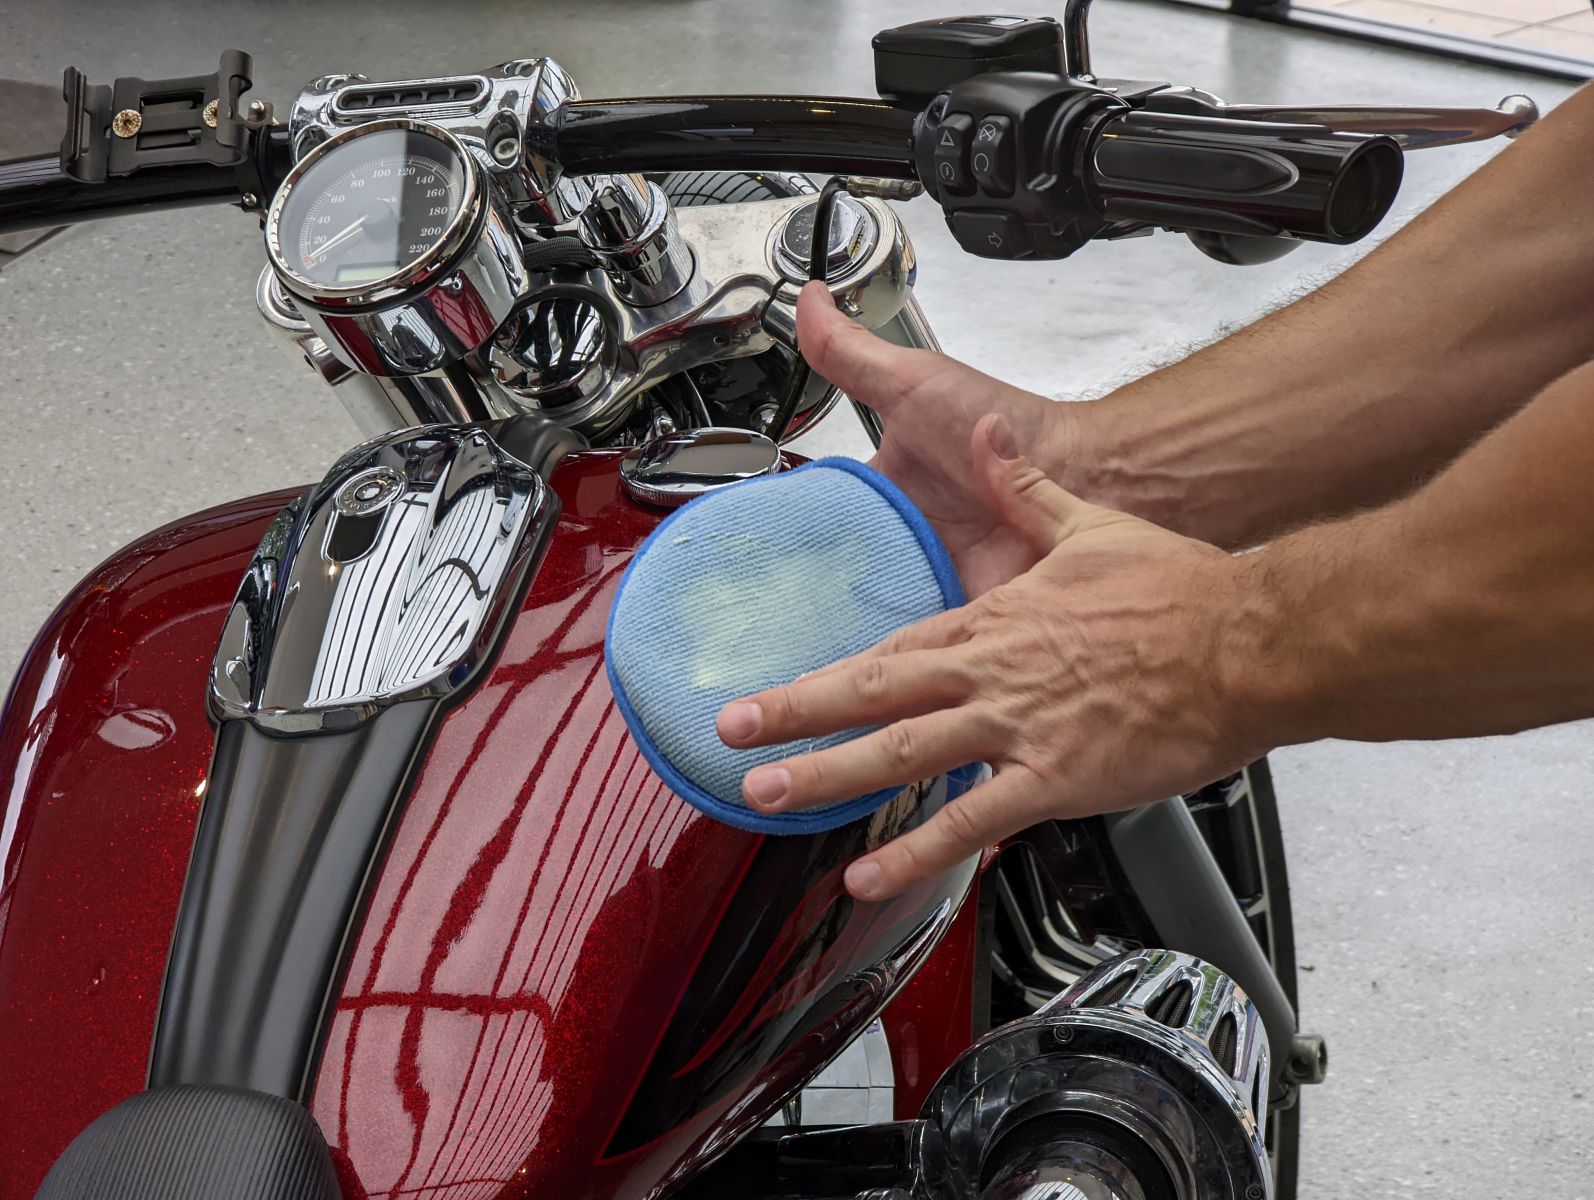
After the wax has cured, it's time to apply Bead Machine to protect the paint and the wax. Spray 4-6 sprays of Bead Machine into a folded, clean and dry Big Softie cloth, then massage it into the paint (it can be applied to chrome and other metal bits too), up and down, then back and forth. Then, grab a clean and dry Big Softie cloth and go over the section you just applied to, to remove any residue. For the next section, only apply 1-2 more sprays of Bead Machine, as the cloth is already primed with product - you don't want to saturate the cloth. If you notice any smearing or streaking, switch to fresh cloths.
For more info on our Beaut Beads paste wax, see our detailed guide here:
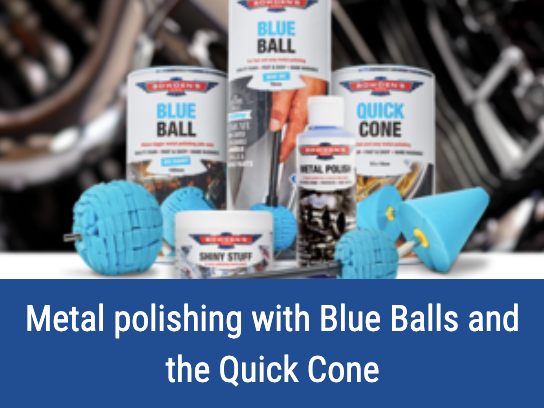
Metal & Chrome polishing
Polishing the metal parts of the bike can really set it off at the end of a full detail.
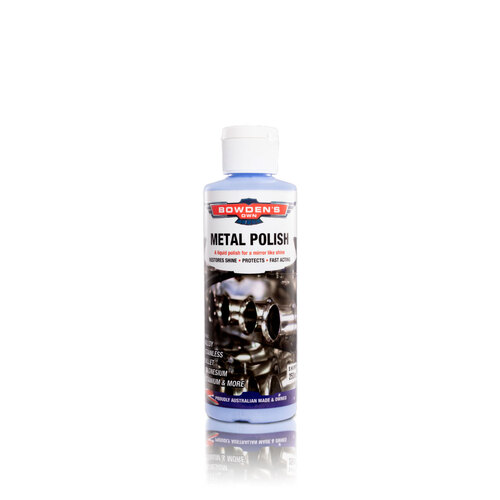
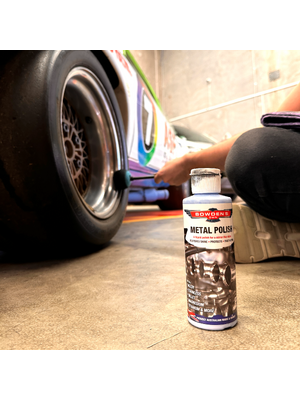
For more oxidised or pitted metal and chrome, you may want to do a 2 step polish by using our Metal Polish first, to remove the larger and heavier marks, then finish off with Shiny Stuff, which is a finer metal polishing paste, to refine the finish and add that lovely shine.
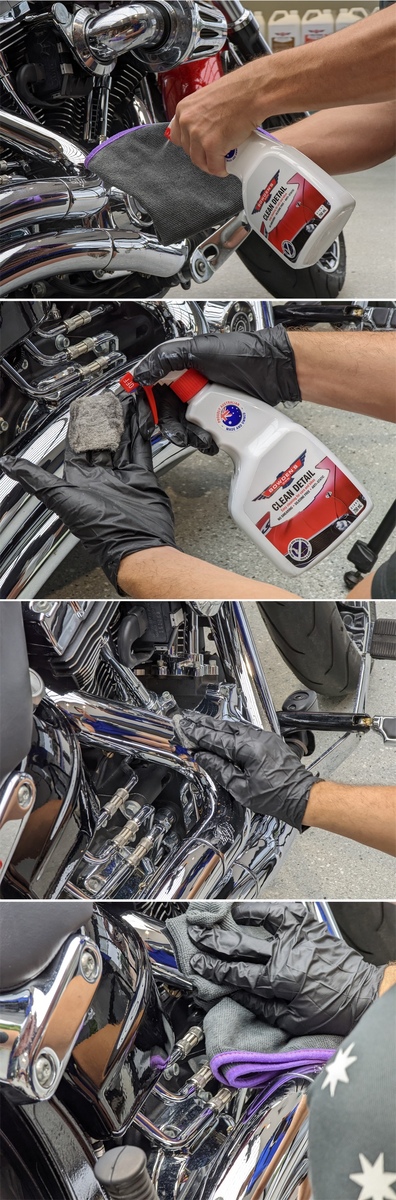
First thing to do is clean the metal or chrome surfaces. We do this with Clean Detail. Clean Detail is an alcohol based cleaning spray, that will flash off and leave no residue. Spray 6-8 sprays of Clean Detail into a Dirty Deeds cloth, and wipe over the areas to be cleaned, then flip the cloth to a clean side and remove any remaining residue, or use a second clean and dry cloth.
For heavier chrome pitting, it can pay to use some 0000 steel wool first, to remove the worst of the pitting. Spray some Clean Detail into the steel wool to act as lubrication, then gently go over the pitting until it begins to smooth out. Wipe any excess Clean Detail off with a clean Dirty Deeds cloth.
If there is no heavy pitting, then use either our Metal Polish for harder metals, or Shiny Stuff for softer metals and chrome. If you're using it by hand, put a small dollop of Metal Polish or Shiny Stuff into a Dirty Deeds cloth, then gently work over the metal/chrome in a back and forward motion until you get the desired finish. Once you're happy, wipe off any excess product.
For the fastest and best results, use our Metal Polish and Shiny Stuff in conjunction with our Blue Balls and Quick Cone metal polishing tools. These tools connect to any standard drill and make the metal polishing process a quick and enjoyable one.

For a full break down on our metal polishing tools, including a detailed how-to video, see our guide here:
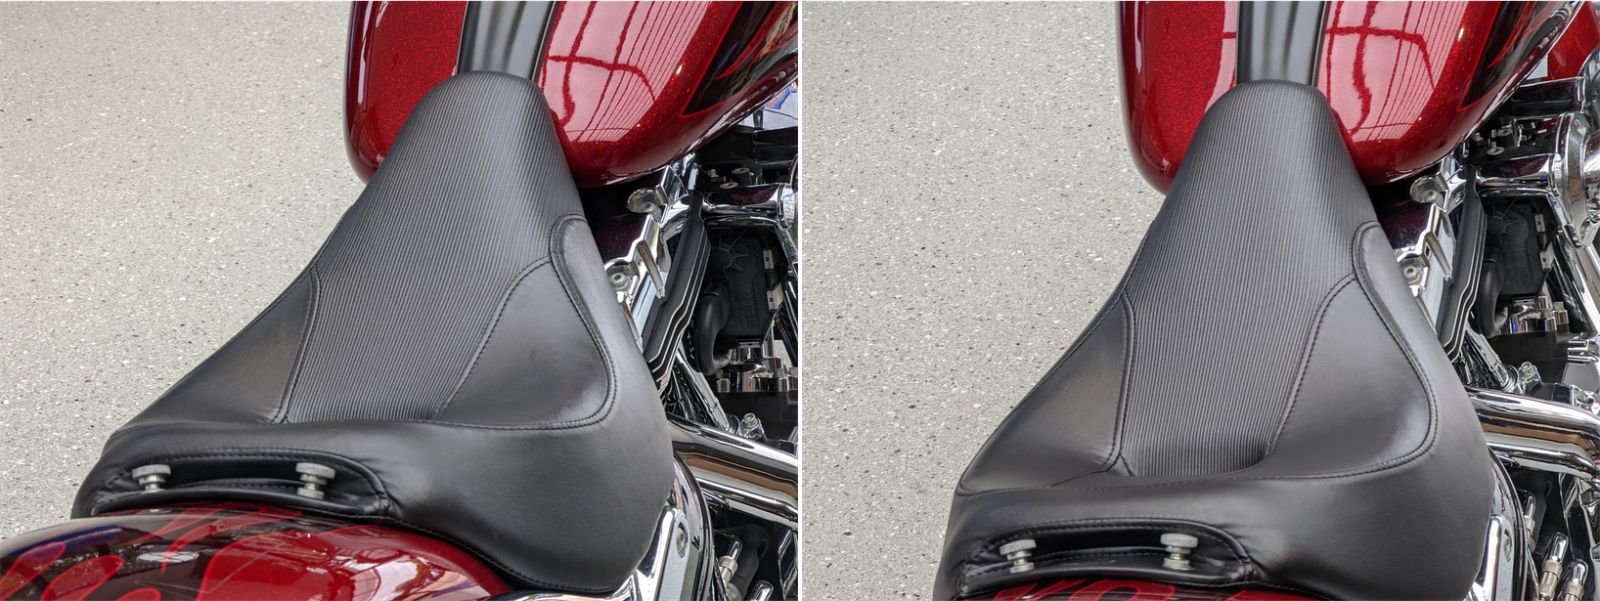
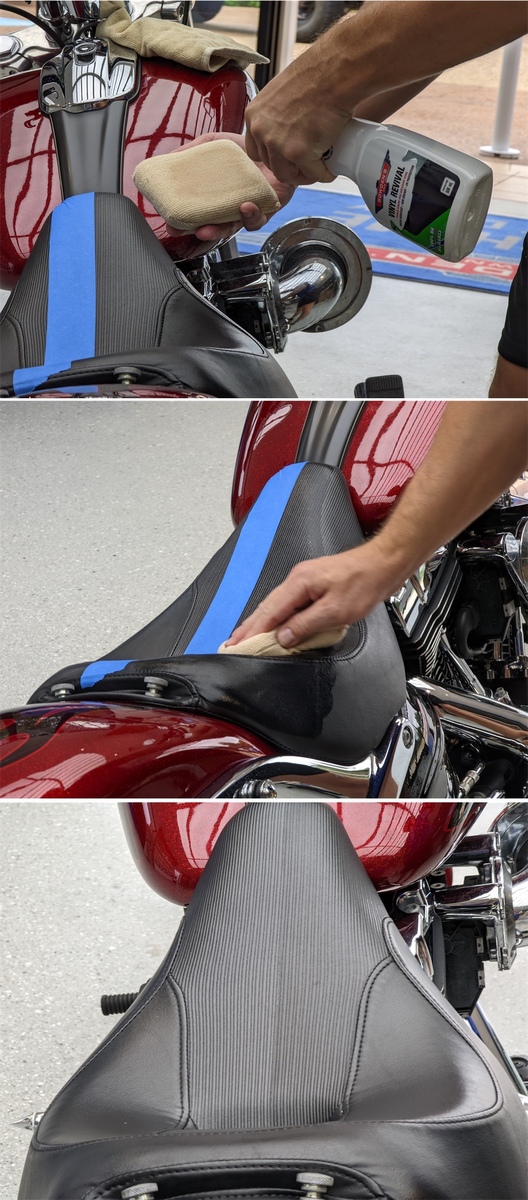
Seat / Exterior Vinyl & Plastics
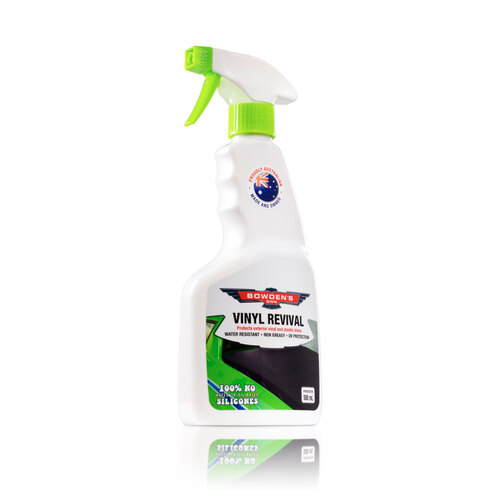
If the seat on your bike is a vinyl finish like the one on this bike, then follow the steps below. Some seats are leather - if yours is leather, then use our Leather Love and Leather Guard.
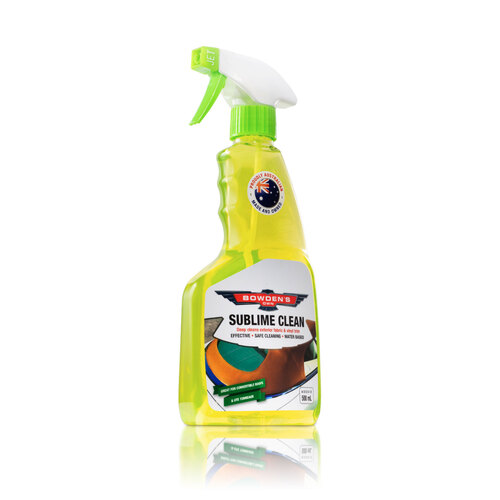
With the seat cleaned during the washing process earlier, we just need to apply some Vinyl Revival to our seat here to help protect it. If your seat is still dirty, you can clean it here with some Sublime Clean and a brush like our Plush Brush. Be sure to rinse the seat thoroughly and allow it to dry completely before applying Vinyl Revival.
Simply spray some Vinyl Revival into a Square Bear applicator pad and apply liberally to the seat. Leave it to sit for 1 minute, then apply another layer of Vinyl Revival. Leave that to sit for another minute, then wipe off any excess product with a Plush Daddy cloth or similar.
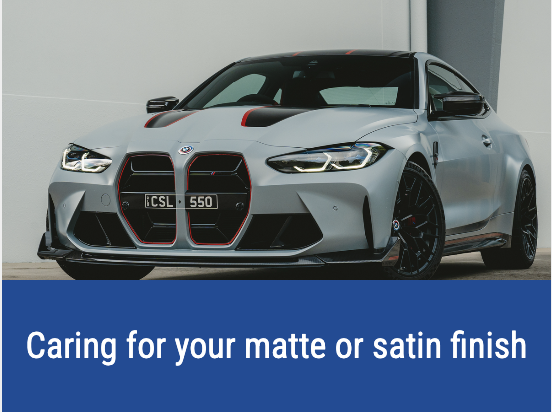
Matte Finishes
As we touched on before, if your bike has a matte finish paint job, these are the steps that you would follow.
Please note that the Fine Clay Bar, Claying Rubber and Paint Cleanse & Restore are not suitable to use on matte finishes.
Use Orange Agent on all the greasy and oily areas as per normal, then Snow Job as your pre wash and then wash with Auto Body Gel. All of our snow foams are safe for matte finishes and Auto Body Gel is also safe for matte finishes and will leave a very nice and clean surface without the risk of any streaking.
Dry the bike with one of our safe microfibre drying towels like The Twisted Pro Sucker without the use of Boss Gloss on the painted areas. Once the bike has been dried, wipe down all the matte finished areas with Clean Detail and a couple Big Softie cloths. Clean Detail is our dedicated cleaning spray and is perfect for matte finishes due to having no extra gloss enhancers built into its formula. It's also got some anti static properties built into it, which makes it very useful for bikes and matte finishes.
We also now have a dedicated matte sealant; Flat Matte.
Thanks to Nathanael House from Perfection Automotive Detailing in Adelaide for the pics here.
For a detailed look into how to maintain a matte finished vehicle, see our guide here:
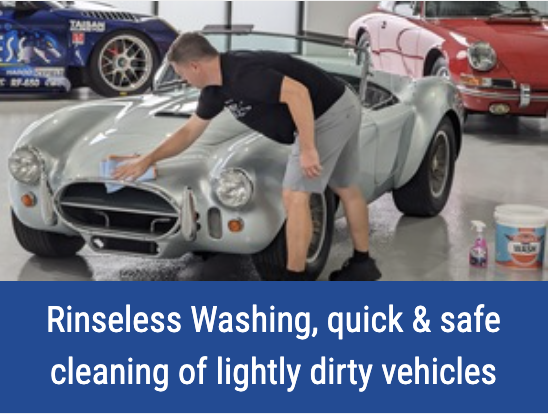
Washing without a hose - rinseless washing
Perfect for those classics that you don't like to get wet for fear of rust forming in places you can't see, or you just prefer to not wash it, our solution for rinseless washing is here; Dry Spell. Rinseless washing is ideal in many different circumstances, like for apartment dwellers who don’t have access to a hose or wash bay, people in water restricted areas, classic car owners, or simply for a mid-week, or pre car show maintenance clean to quickly bring back the shine to your garaged friend. We find it takes us a quarter of the time with this system over traditional washing with a hose.
Begin by adding 8 litres of water into a 15 litre bucket, or the top of the Bowden’s Own logo on our buckets. Pour in 40mL of Dry Spell, quickly agitate, then drown 6-8 Plushcious cloths in the solution. The number of cloths you’ll need is dictated by the size of what you’re cleaning. For the pre-spray bottle or our Frother pump sprayer, mix up a stronger solution with good quality water at a ratio of 40 to one.
Pre spray the panels one at a time and allow the Dry Spell pre mix to penetrate for 2 minutes. Grab a cloth from the dry spell bucket, wring it out till it's damp, and fold it into quarters. Clean the sprayed section by dragging the cloth in one direction, rolling up the front edge of the cloth as you go. Flip or fold the cloth to a clean side for the next area. Use a new cloth after using all 8 sides, and store the used cloth in a separate bucket.
Dry the cleaned panel immediately using either The Big Green Sucker with Boss Gloss or our personal favourite; After Glow, for a perfect, anti-static finish. Both products add to the slick and shiny finish created by Dry Spell.
For even more info on Dry Spell, including what it is, and how to use it, see our detailed guide here:
Questions?
I hope this has helped answer some questions you may have about motorbike detailing with our car care products. We know there are a lot of you out there who already use our products for your bikes, so I hope this has helped you too.
If you have any more questions about this article or the processes used, feel free to email us at info@bowdensown.com.au or call on 1800 351 308.
Happy detailing!
Brett Hobbs
Products Used


Nanolicious Wash
Our dream wash just got dreamier! New formula created for the very fussiest of fanatics.
$24.99
FAVE

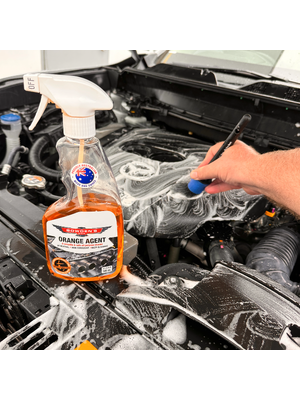
Orange Agent
Super versatile citrus pH neutral cleaner, to remove silicones, oils and heavy grime from most surfaces.
$17.99

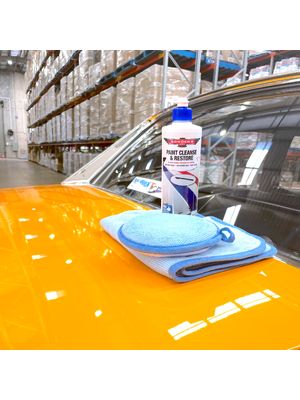
Paint Cleanse & Restore
A modern replacement for abrasive polishes, that rejuvenates paint without creating swirls.
$31.99

The Wash Bucket
Created for our Safe Wash System, this dedicated 15 litre car wash bucket is part of our new bucket set for the safest clean of car or bike. We made these easily identifiable buckets for washing and rinsing ...s
$19.99

The Rinse Bucket
Created for our Safe Wash System, this dedicated 15 litre rinse bucket is a part of our process to get the safest clean of any car, truck or bike. We made this and our Wash bucket easily identifiable for a t...s
$19.99

Sublime Clean
Deep cleans exterior fabrics and vinyl, as well as removing silicones from plastics.
$24.99